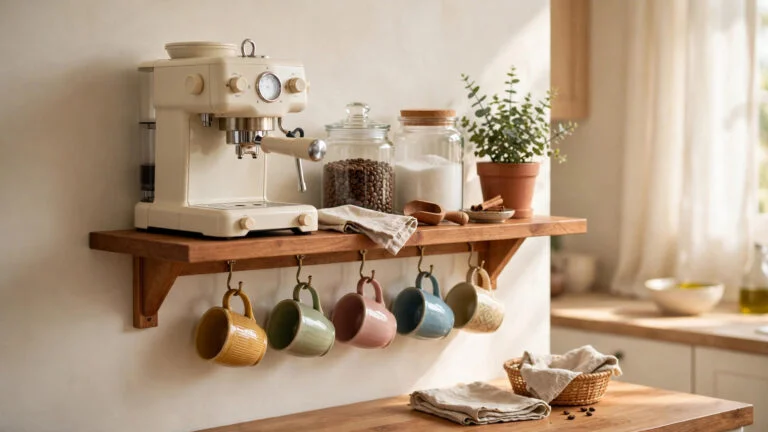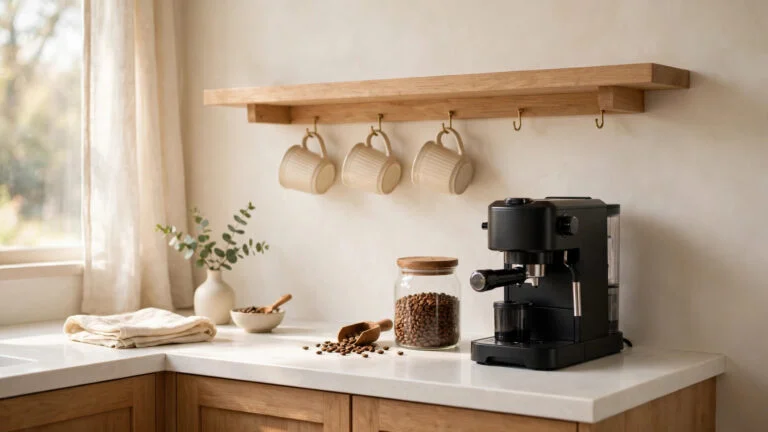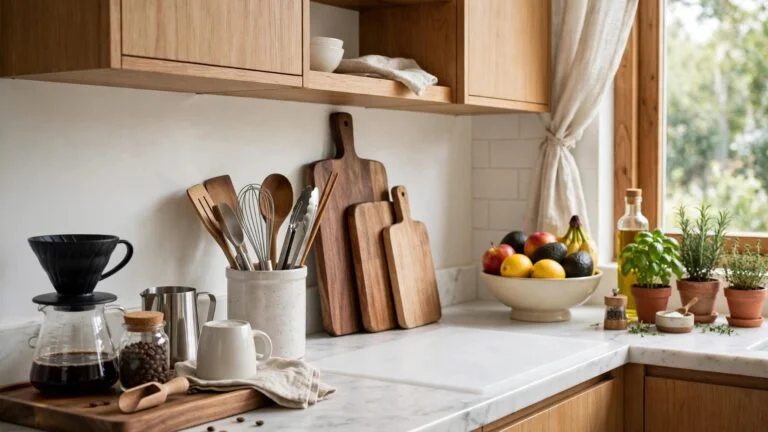
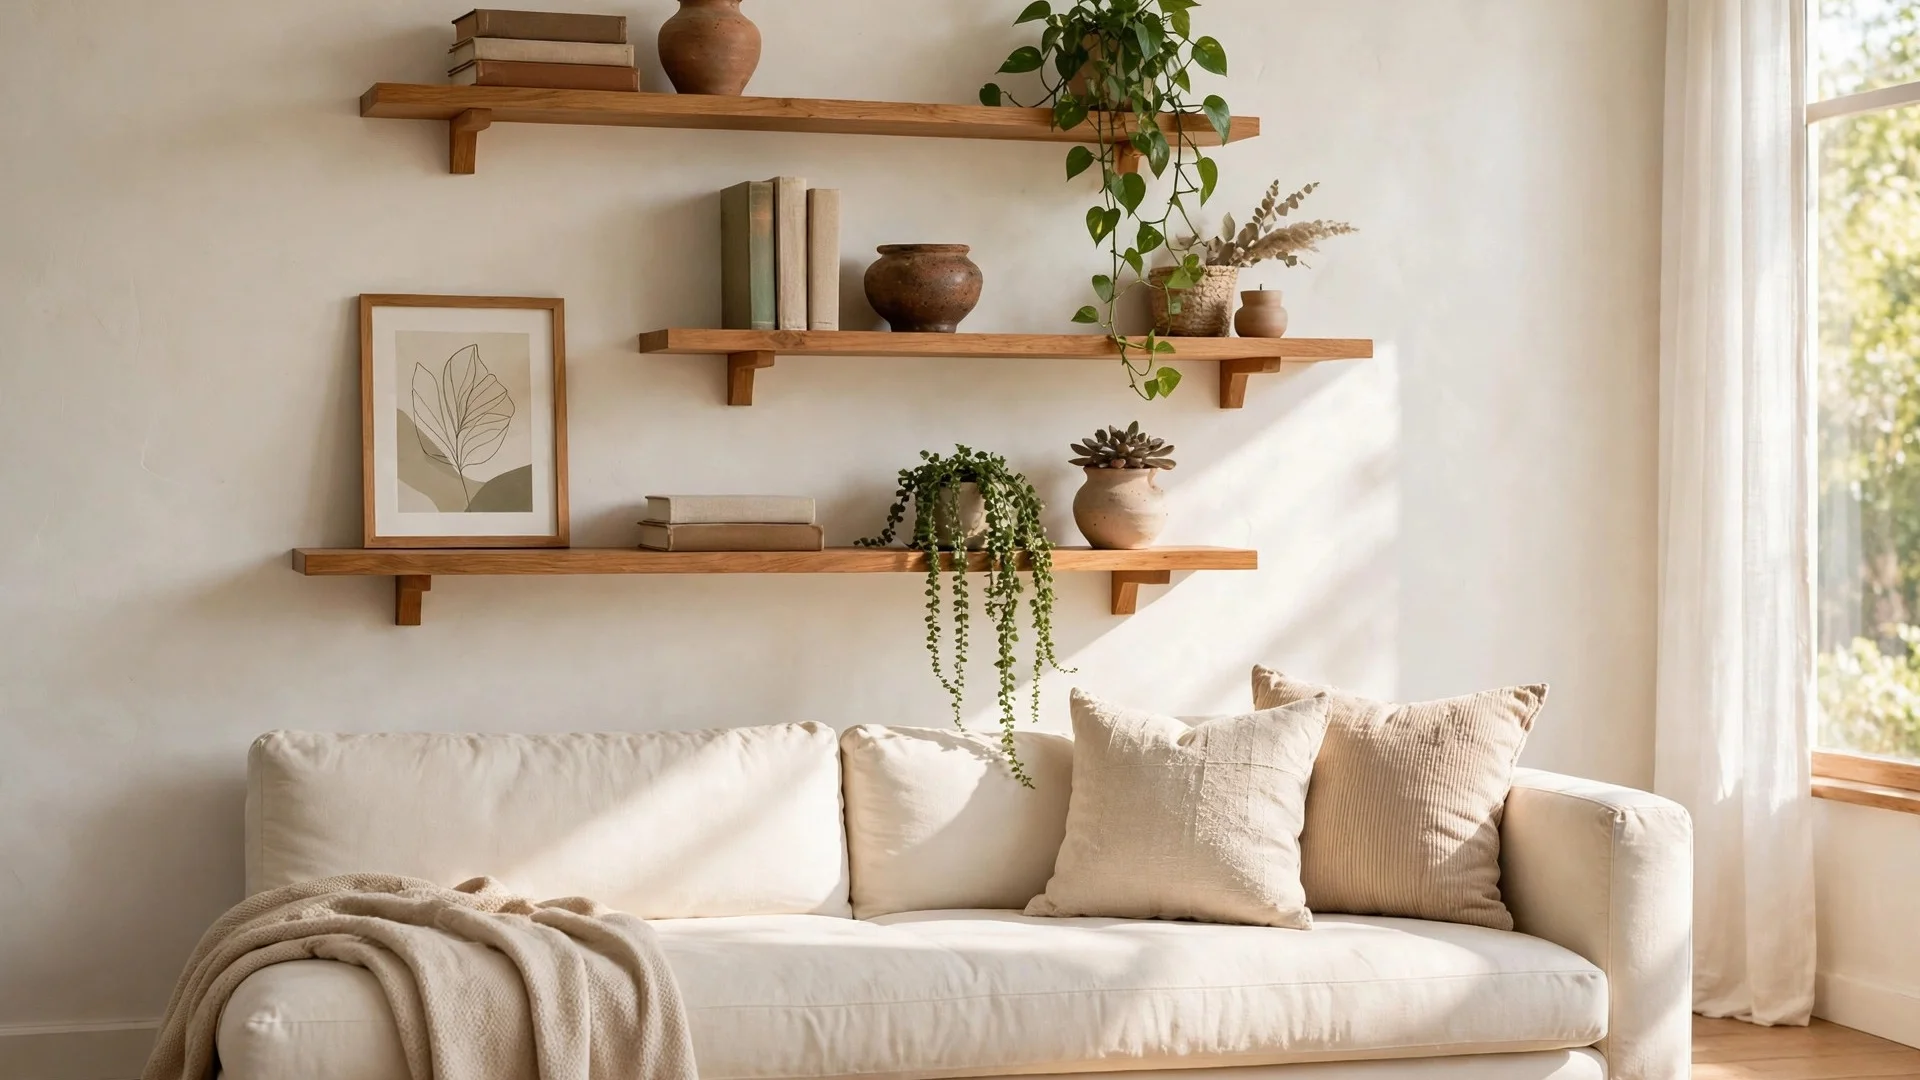
Floating wood shelves are the easiest place to start, and they suit almost every room in the house. Corner shelves, crate shelves, and pipe shelves add storage with simple tools and low cost materials.
Books on the floor, jars on the counter, plants crowding the windowsill. One simple shelf fixes all of that in an afternoon. Most of these builds need just a board, a few brackets, and basic tools.
These DIY shelf ideas cover living rooms, kitchens, bathrooms, and the small corners most people ignore. This guide from Dreamy Decor Ideas walks through each build in order. Pick one project that fits your space and your skill level, and build from there.
In this article
- 1. Build Classic Floating Wood Shelves
- 2. Hang Rope Swing Shelves Near a Window
- 3. Fit Corner Floating Shelves Into a Dead Corner
- 4. Make Industrial Pipe Shelves for a Living Room
- 5. Lean a Ladder Shelf Against the Wall
- 6. Turn Wooden Crates Into a Stacked Shelf Unit
- 7. Add a Pegboard Shelf Wall for Craft Supplies
- 8. Build a Honeycomb Hexagon Shelf Cluster
- 9. Install Open Kitchen Shelves for Dishes and Jars
- 10. Add a Slim Shelf Above the Toilet for Bathroom Storage
- 11. Hang a Picture Ledge for Frames and Small Books
- 12. Make a Rustic Barnwood Shelf With Iron Brackets
- 13. Build a Cube Shelf Unit for a Small Room
- 14. Add Shelves Under the Stairs for Hidden Storage
- 15. Make a Pallet Wood Shelf for a Farmhouse Look
- 16. Hang Plant Shelves in a Sunny Corner
- 17. Stack Boards and Bricks Into a Low Bookshelf
- 18. Mount a Spice Shelf on a Cabinet Door
- 19. Mount Box Shelves as Shadow Display Shelves
- 20. Hang a Shelf Above a Doorway for Extra Storage
- 21. Build a Narrow Rolling Shelf for Tight Gaps
- 22. Add a Floating Bedside Shelf Instead of a Nightstand
- 23. Make a Plate Rack Shelf for a Kitchen Wall
- 24. Fit Shelves Into a Wall Alcove
- 25. Hang a Tree Branch Shelf for a Natural Touch
- Frequently Asked Questions About DIY Shelf Ideas
- Conclusion
1. Build Classic Floating Wood Shelves
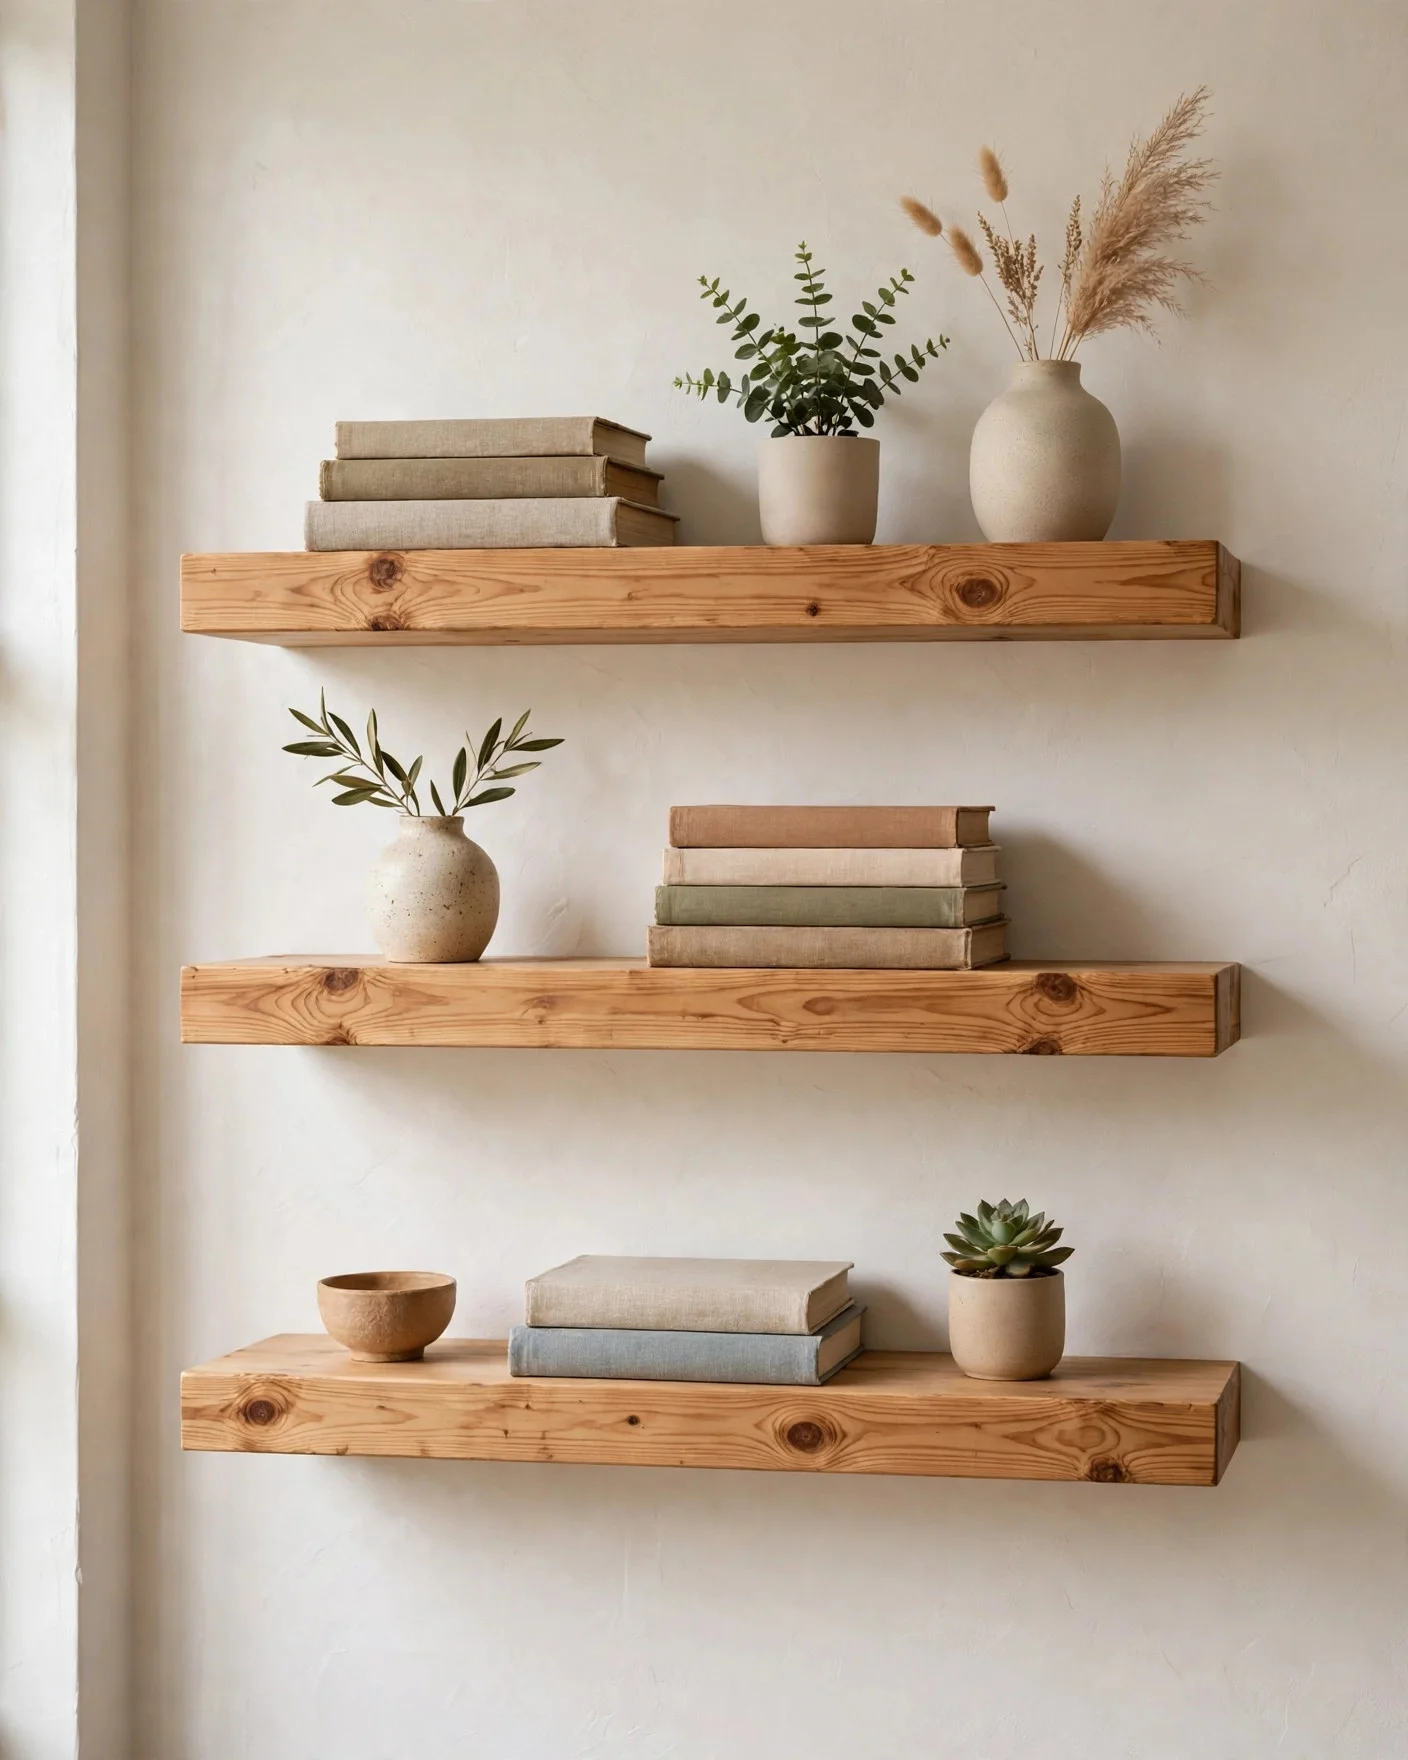
Floating shelves are the first project most people try, and for good reason. A thick wood board on hidden brackets looks clean and modern, and it holds books, plants, and decor with ease. Pine boards from a hardware store work well and cost little.
Cut the board to your wall space, sand it smooth, and add stain or paint. Fit the hidden bracket rods into wall studs where you can, then slide the shelf on and lock it in place. A shelf is a flat board fixed to a wall for storage, and the plain shelf has held books and jars in homes for centuries.
These DIY shelf ideas start here because the build is short and the result looks calm in any room. These suit living rooms, bedrooms, and halls.
Simple styling rules:
- Group items in threes.
- Mix one plant, one stack of books, one object.
- Leave empty space at both ends.
Board pick: Pine or spruce, about 4 cm thick for a solid look.
Bracket rule: One hidden bracket pair for each 80 cm of shelf.
Depth guide: 20 to 25 cm front to back holds books and decor well.
2. Hang Rope Swing Shelves Near a Window
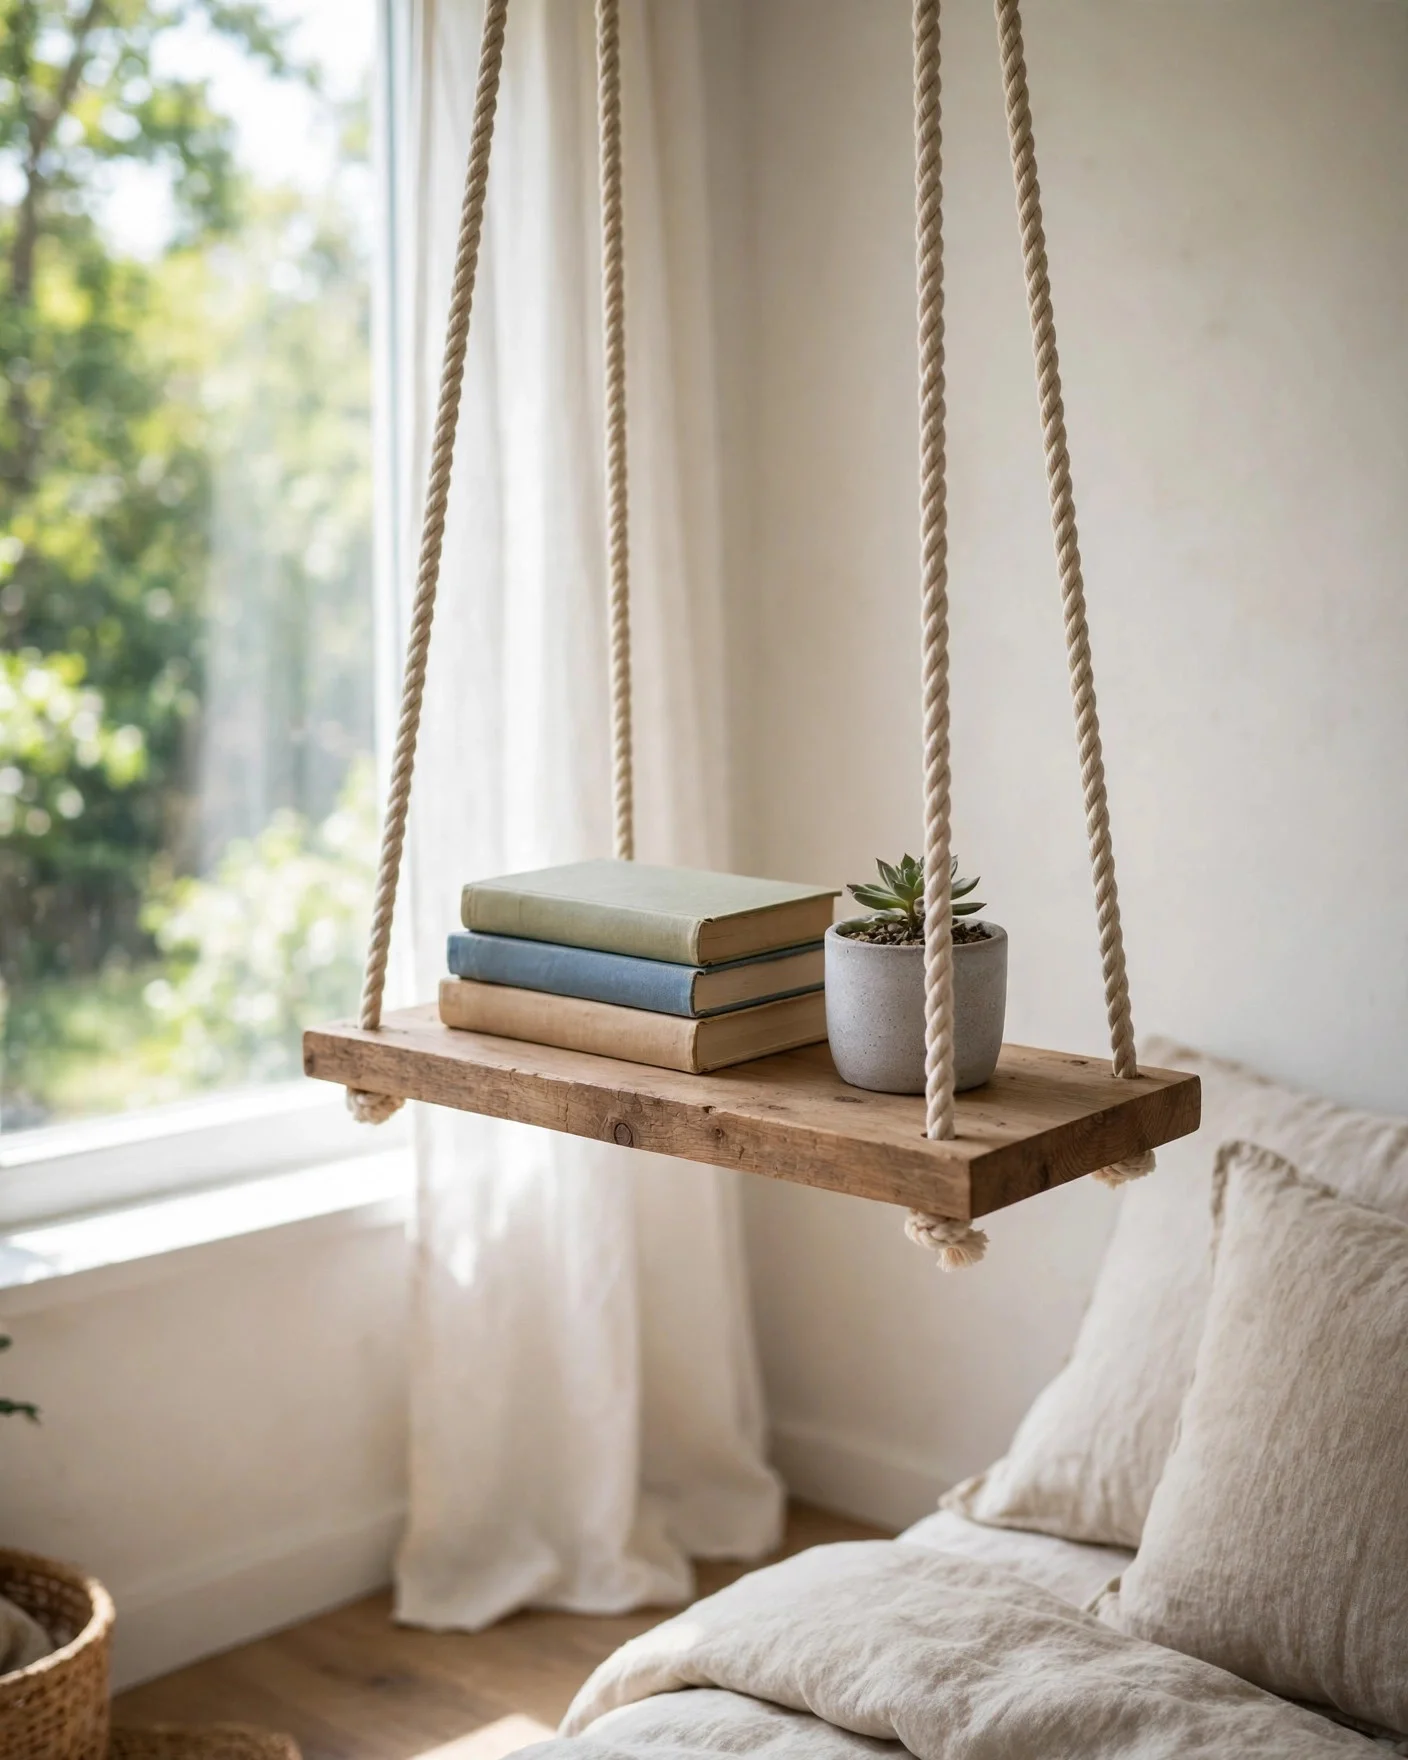
A rope swing shelf adds a soft, handmade feel to a bedroom or reading corner. You need one wood board, thick cotton or jute rope, and two strong ceiling or wall hooks. The shelf hangs like a small swing and moves a little when you touch it, so light items suit it best.
Drill a hole near each corner of the board, thread the rope through, and tie firm knots under the board. Level the board before you set anything on it, and hang it near a window where plants get light.
Of all the DIY shelf ideas here, this one feels the most playful. Keep the load light and the knots firm, and it will sway gently for years.
Best items for this shelf:
- Small potted plants.
- Paperback books.
- Light frames and candles.
Keep it light: A swing shelf is decor first and storage second. Stick to plants, paperbacks, and small light objects, and check the knots every few months.
3. Fit Corner Floating Shelves Into a Dead Corner
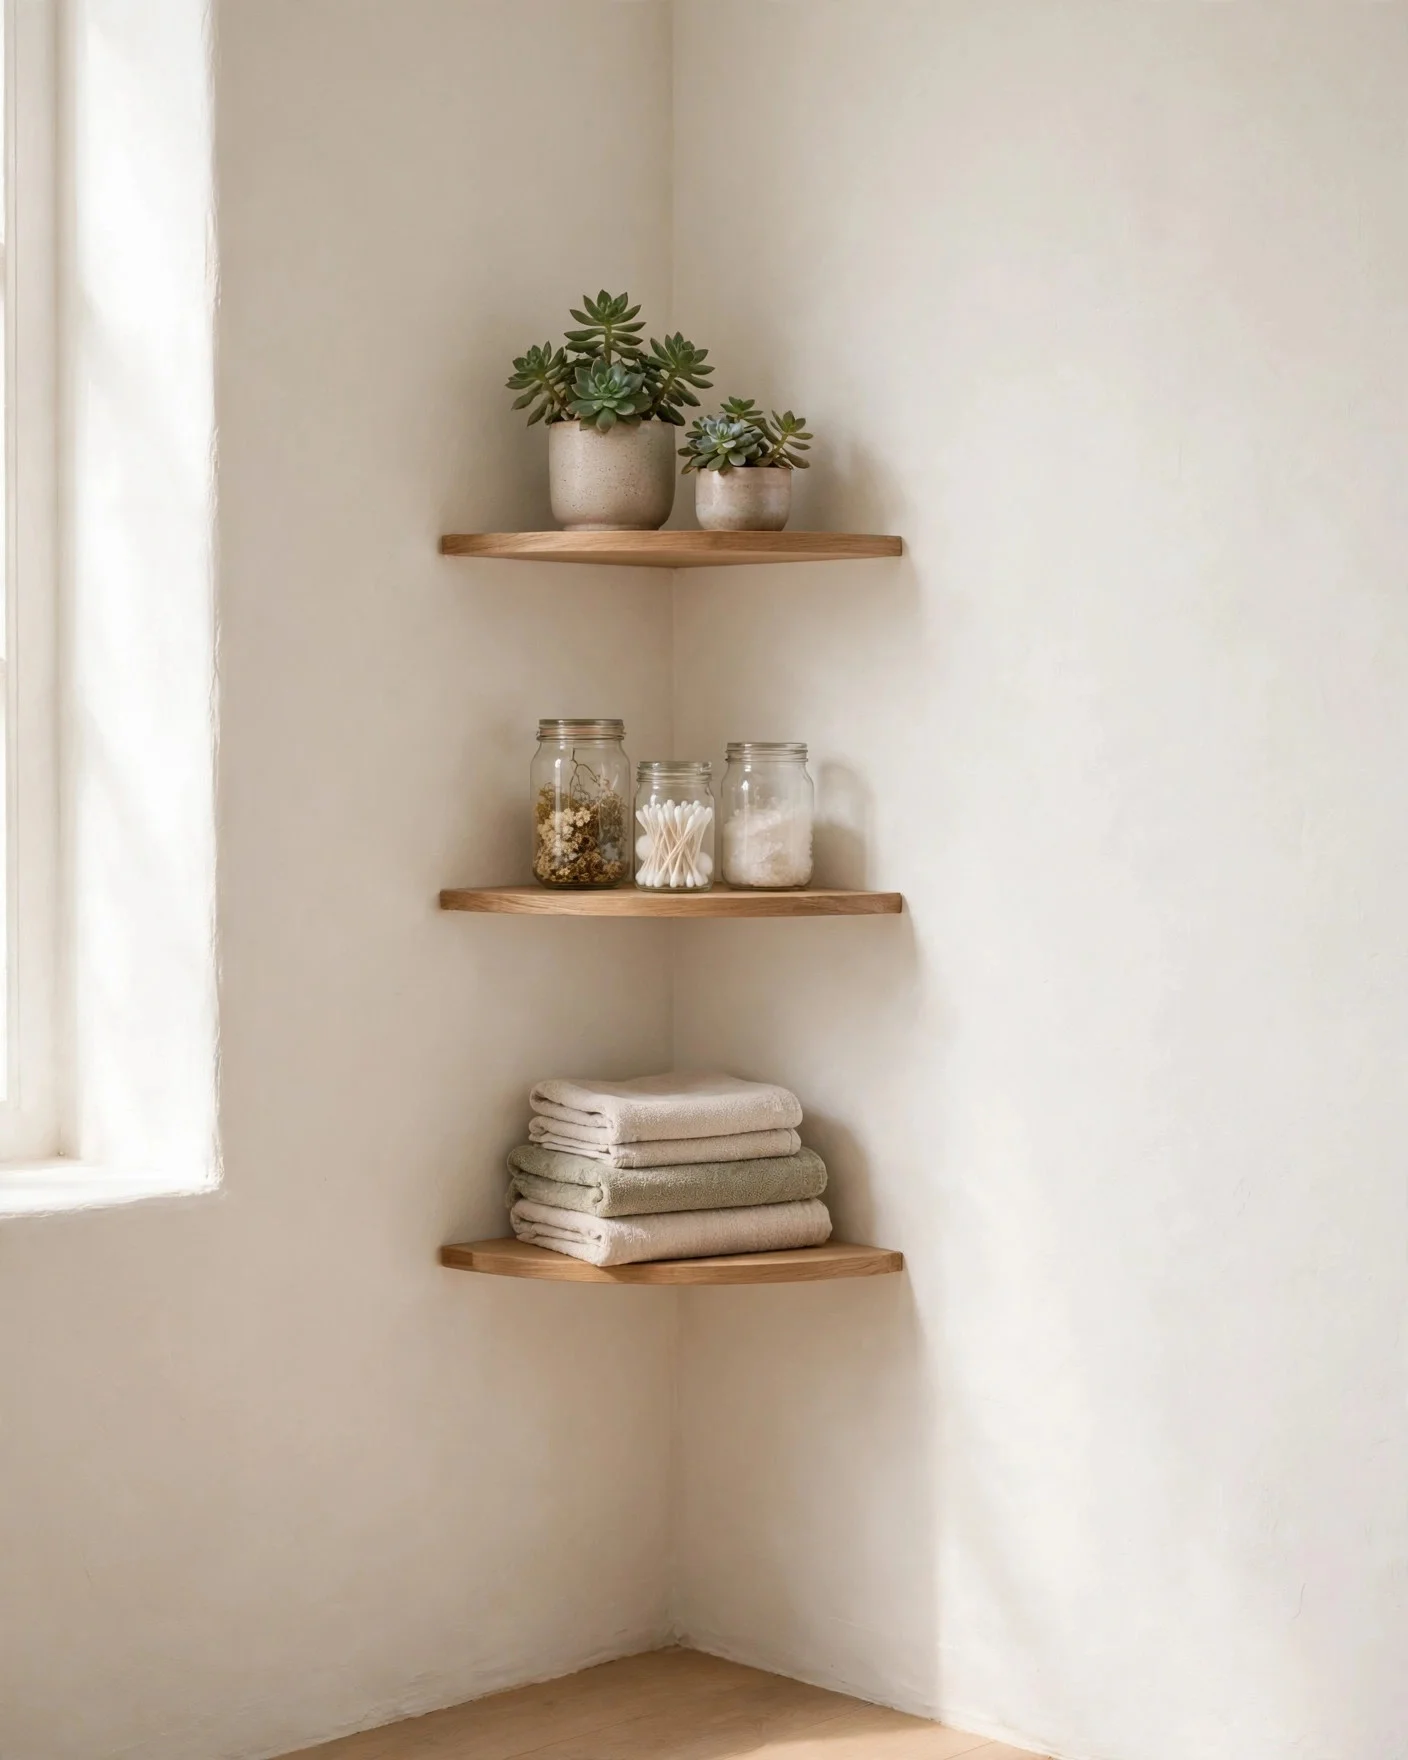
Every room has one corner that does nothing. Corner floating shelves turn that dead space into storage for plants, jars, or folded towels. Triangle or quarter round boards fit the shape, and small hidden or L brackets hold them up.
Measure both walls before you cut, since corners are often not square. Cut the board a touch small and fill any tiny gap with caulk for a neat finish. Start with two or three shelves spaced about 30 cm apart, and add more only if you need them.
Good corner uses:
- Bathroom towels and jars.
- Kitchen spices and cups.
- Bedroom plants and books.
- Measure both walls, since few corners are truly square.
- Fix brackets into studs or solid wall plugs on both sides.
- Space shelves about 30 cm apart for jars and plants.
4. Make Industrial Pipe Shelves for a Living Room
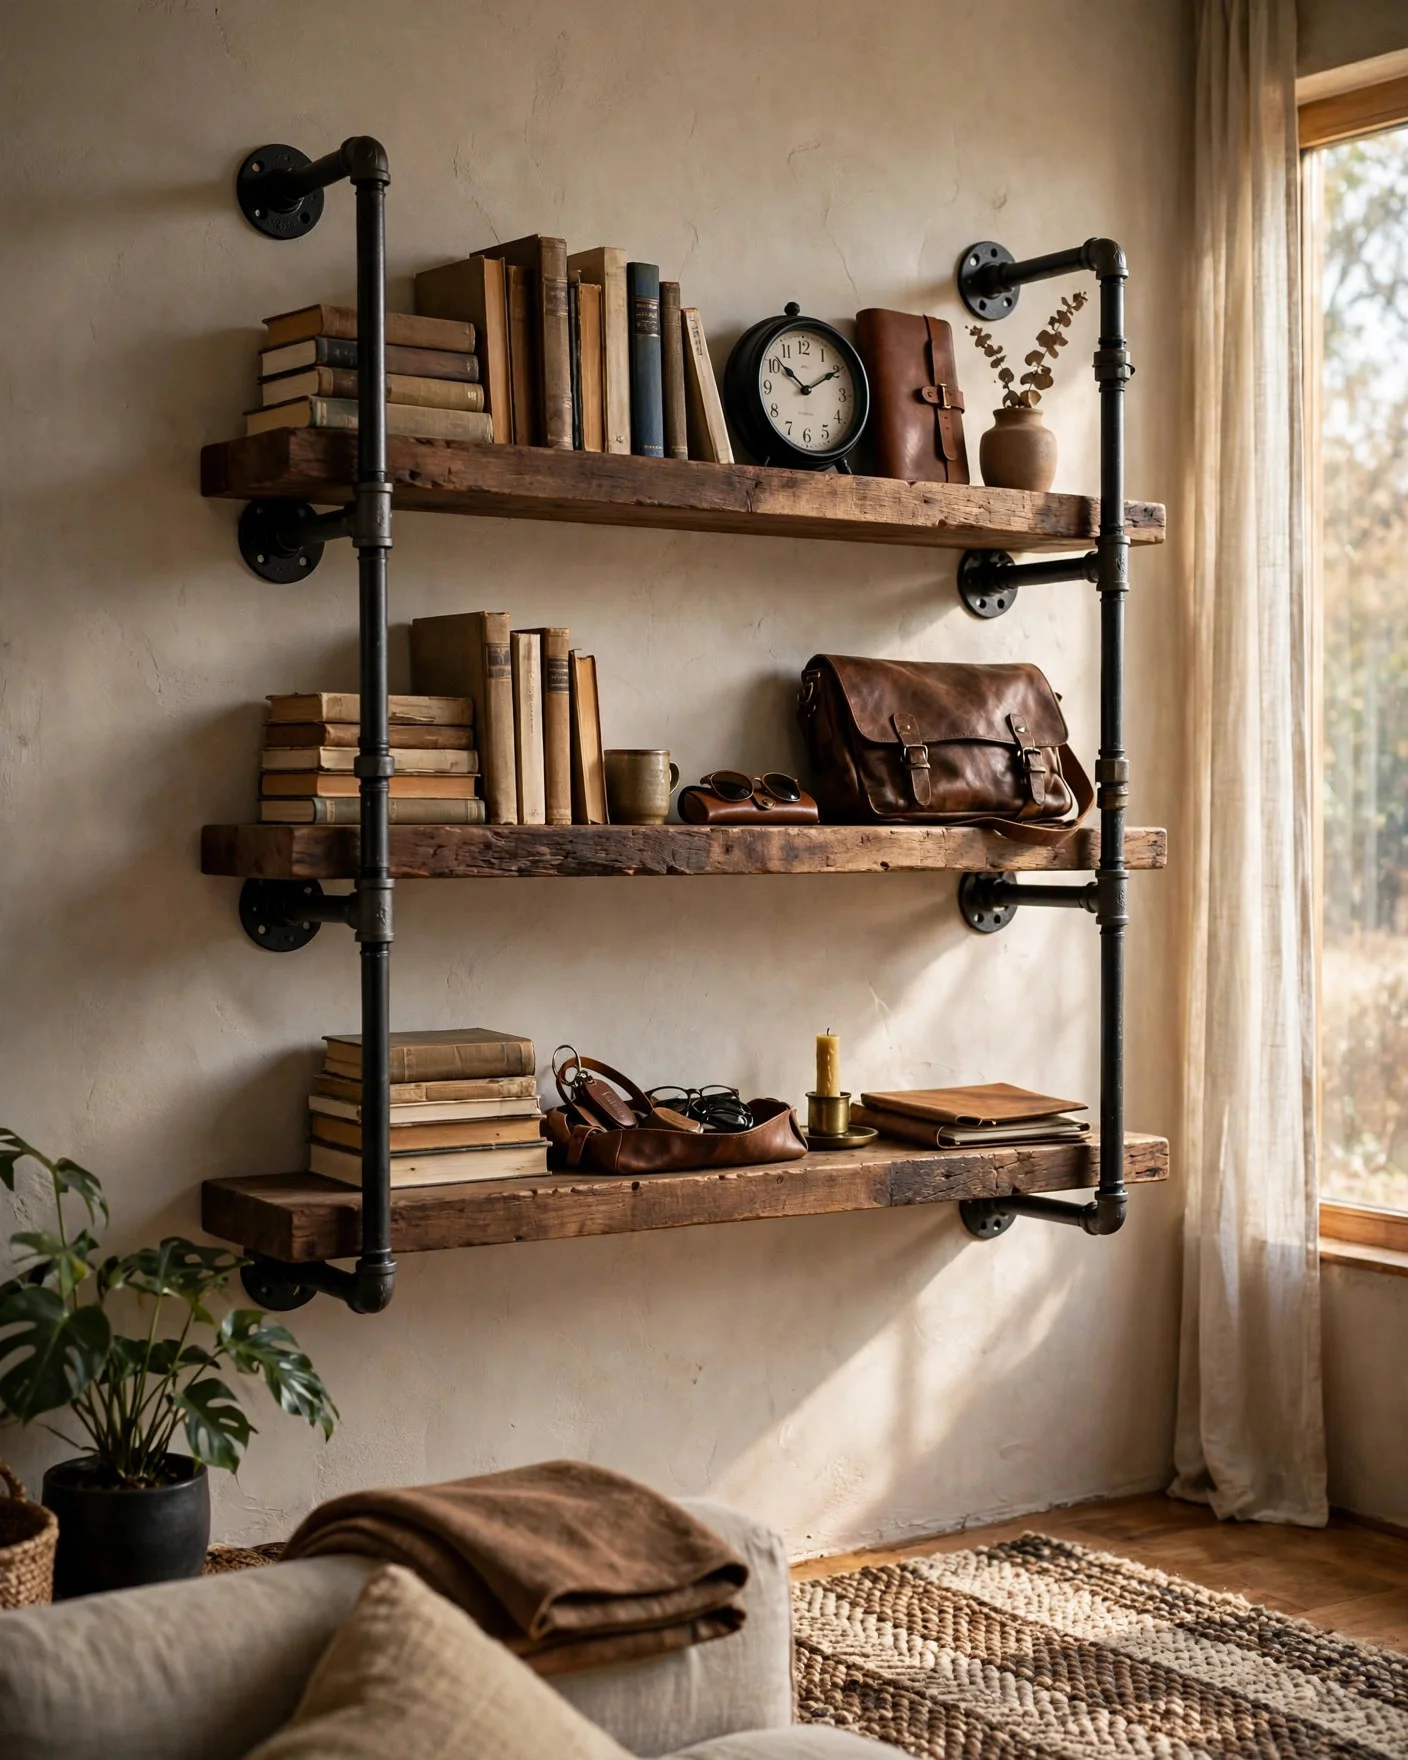
Pipe shelves bring a strong, urban look to a living room. Black iron pipes and flanges screw together like a kit, and thick wood boards rest on top. The frame fixes to the wall at several points, which makes the unit feel solid.
Plan the layout on the floor first. Screw the pipes together, fix the flanges to studs, then lay the boards across and secure them from below. Style with books, a clock, and metal or leather objects to match the frame.
These DIY shelf ideas suit rooms that like a bold frame. The pipes do the visual work, so keep the boards and the styling simple.
Materials at a glance:
- Iron pipes, elbows, and floor flanges.
- Thick wood boards, sanded and sealed.
- Long screws for stud fixing.
Solid fix rule: Pipe frames are heavy even before books go on. Fix every flange into a stud or a solid plug, and check the bracket and pipe ratings before you load the boards.
5. Lean a Ladder Shelf Against the Wall
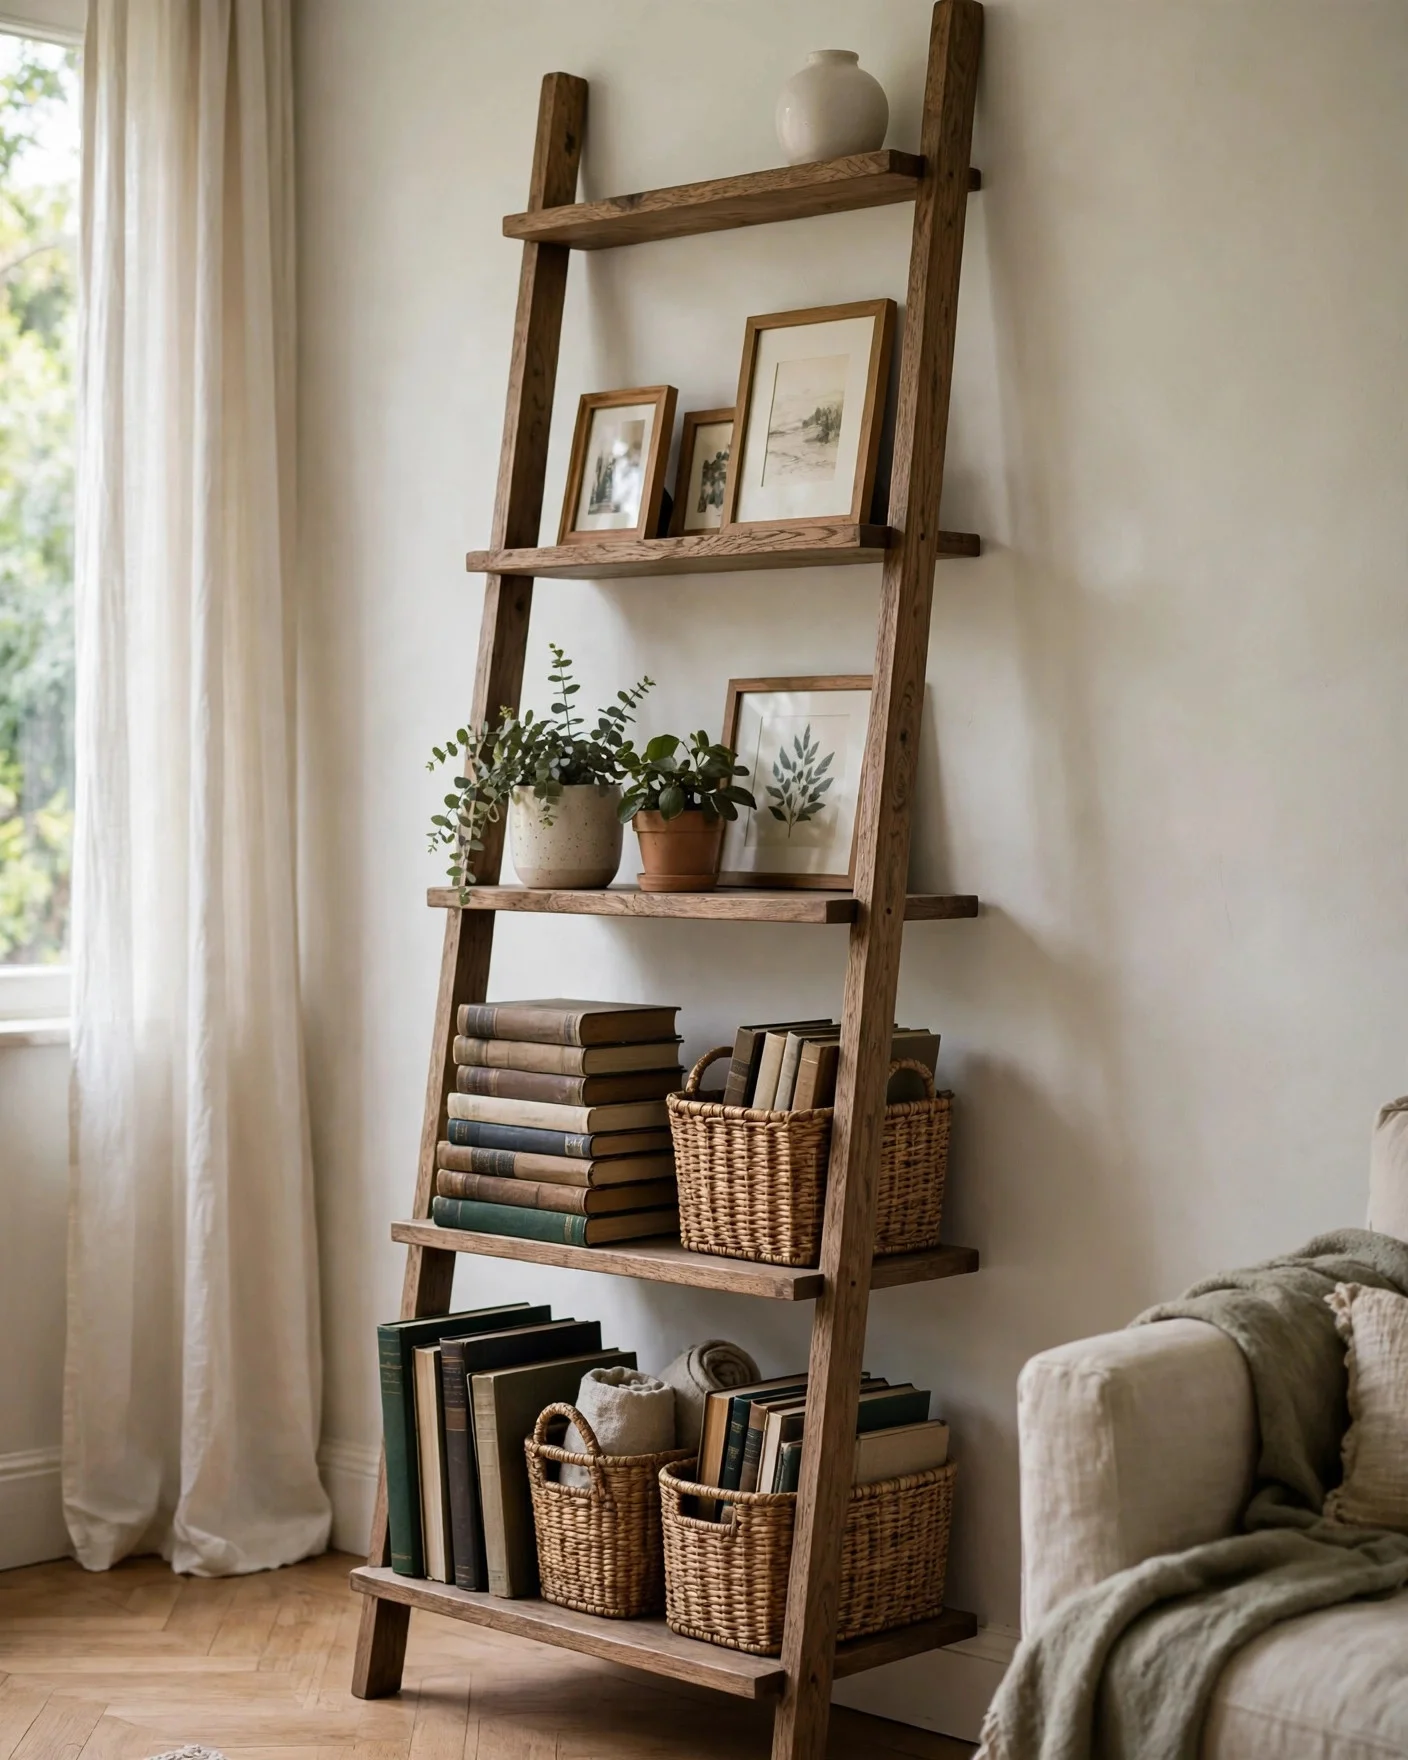
A ladder shelf gives you four or five shelves in a tall, slim shape, and you can buy one or build one from two side rails and flat boards. The shelves get wider toward the floor, so big items sit low and small ones sit high.
Build it with screws at every joint, then fix the top to the wall with a strap or bracket so it can never tip forward. Paint it white for a soft look or stain it for a rustic one.
Load it in this order, and it will stay safe and look planned. These DIY shelf ideas work well in rentals too, since only one small fixing at the top holds the whole unit steady.
Load it in this order:
- Bottom shelf: heavy books and baskets.
- Middle shelves: plants and frames.
- Top shelf: one light object only.
Low shelves: Heavy books and storage baskets.
Mid shelves: Plants, frames, and folded throws.
Top shelf: One light decor piece only.
6. Turn Wooden Crates Into a Stacked Shelf Unit
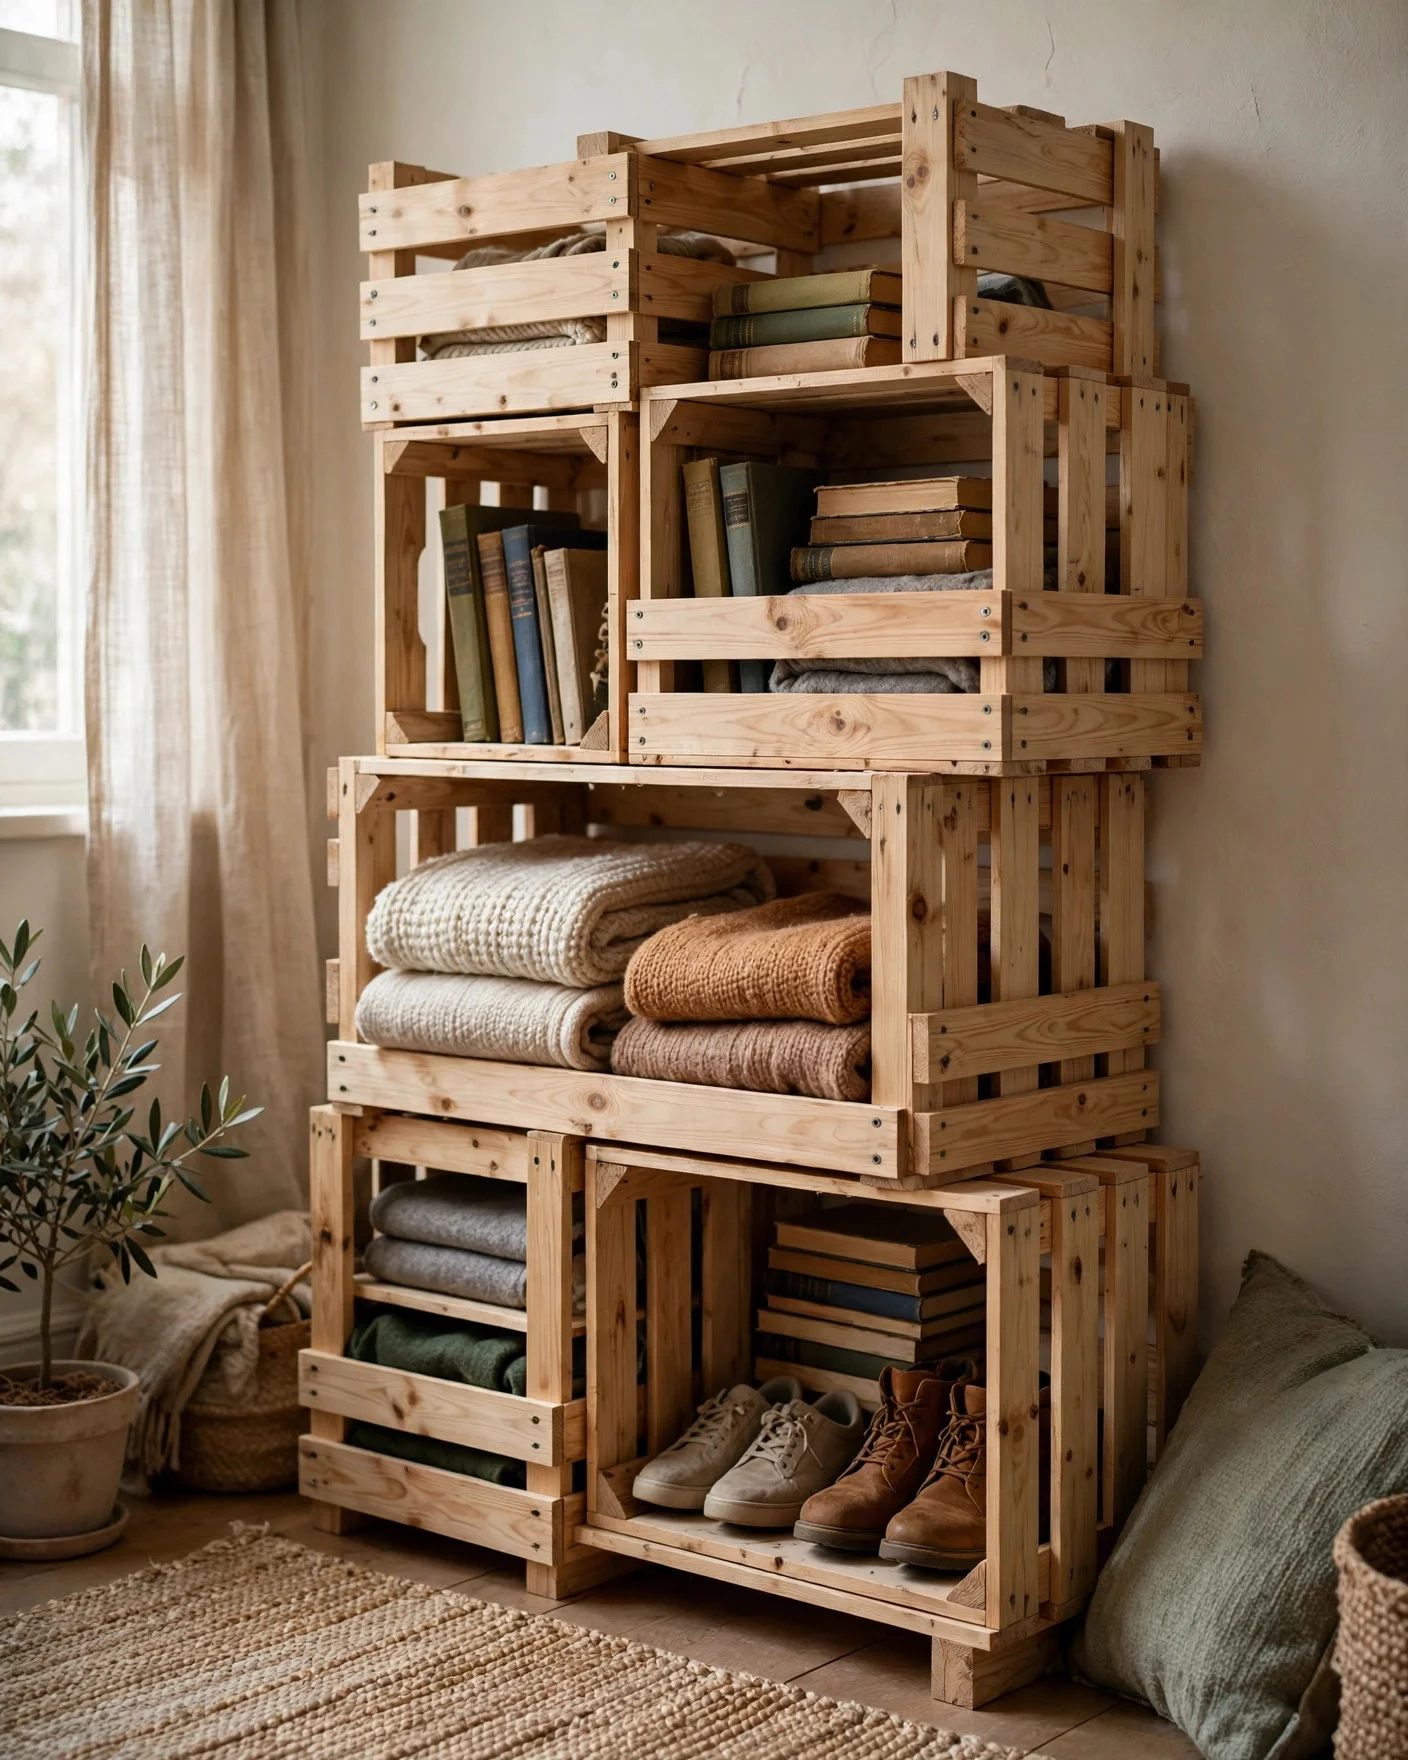
Old wooden crates stack into a shelf unit in minutes, and you can change the shape any time. Sand each crate, fix them to each other with screws, and anchor the whole stack to the wall. Leave some crates on their side and some upright for a varied look.
Crates hold books, shoes, toys, and folded blankets. Paint them one color for a calm unit, or stain them for a farmhouse feel. This is a strong pick for renters on a small budget, since the whole unit comes apart when you move.
Build notes:
- Sand splinters and rough edges first.
- Screw every crate to its neighbor.
- Fix the top crate to the wall.
Do this:
- Screw crates together and anchor the stack to the wall.
Skip this:
- Loose stacks with no fixings, they shift and lean.
7. Add a Pegboard Shelf Wall for Craft Supplies
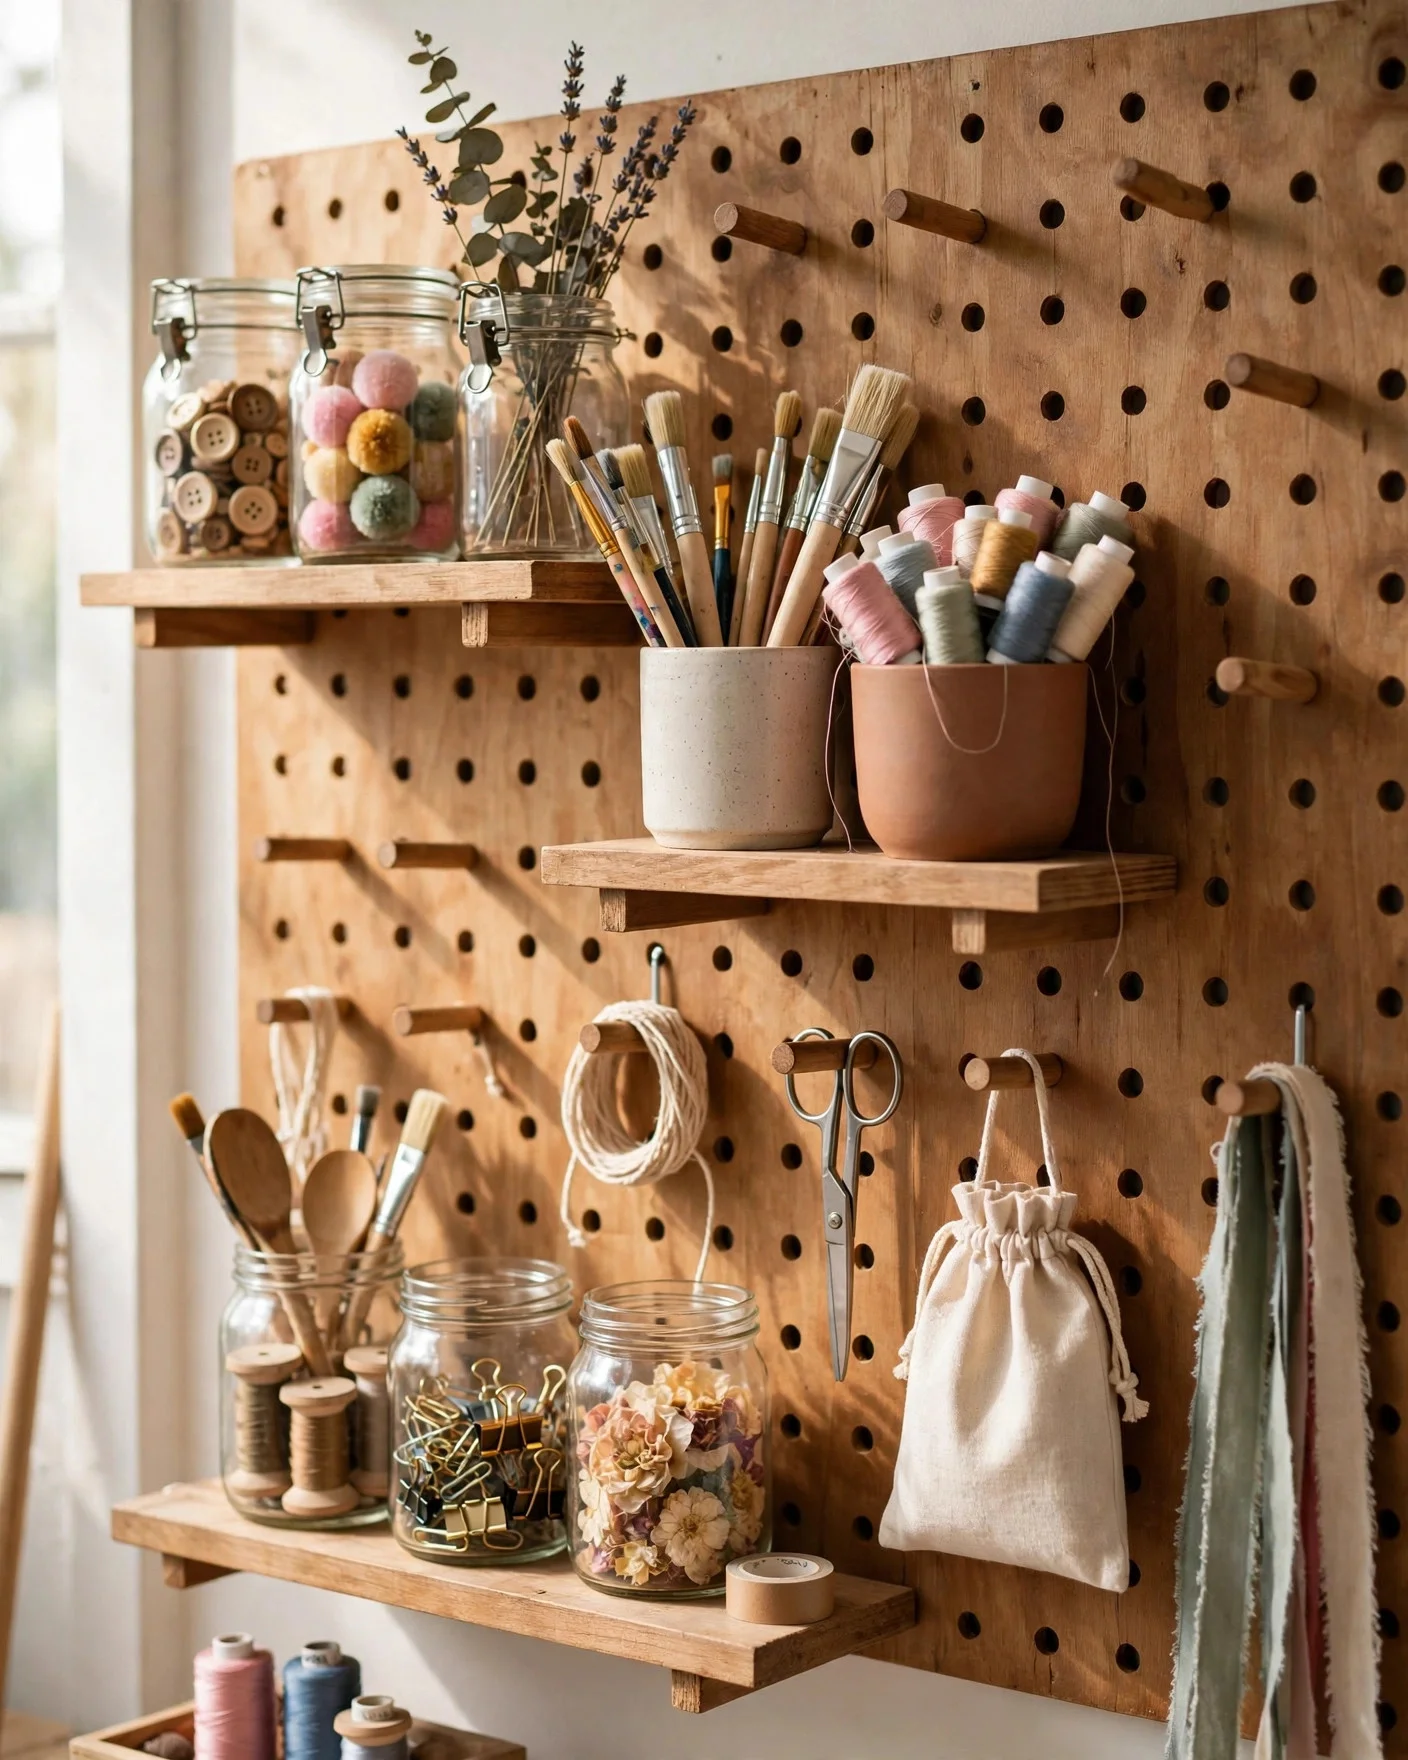
A pegboard wall gives craft supplies a visible home and lets you move things as your projects change. Small shelves, hooks, and cups clip into the holes, so thread, tools, and paint jars all sit in reach.
Fix the board to the wall with spacers so hooks can pass through. Add two or three short shelves for jars and boxes, then hooks for scissors and tools. Frame the board with trim for a finished look in a craft room or home office.
These DIY shelf ideas shine in rooms where supplies change often. Move a hook, shift a shelf, and the wall keeps up with the next project.
Set it up with:
- Shelves for jars and paint pots.
- Hooks for tools you use daily.
- Cups for brushes and pencils.
Pegboard setup checks
- Spacers behind the board so hooks fit through the holes.
- Daily tools at hand height, spare stock up high.
- Labels on jars so supplies go back to the right spot.
8. Build a Honeycomb Hexagon Shelf Cluster
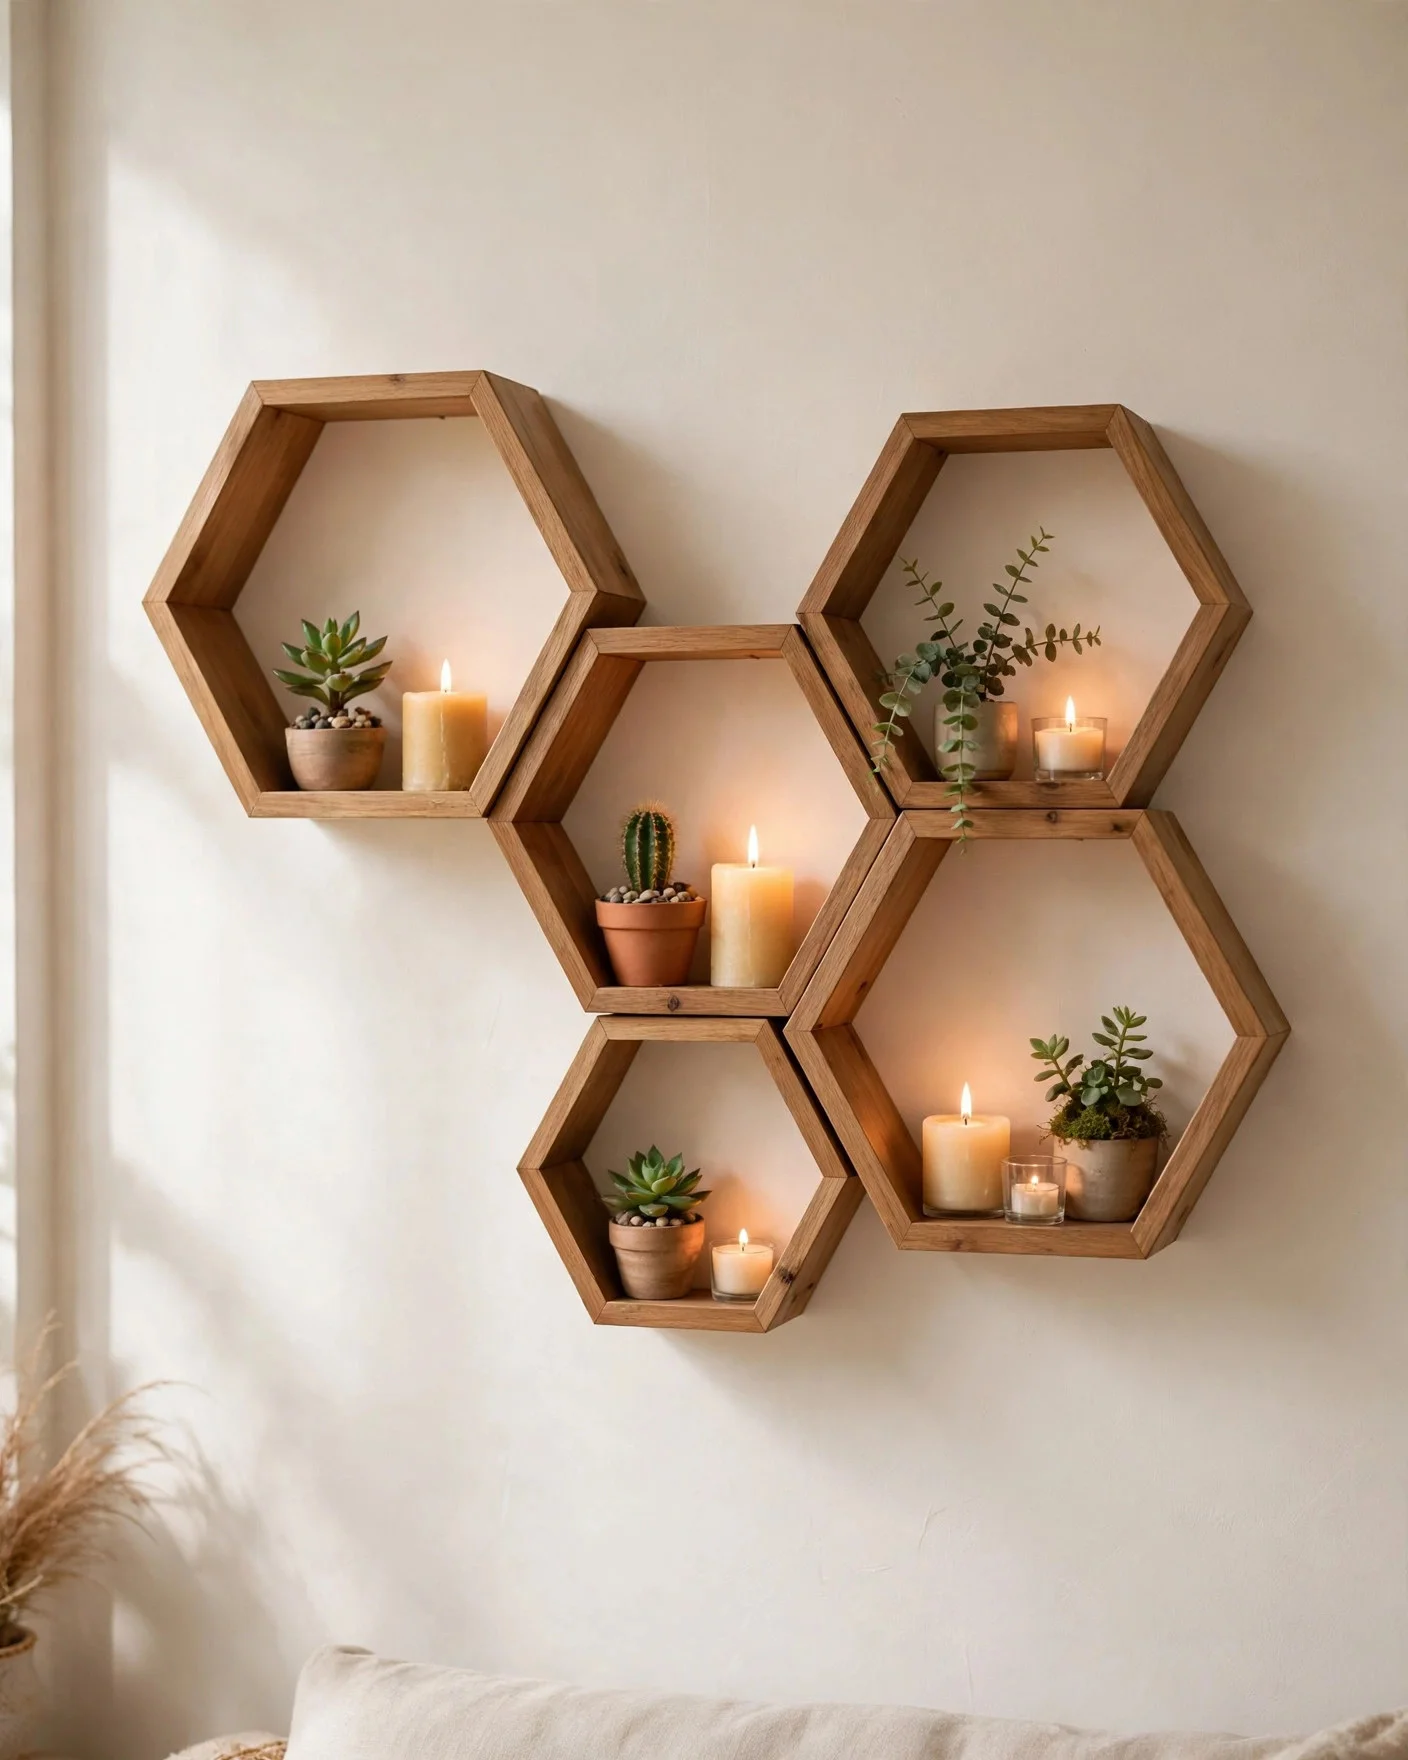
Hexagon shelves look like honeycomb on the wall and hold small plants, candles, and keepsakes. Build each box from six equal boards cut at angled ends, glued and pinned together, or buy plain hexagon boxes and paint them.
Hang three to five boxes as a cluster, with gaps of a few cm between them. Fix each box to the wall with two screws through the back panel or top edge. They suit living rooms and bedrooms where you want art and storage in one piece.
Cluster tips:
- Odd numbers look best.
- Mix one painted box with plain wood ones.
- Keep heavy items out, these are light display shelves.
Cluster formula: Three to five hexagons, one large and the rest smaller, hung with small even gaps. Mark the full shape on the wall with tape before you drill a single hole.
9. Install Open Kitchen Shelves for Dishes and Jars
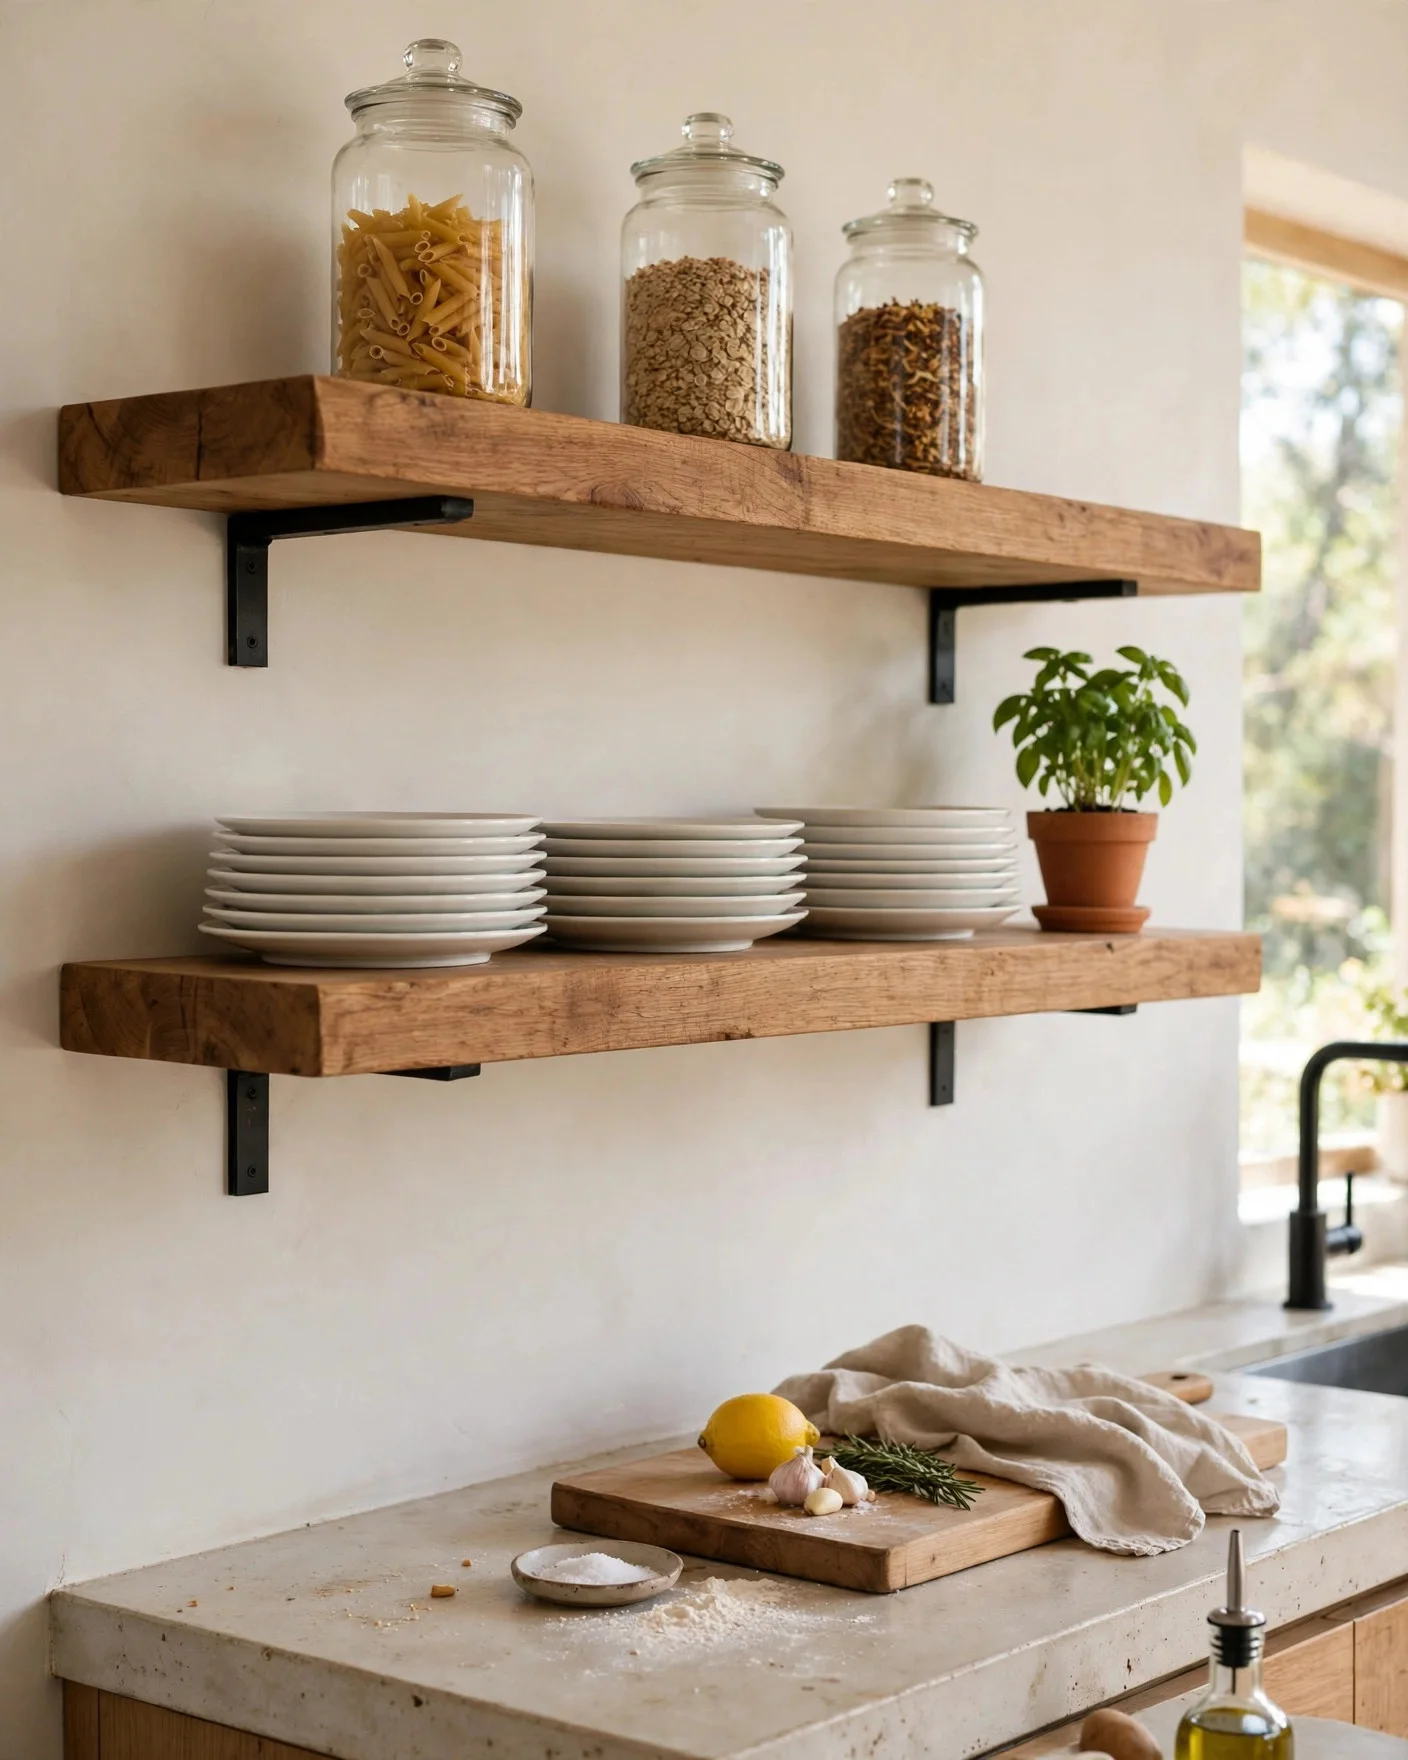
Open shelves in the kitchen keep daily dishes in reach and free up cabinet space. Thick boards on strong brackets work well. Place the shelves where you prep food, so plates and jars sit a step away.
Fix brackets into studs where you can, since dishes add real weight. Keep daily items on the lowest shelf and pretty or rare pieces up high. Wipe boards often, since open shelves collect kitchen dust faster than closed cabinets do.
These DIY shelf ideas earn their keep in kitchens, where every reach counts. A low shelf for daily plates and a high shelf for jars keeps the whole wall working.
Style them with:
- Stacks of plain plates and bowls.
- Glass jars for dry goods.
- One plant or herb pot for color.
| Shelf | What lives there |
|---|---|
| Lowest | Daily plates, bowls, and glasses |
| Upper | Jars, serving dishes, and decor pieces |
See also: Kitchen decor ideas
10. Add a Slim Shelf Above the Toilet for Bathroom Storage
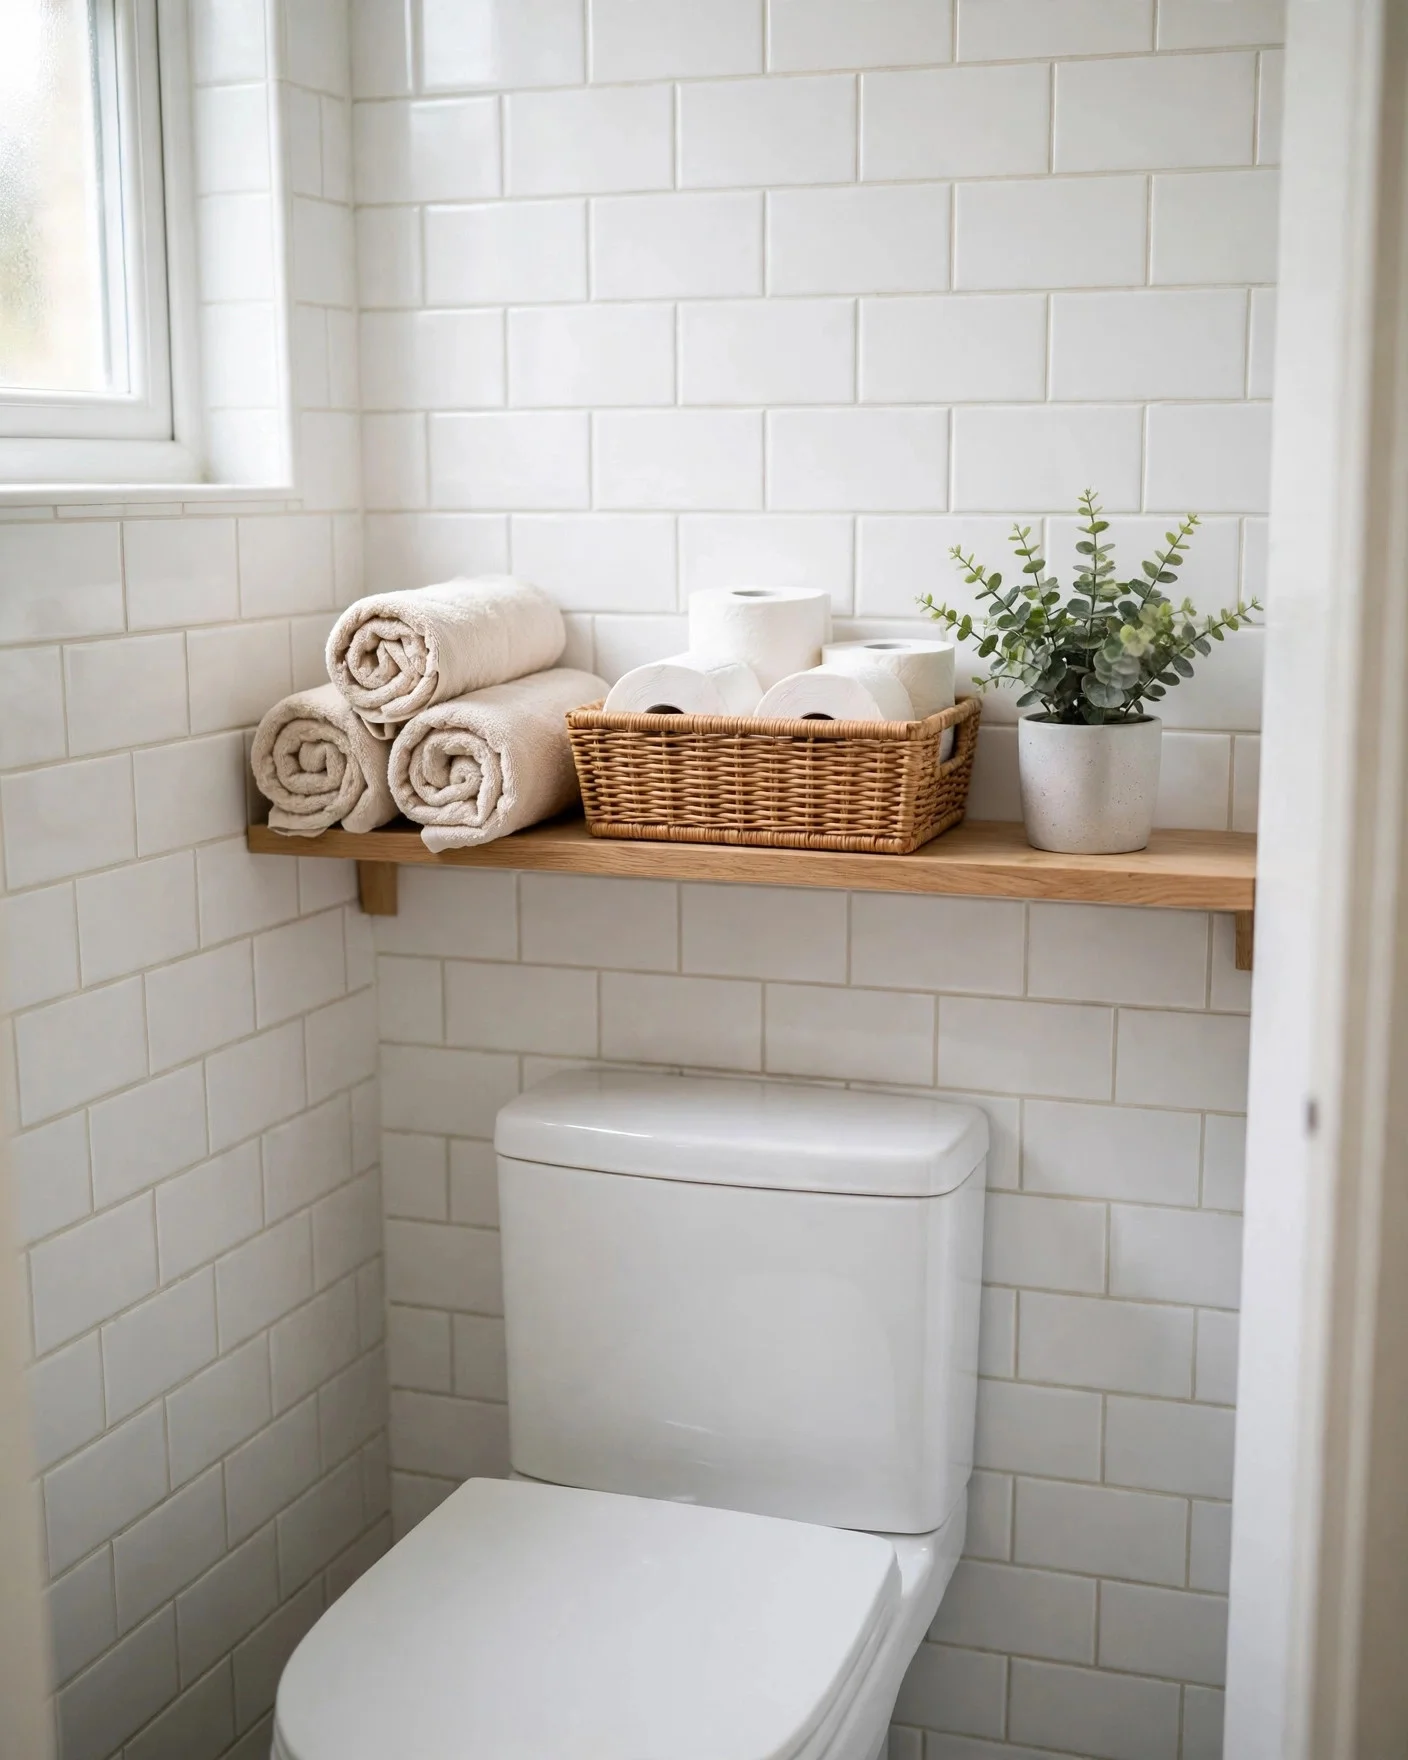
The wall above the toilet is free storage in most bathrooms. A slim shelf there holds rolled towels, spare rolls, and a small plant. Pick a board depth that clears your head when you stand, about 15 to 20 cm.
Use brackets or a floating shelf kit, and fix into studs or solid plugs since bathroom walls are often hollow. Choose wood sealed against damp, or a painted finish that wipes clean. This suits small bathrooms where floor space is tight.
These DIY shelf ideas prove that small walls can carry real storage. One slim board above the toilet frees a whole drawer elsewhere. For more small bathroom fixes, see our neutral bathroom ideas for calm, clean looks that pair well with wood.
Keep on it:
- Rolled hand towels.
- A basket for spare rolls.
- One small plant or candle.
Headroom first: Sit and stand under the marked line before you drill. A shelf 15 to 20 cm front to back, fitted well above head height, keeps the spot useful and safe.
11. Hang a Picture Ledge for Frames and Small Books
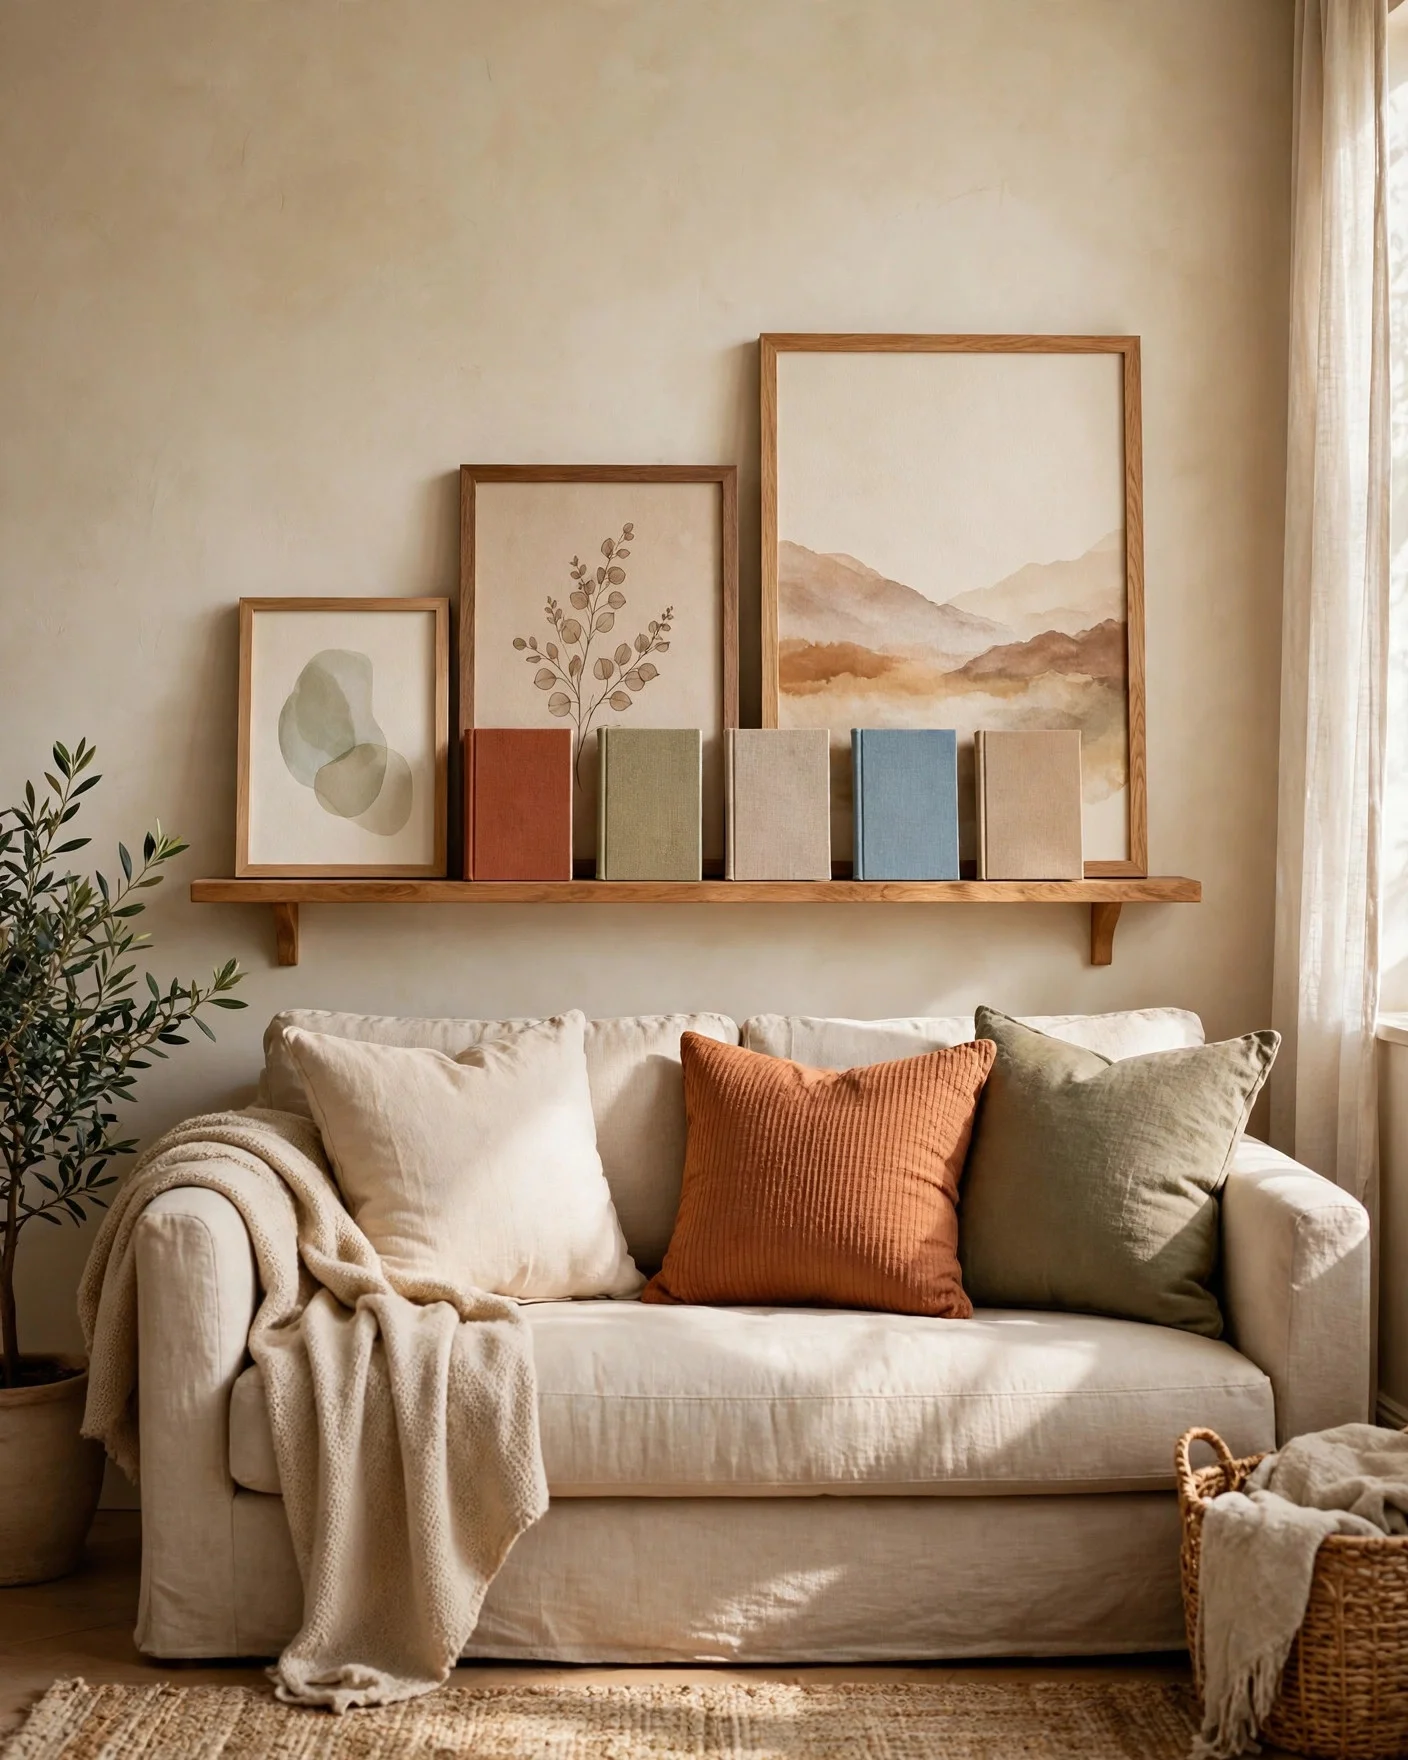
A picture ledge is a shallow shelf with a lip that holds frames in a leaning row. You can swap art in seconds with no new holes, which suits renters and anyone who likes change. A ledge also holds small books with covers facing out, a fun pick for kids rooms.
Build one from three thin boards glued and screwed into a channel shape, or buy a ready ledge and paint it. Use one above a desk, sofa, or bed, and layer a large frame behind smaller ones with gaps so pieces can shift.
Ledge basics:
- Fit it level into studs or solid plugs.
- Layer a large frame behind smaller ones.
- Leave gaps so pieces can shift.
- Fit the ledge level, into solid fixings.
- Lean the largest frame at the back.
- Layer small frames and books in front.
12. Make a Rustic Barnwood Shelf With Iron Brackets
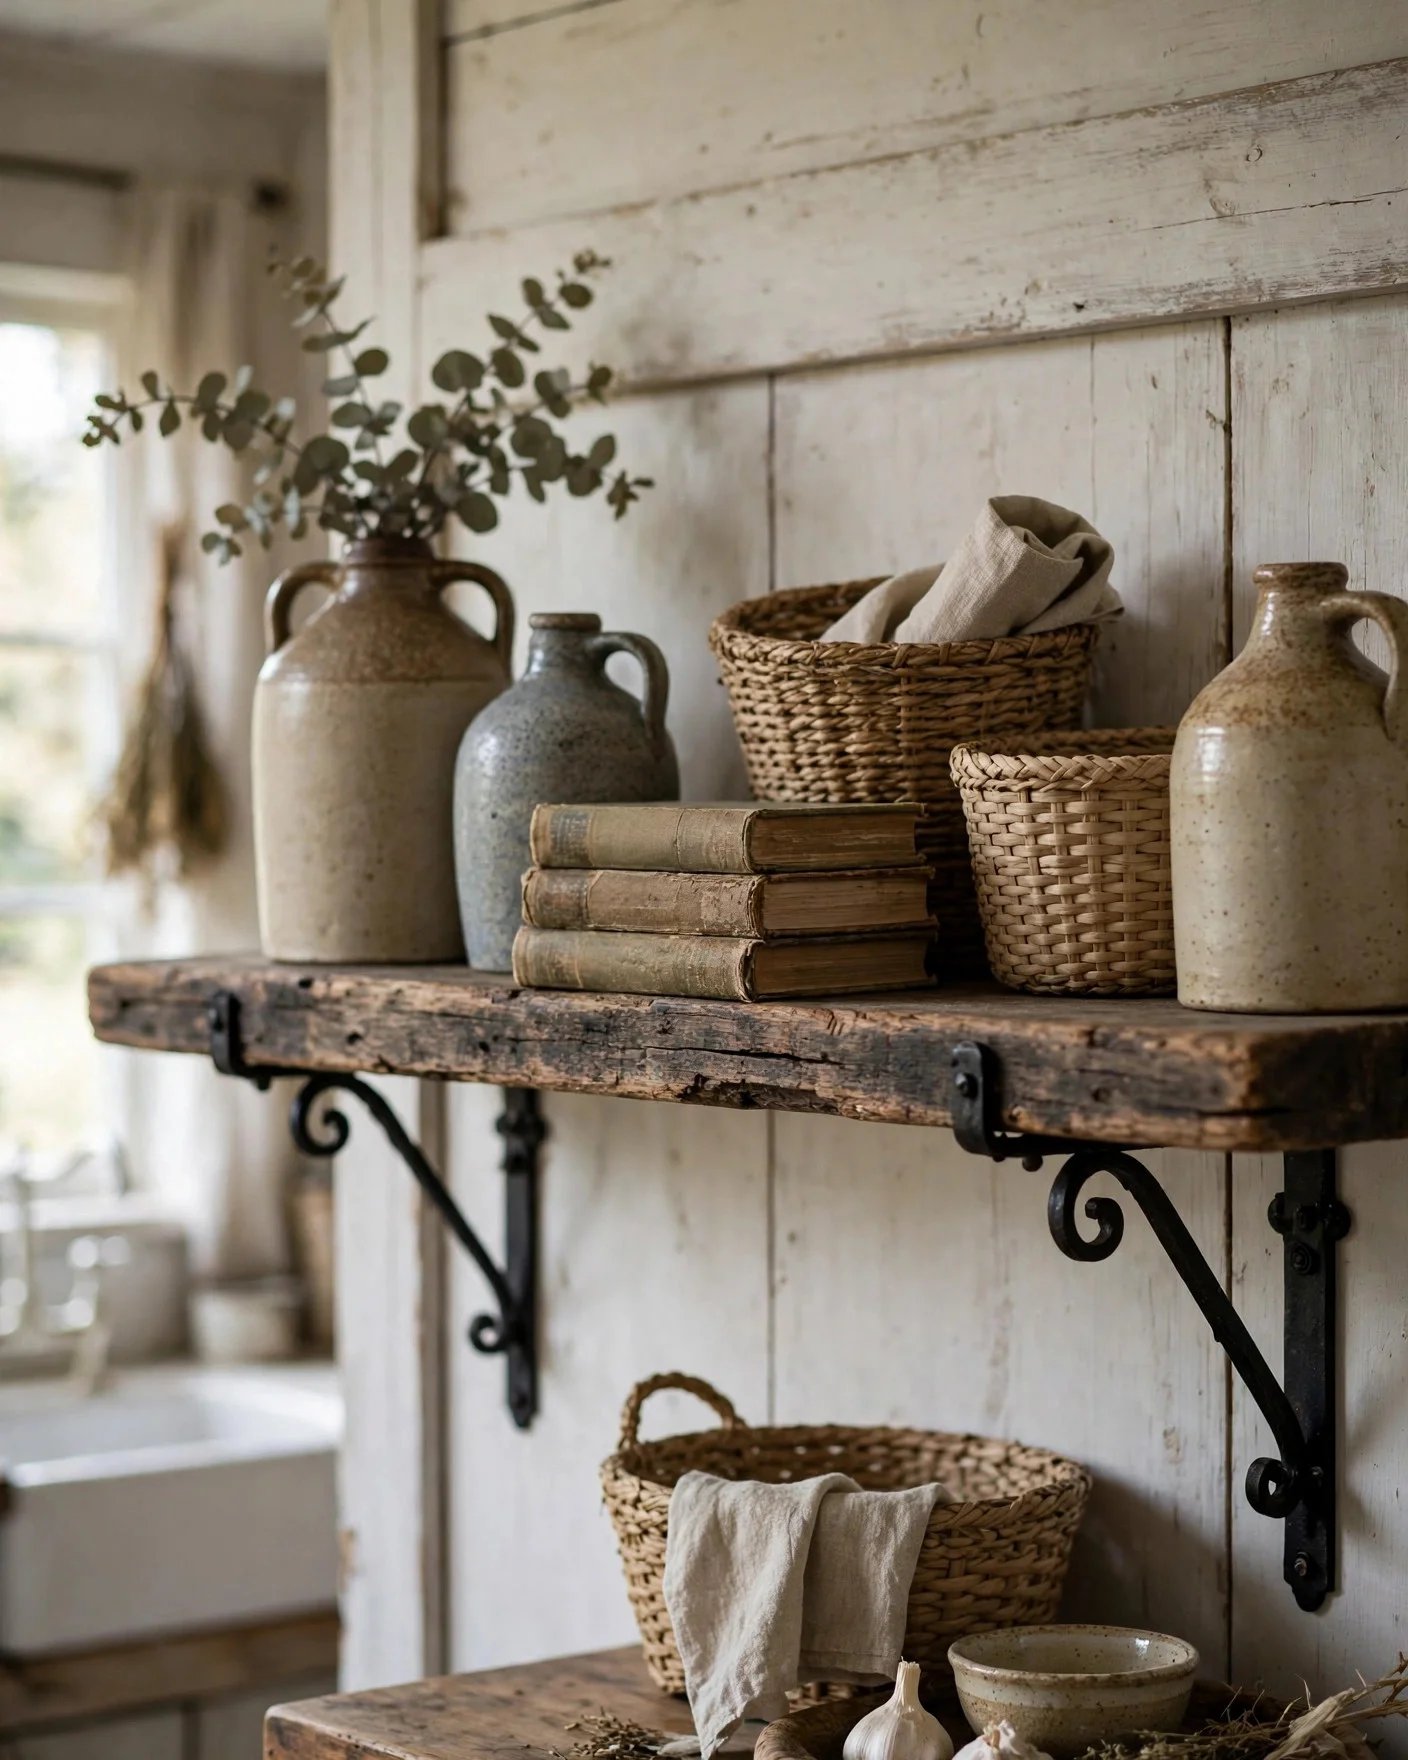
Weathered barnwood has color and grain that new boards lack. One thick plank on black iron brackets gives a kitchen or living room a warm farmhouse shelf. Clean old wood well, sand sharp edges, and seal it if it will sit near steam or splashes.
Check reclaimed boards for nails and screws before you cut or drill. Heavy iron brackets need fixing into studs or solid plugs. Style it with stoneware jugs, woven baskets, and old books with plain covers.
The rough wood does the talking, so keep items simple and few. These DIY shelf ideas suit farmhouse, rustic, and cottage rooms, where old wood feels at home.
Style it with:
- Stoneware jugs and bowls.
- Woven baskets.
- Old books with plain covers.
Check first: Scan old boards for hidden nails before cutting.
Seal it: Matte sealer keeps the old look, blocks splinters.
Bracket size: Bracket arm near the full depth of the board.
13. Build a Cube Shelf Unit for a Small Room
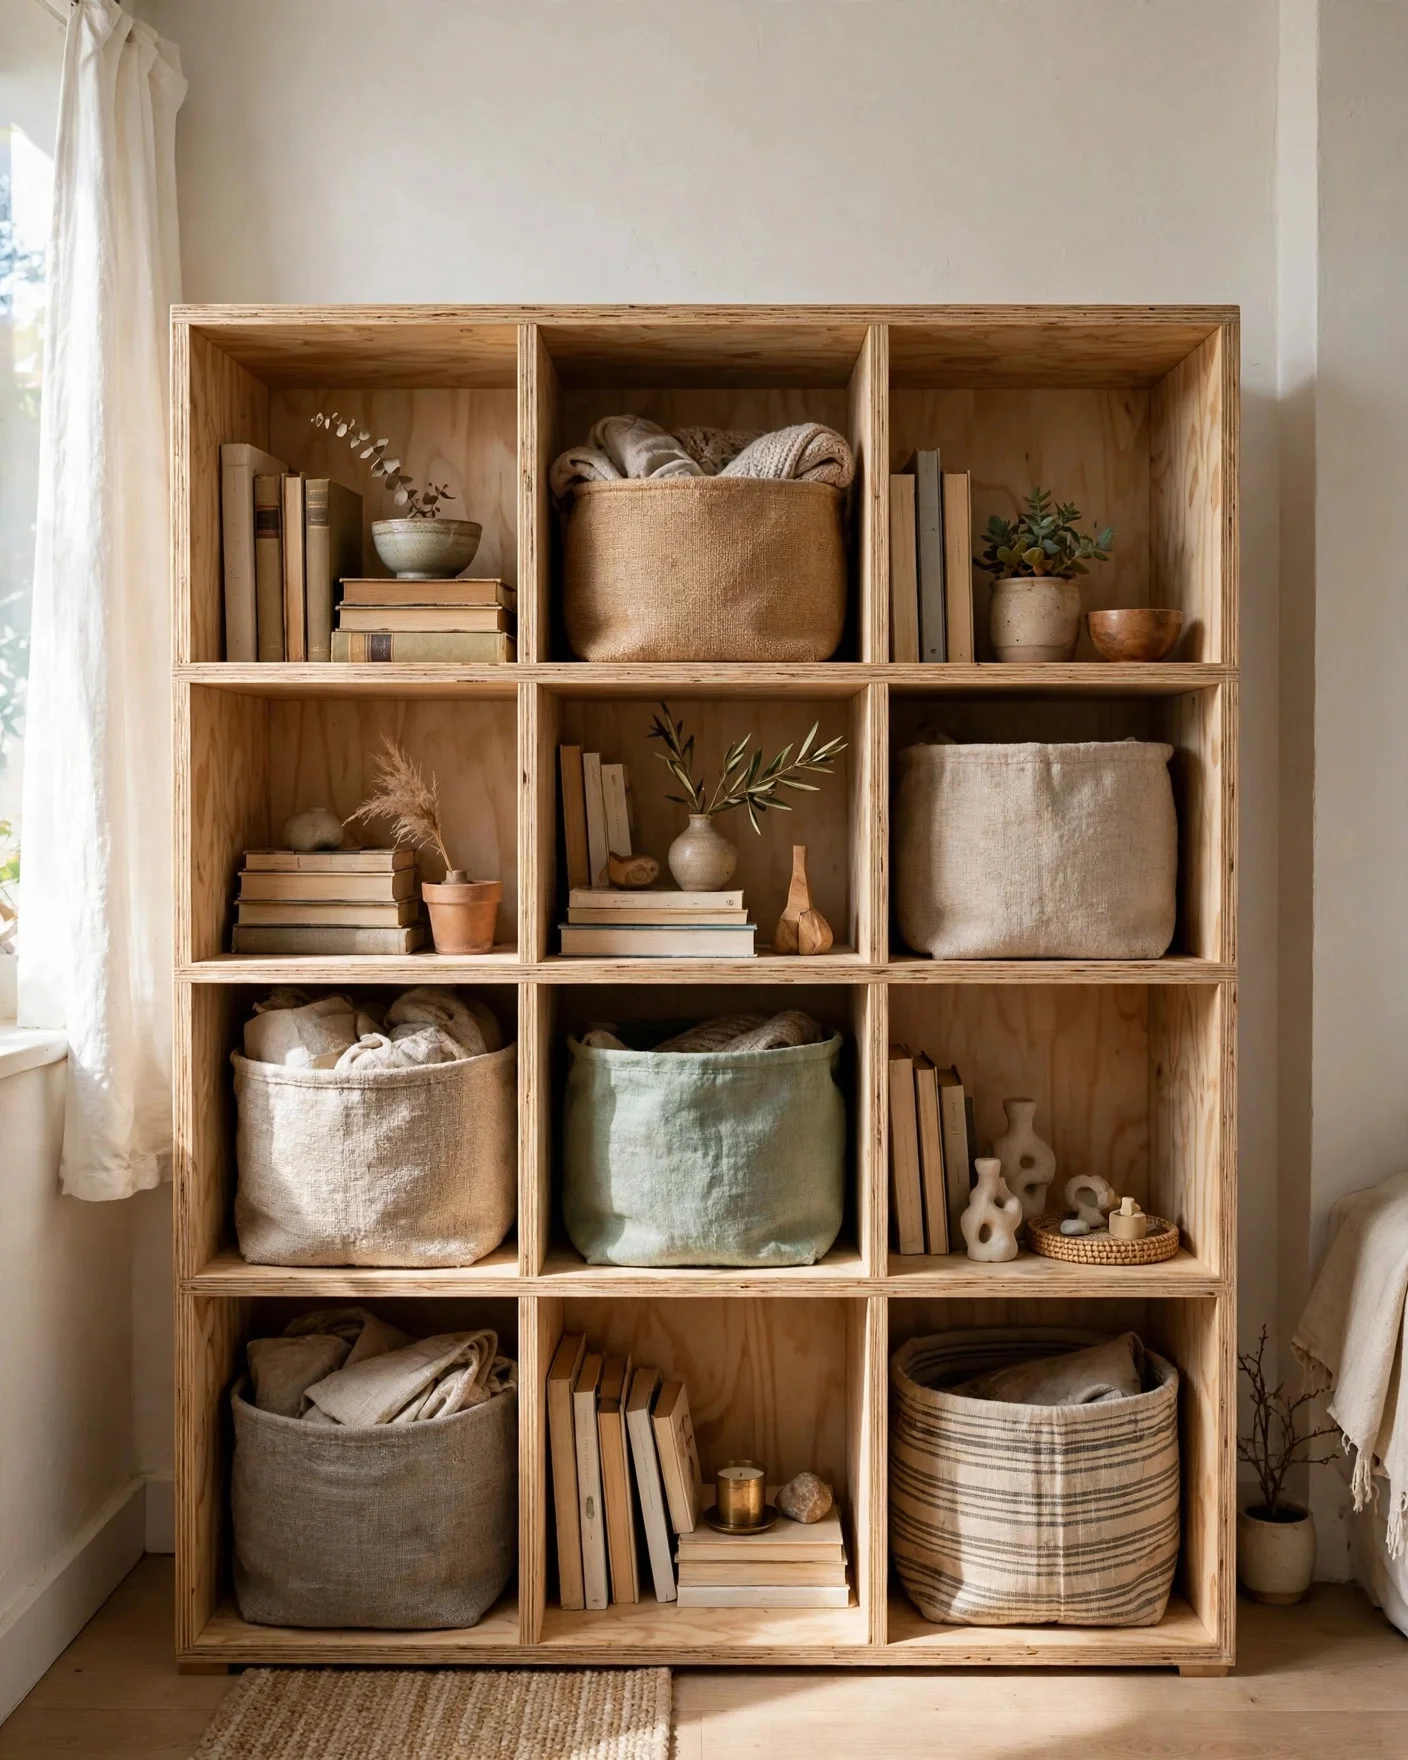
A cube unit divides one footprint into neat boxes for books, baskets, and decor. Build it from plywood or boards cut to equal sizes, glued and screwed into a grid, or stack ready cube boxes and fix them together.
Cubes suit small rooms since they use wall height instead of floor width. Add fabric baskets in some cubes to hide clutter. Anchor tall units to the wall at the top so they stay steady.
These DIY shelf ideas are a smart pick for a first build, since every cut is the same size. For more storage that hides clutter, see our pots and pans storage ideas for kitchen cabinets that stay tidy.
Plan the grid:
- Two by two cubes for a low unit.
- Two by four for a tall bookcase.
- Baskets in half the cubes, open display in the rest.
Balance rule: Mix open cubes and basket cubes about half and half. All open looks busy, all closed looks flat. Anchor tall units to the wall before you fill them.
14. Add Shelves Under the Stairs for Hidden Storage
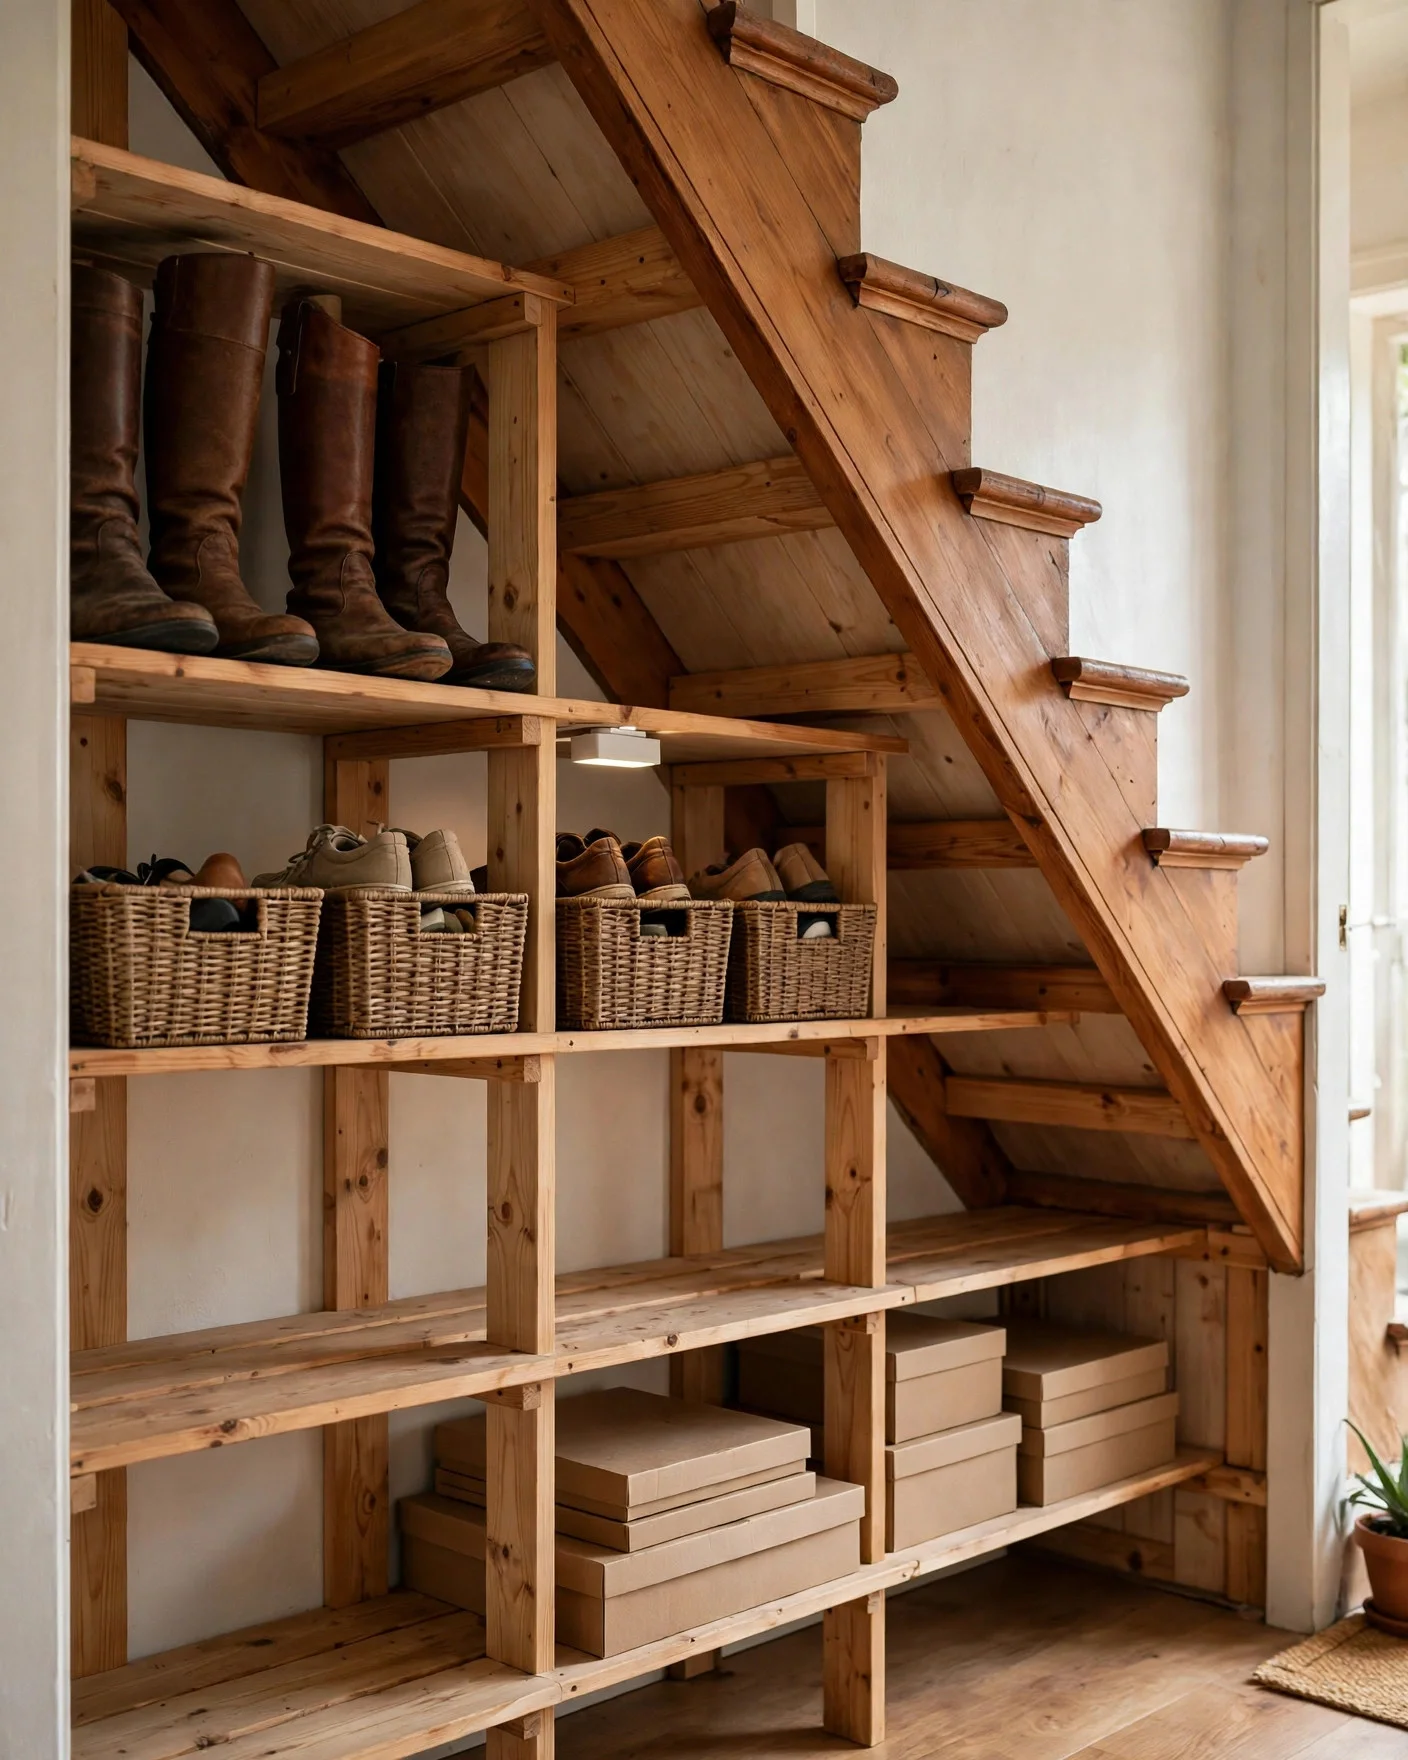
The space under the stairs often holds coats and clutter in a heap. A few shelves turn it into tidy storage for shoes, bags, cleaning supplies, or a small book nook. Board shelves on simple battens work well in this odd shape.
Fit battens to the side walls and lay boards across. The space gets lower toward one end, so store tall items at the high end and small boxes at the low end. Add a stick on light so you can see to the back.
Sort it by zone:
- High end: tall boots and bags.
- Middle: shoe racks and baskets.
- Low end: flat boxes and spare supplies.
- Clear the space and mark the slope line on both walls.
- Screw battens level to the side walls, then lay boards across.
- Sort items tall to small along the slope.
15. Make a Pallet Wood Shelf for a Farmhouse Look
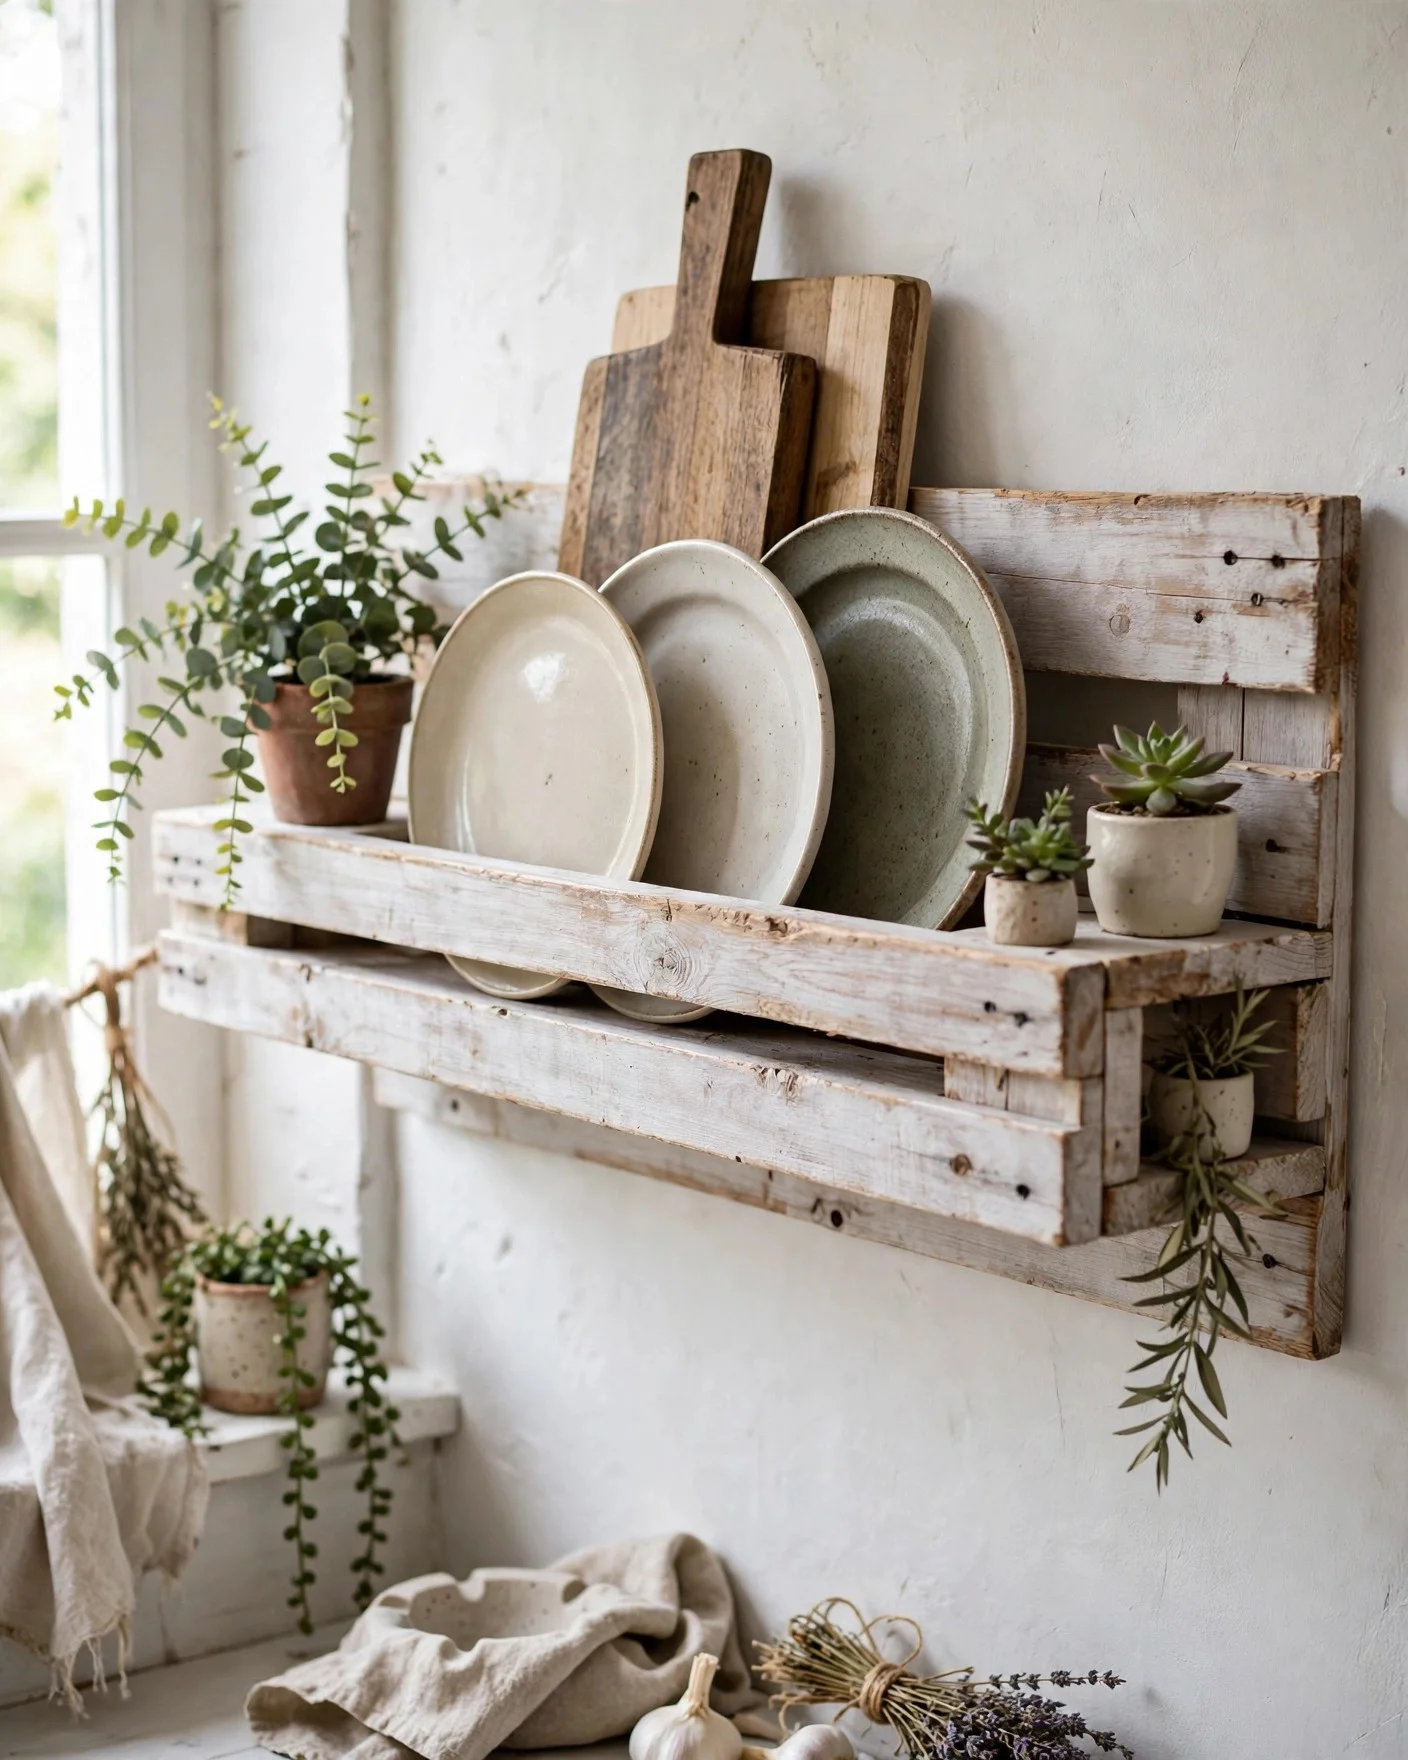
A pallet has ready made slats that work as a shelf with a back panel built in. Stand a cleaned pallet section on the wall, or pull boards off and rebuild them into a simple shelf with a plate groove. Pallet projects cost very little.
Clean the wood well and sand every edge. Check the stamp on the pallet and use only heat treated wood marked HT for indoor projects. Leave the wood raw for a rustic look, or whitewash it for a softer farmhouse feel.
These DIY shelf ideas are kind to small budgets. One pallet can hold plates in the kitchen, books in the hall, or tools on a porch wall.
Good uses:
- Plate and board display in a kitchen.
- Books and plants in a hall.
- Garden tools on a porch wall.
Safe pick:
- Stamp reads HT, heat treated, for indoor use.
Pass on it:
- No stamp, oil stains, or a strong chemical smell.
16. Hang Plant Shelves in a Sunny Corner
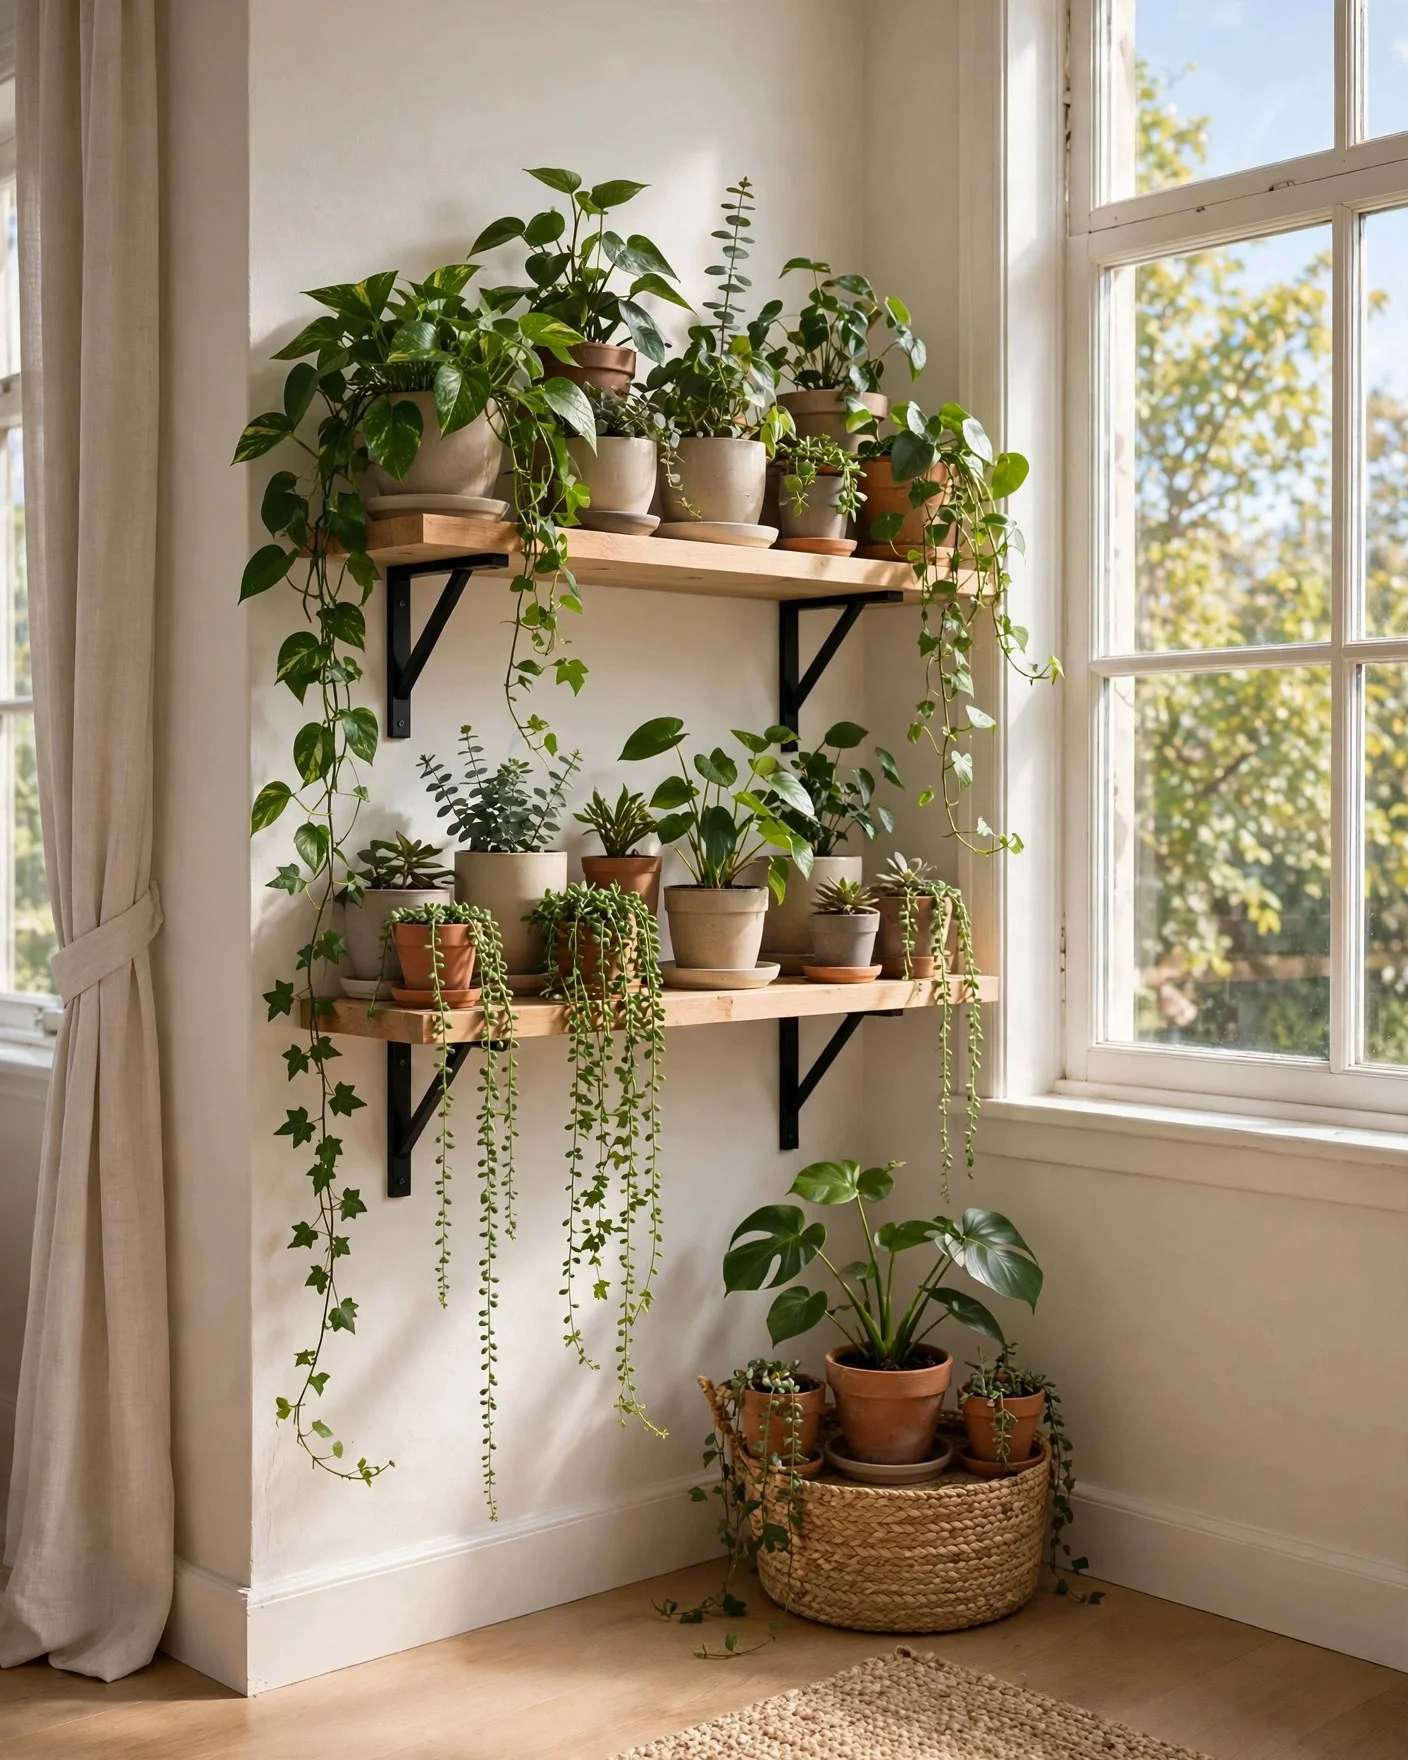
Plants look best grouped, and a sunny corner with two or three shelves turns them into a display. Use simple boards on brackets near the window, spaced wide enough for plants to grow upward.
Set heavy pots low and small pots high. Trailing plants on the top shelf soften the whole corner as they hang down. This suits living rooms and kitchens where one big plant used to sit alone on the floor.
Care points:
- Trays under pots catch water drips.
- Sealed or painted wood handles damp soil best.
- Rotate pots now and then for even growth.
Water smart: Pots drip after watering. Trays under every pot and sealed wood keep the shelf clean and dry, and plants stay healthier on a shelf with real light.
17. Stack Boards and Bricks Into a Low Bookshelf
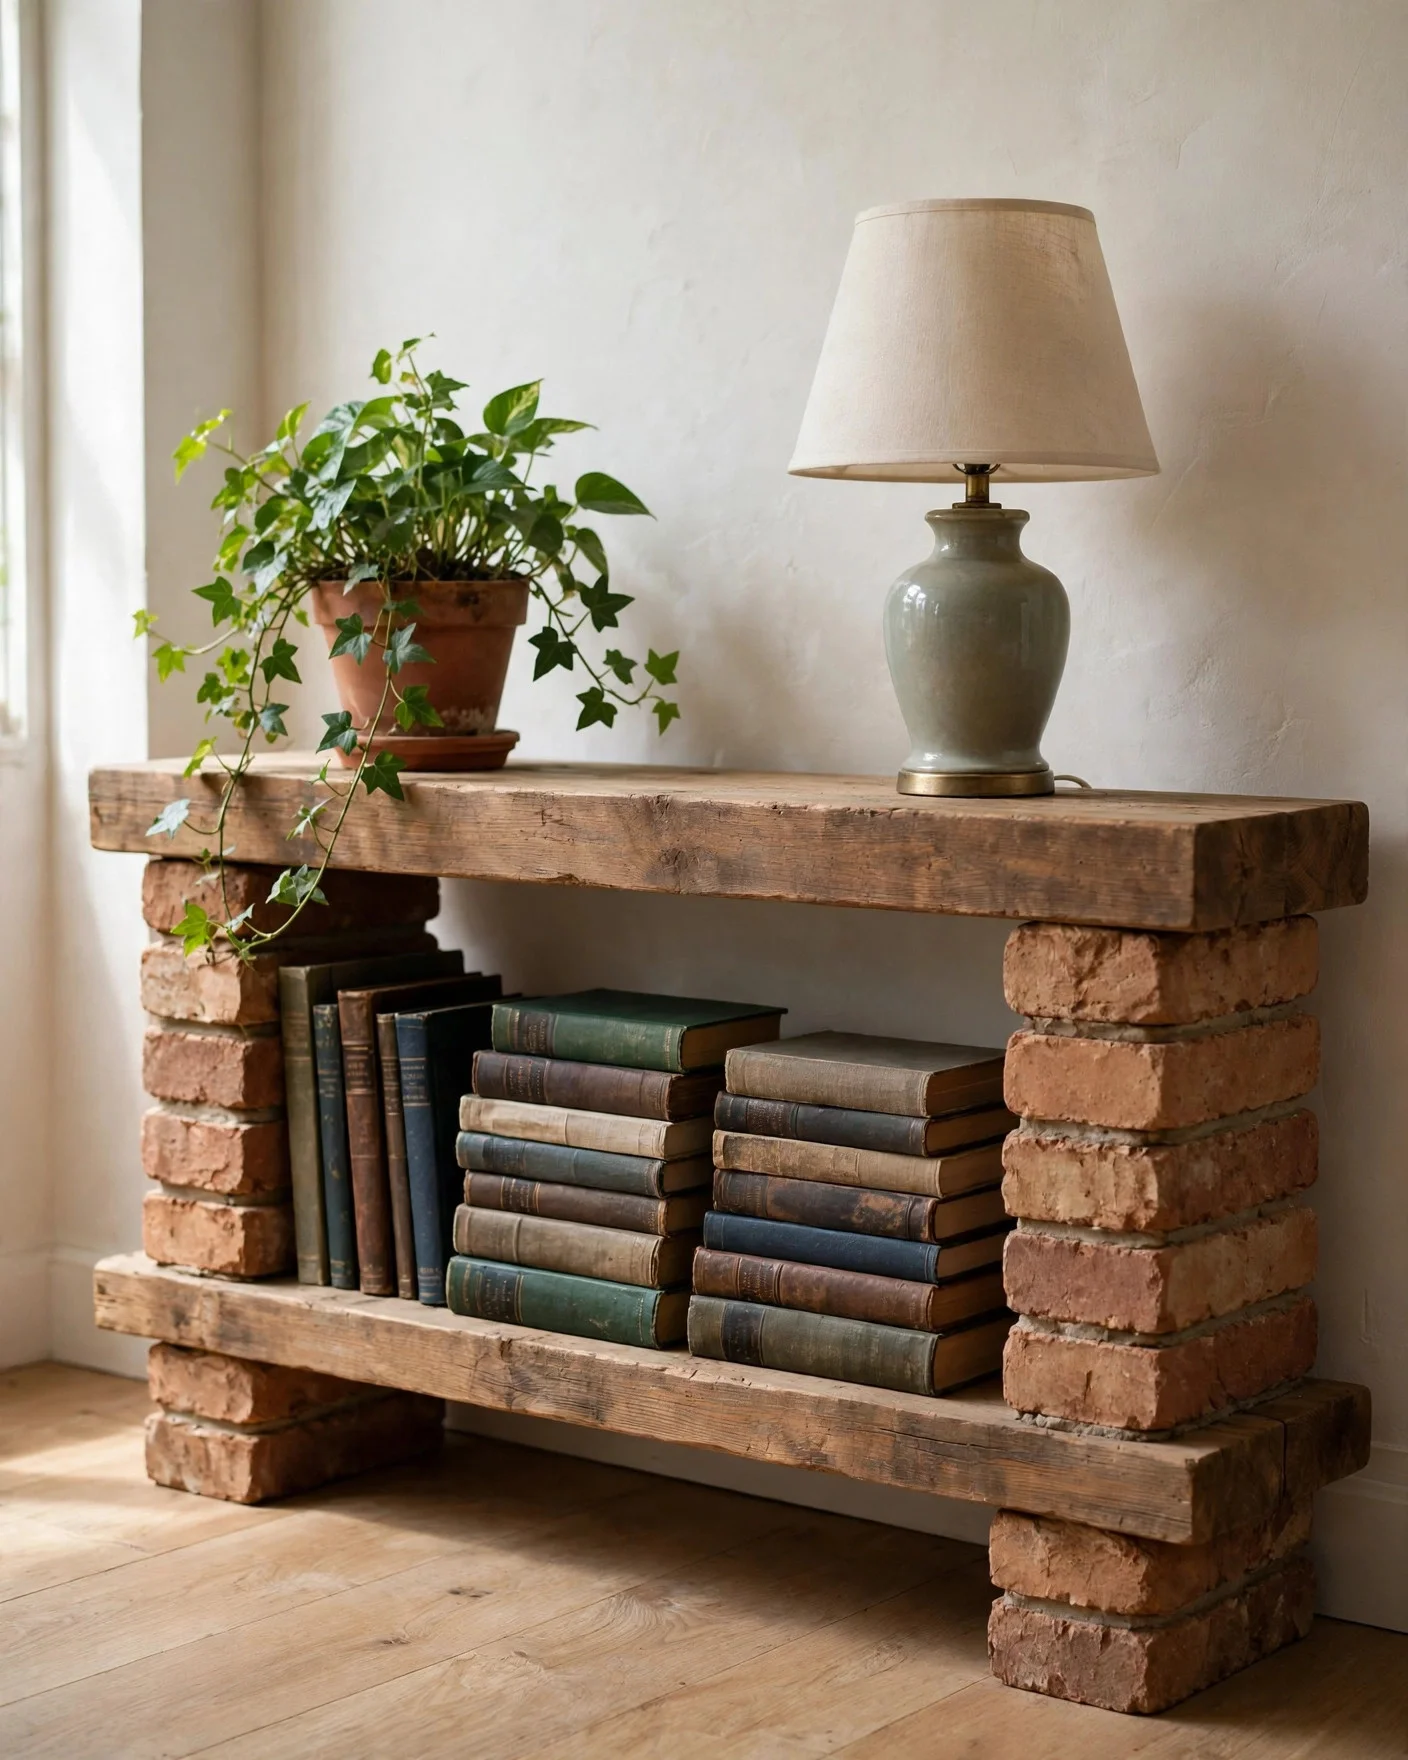
Boards resting on stacked bricks make a low bookshelf with no screws at all. It suits renters, students, and anyone who may move soon. Use clean bricks or blocks, all the same size, and solid wood boards.
Stack two or three bricks at each end of the board, keep the stacks level, and do not build higher than two levels. The weight of the books keeps the shelf steady. Style the top with a plant and a lamp.
These DIY shelf ideas need no tools at all. Level floor, even stacks, heavy books low, and the unit sits firm against the wall.
Keep it safe:
- Level floor and even brick stacks.
- Heavy books on the lowest board.
- Push the unit back against the wall.
Base: Even stacks of two or three bricks.
Boards: Solid wood, no sag in the middle.
Books: Heaviest rows on the lowest board.
18. Mount a Spice Shelf on a Cabinet Door
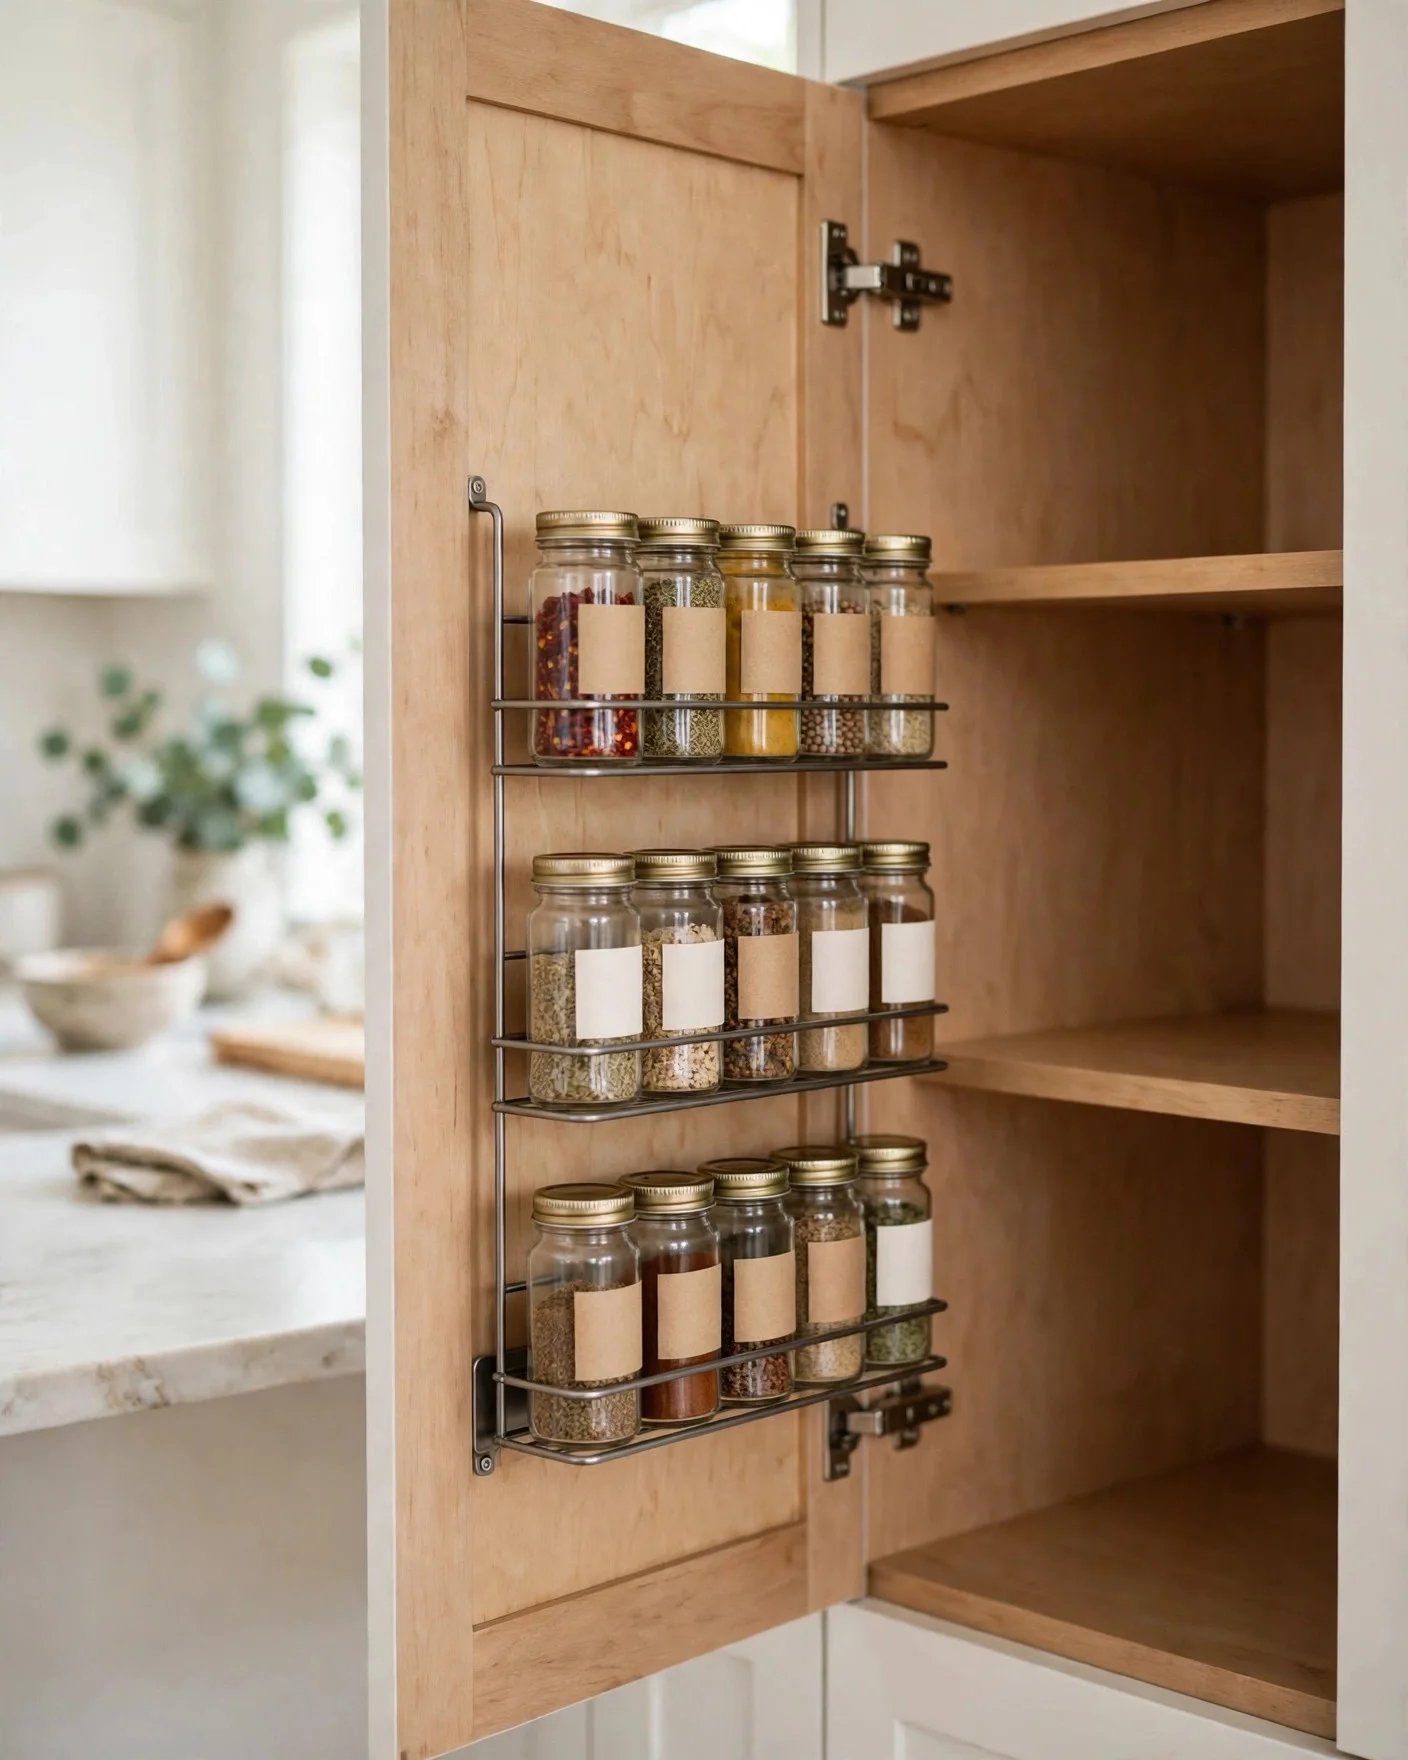
The inside of a cabinet door is wasted space in most kitchens. A slim rack there holds spice jars where you can see every label at once. Buy a wire or wood rack sized for the door, or build a shallow box from thin boards.
Screw the rack to the door with short screws that will not poke through the front. Check that the loaded door still closes without the jars hitting the shelves inside. Small jars only, since heavy bottles belong in the cabinet.
Fit notes:
- Measure jar height before you build.
- Leave a gap so jars clear the cabinet shelf.
- Small jars only, heavy bottles belong in the cabinet.
Door rack checks
- Screws shorter than the door thickness.
- Jars clear the cabinet shelves when the door closes.
- A front rail keeps jars in place when the door swings.
19. Mount Box Shelves as Shadow Display Shelves
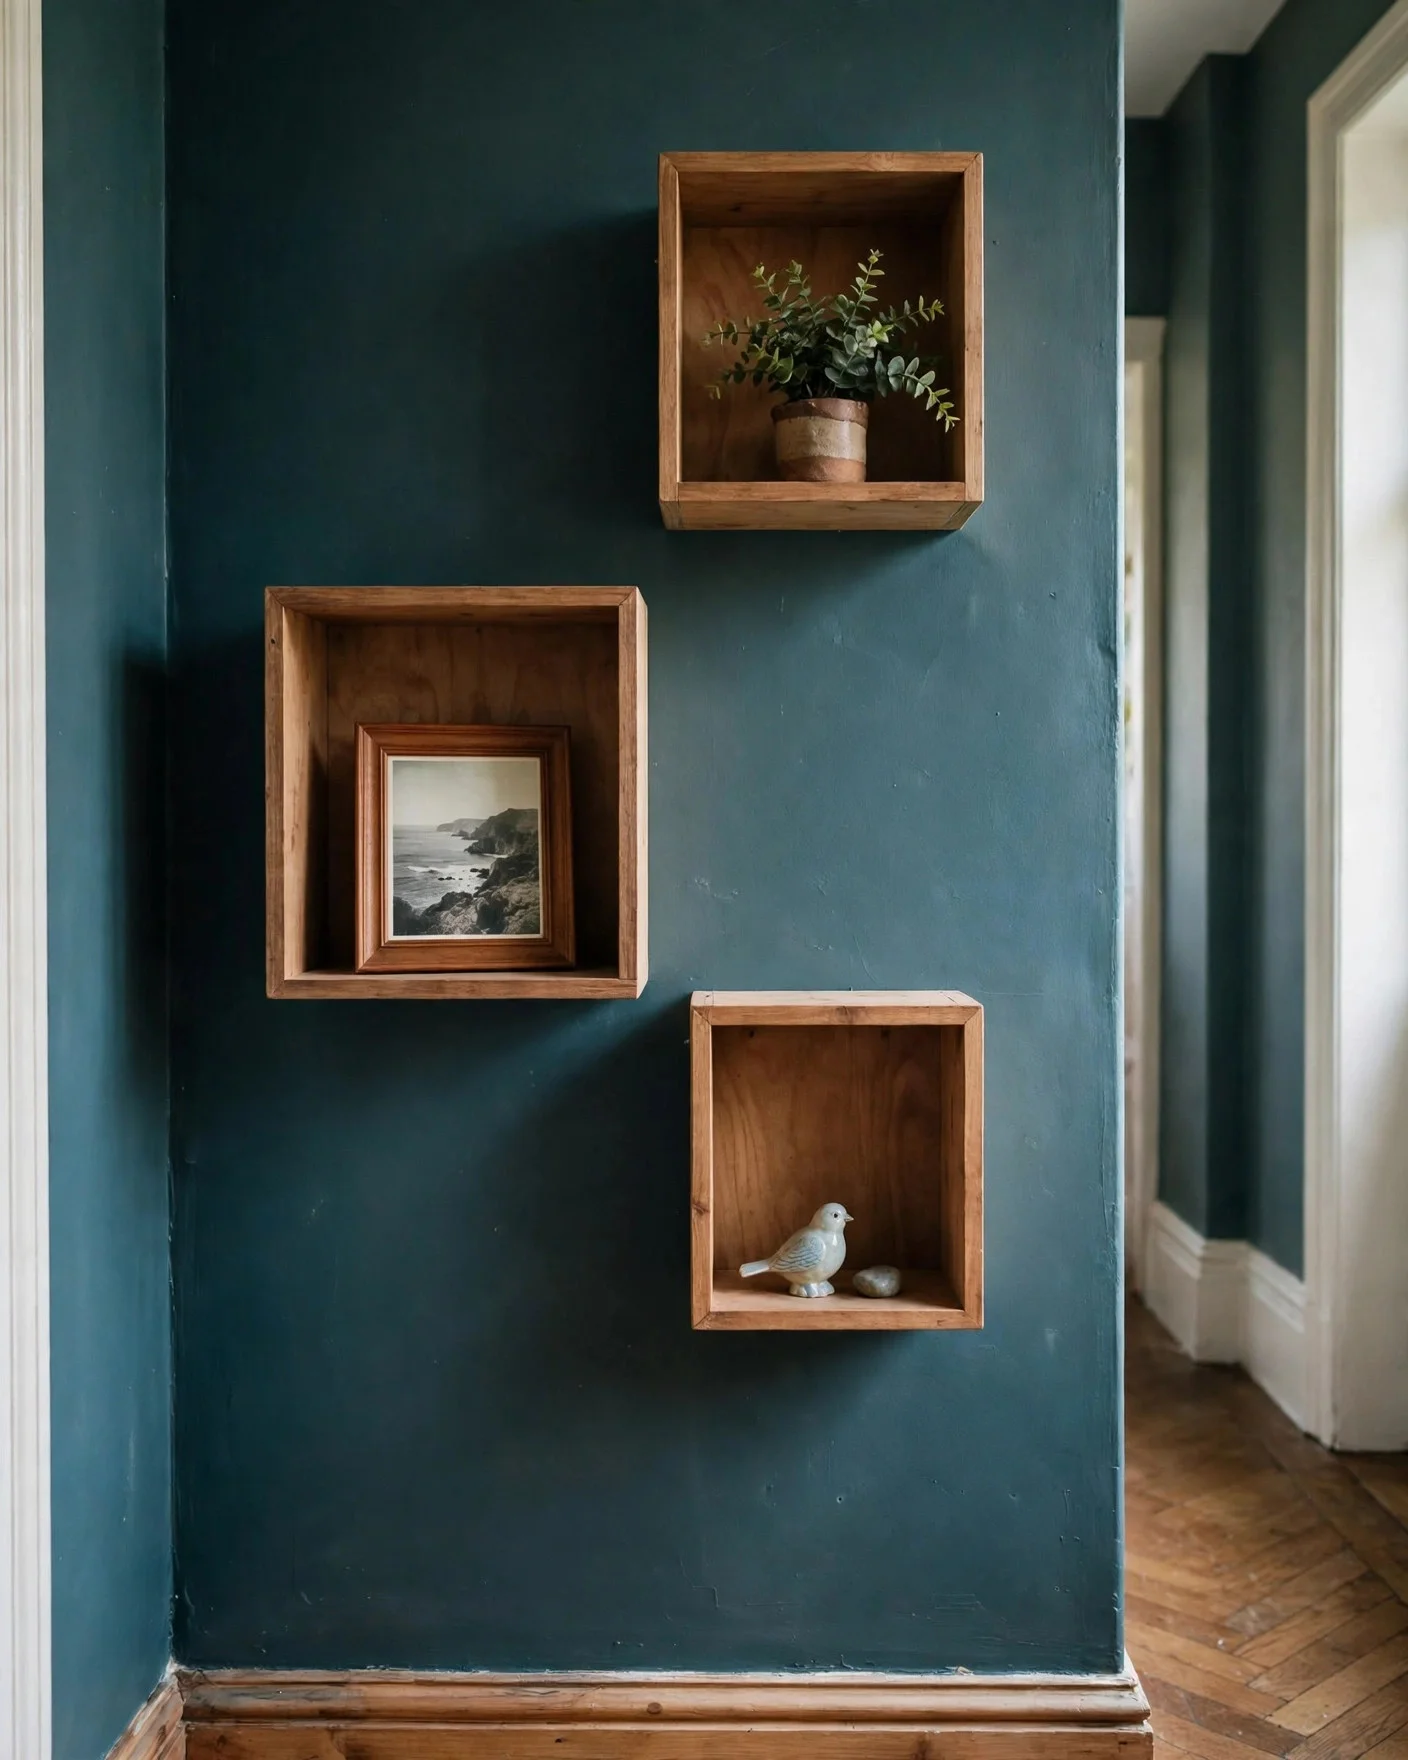
Box shelves are open cubes fixed straight to the wall. They frame whatever sits inside them, like a shadow box, so a plant or a favorite object looks like art. Build boxes from boards cut to size, glued and screwed at the corners, or buy plain craft boxes.
Paint the inside a dark color for contrast, or leave the boxes plain wood. Hang one box alone or a group of three at varied heights. These suit bedrooms and halls where wall space is narrow.
These DIY shelf ideas turn one object into a small gallery. One plant, one photo, or one keepsake per box keeps the wall calm and the items easy to see. For more wall styling, see our boho wall decor ideas for warm, textured walls that pair well with box shelves.
Inside each box:
- One plant or vase.
- One small framed photo.
- One object with a story.
One thing per box: A shadow box works because it frames a single item. One plant, one photo, or one keepsake per box keeps the wall calm and the items easy to see.
20. Hang a Shelf Above a Doorway for Extra Storage
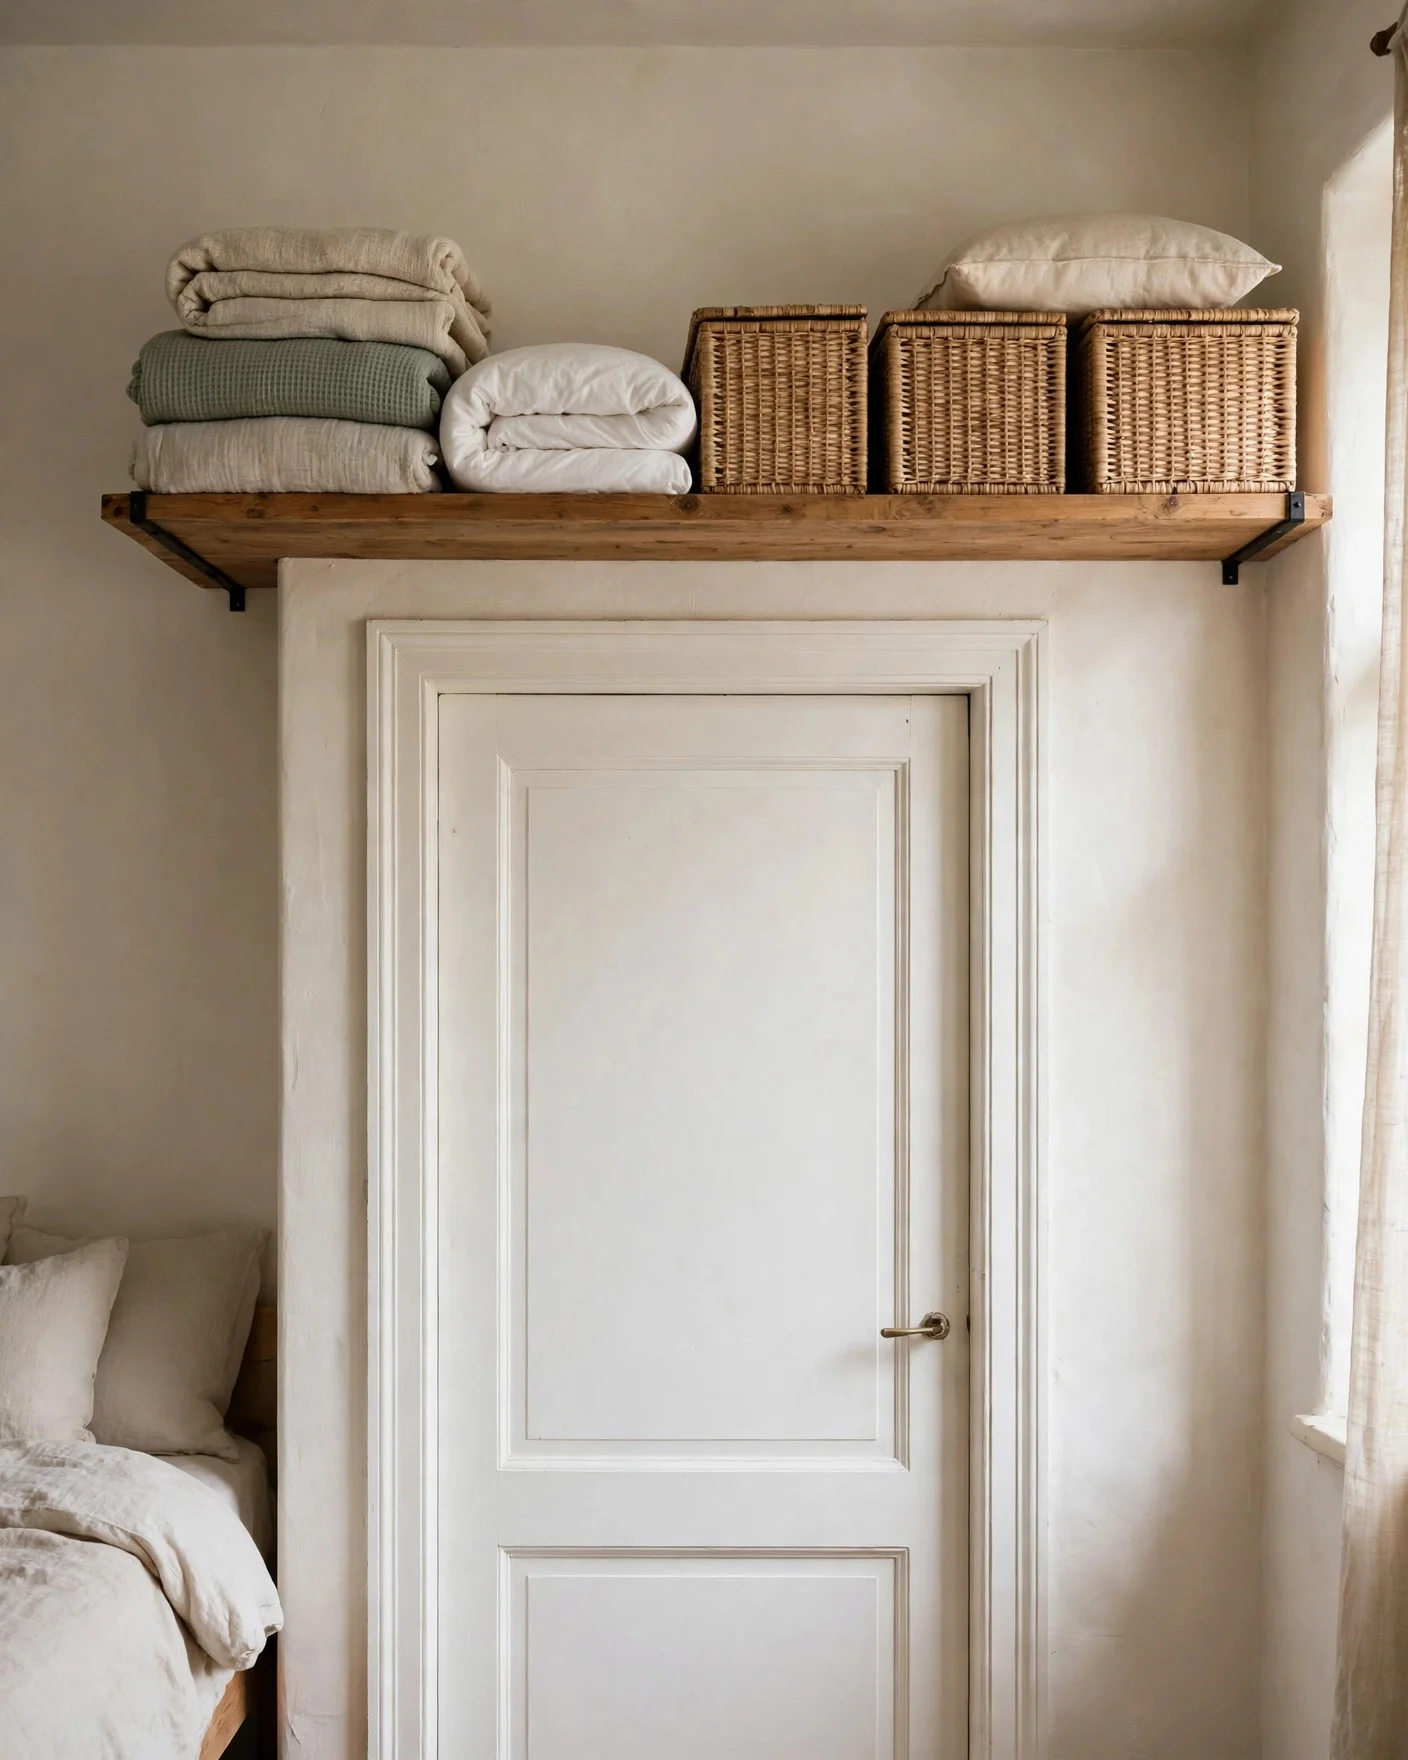
The strip of wall above a doorway holds more than most people think. A shelf there stores spare blankets, storage boxes, or books you read once a year. It keeps low use items out of daily space but still in the same room.
Fit a board on two brackets fixed into studs or solid plugs. Measure the door swing and your head height first, since the shelf should sit well clear of both. This is a good trick for small bedrooms and halls with no spare cupboard.
Use it for:
- Spare bedding and towels.
- Labeled storage boxes.
- Seasonal items in baskets.
| Check | Guide |
|---|---|
| Headroom | Shelf bottom well above head height |
| Load | Light boxes and bedding, nothing heavy |
21. Build a Narrow Rolling Shelf for Tight Gaps
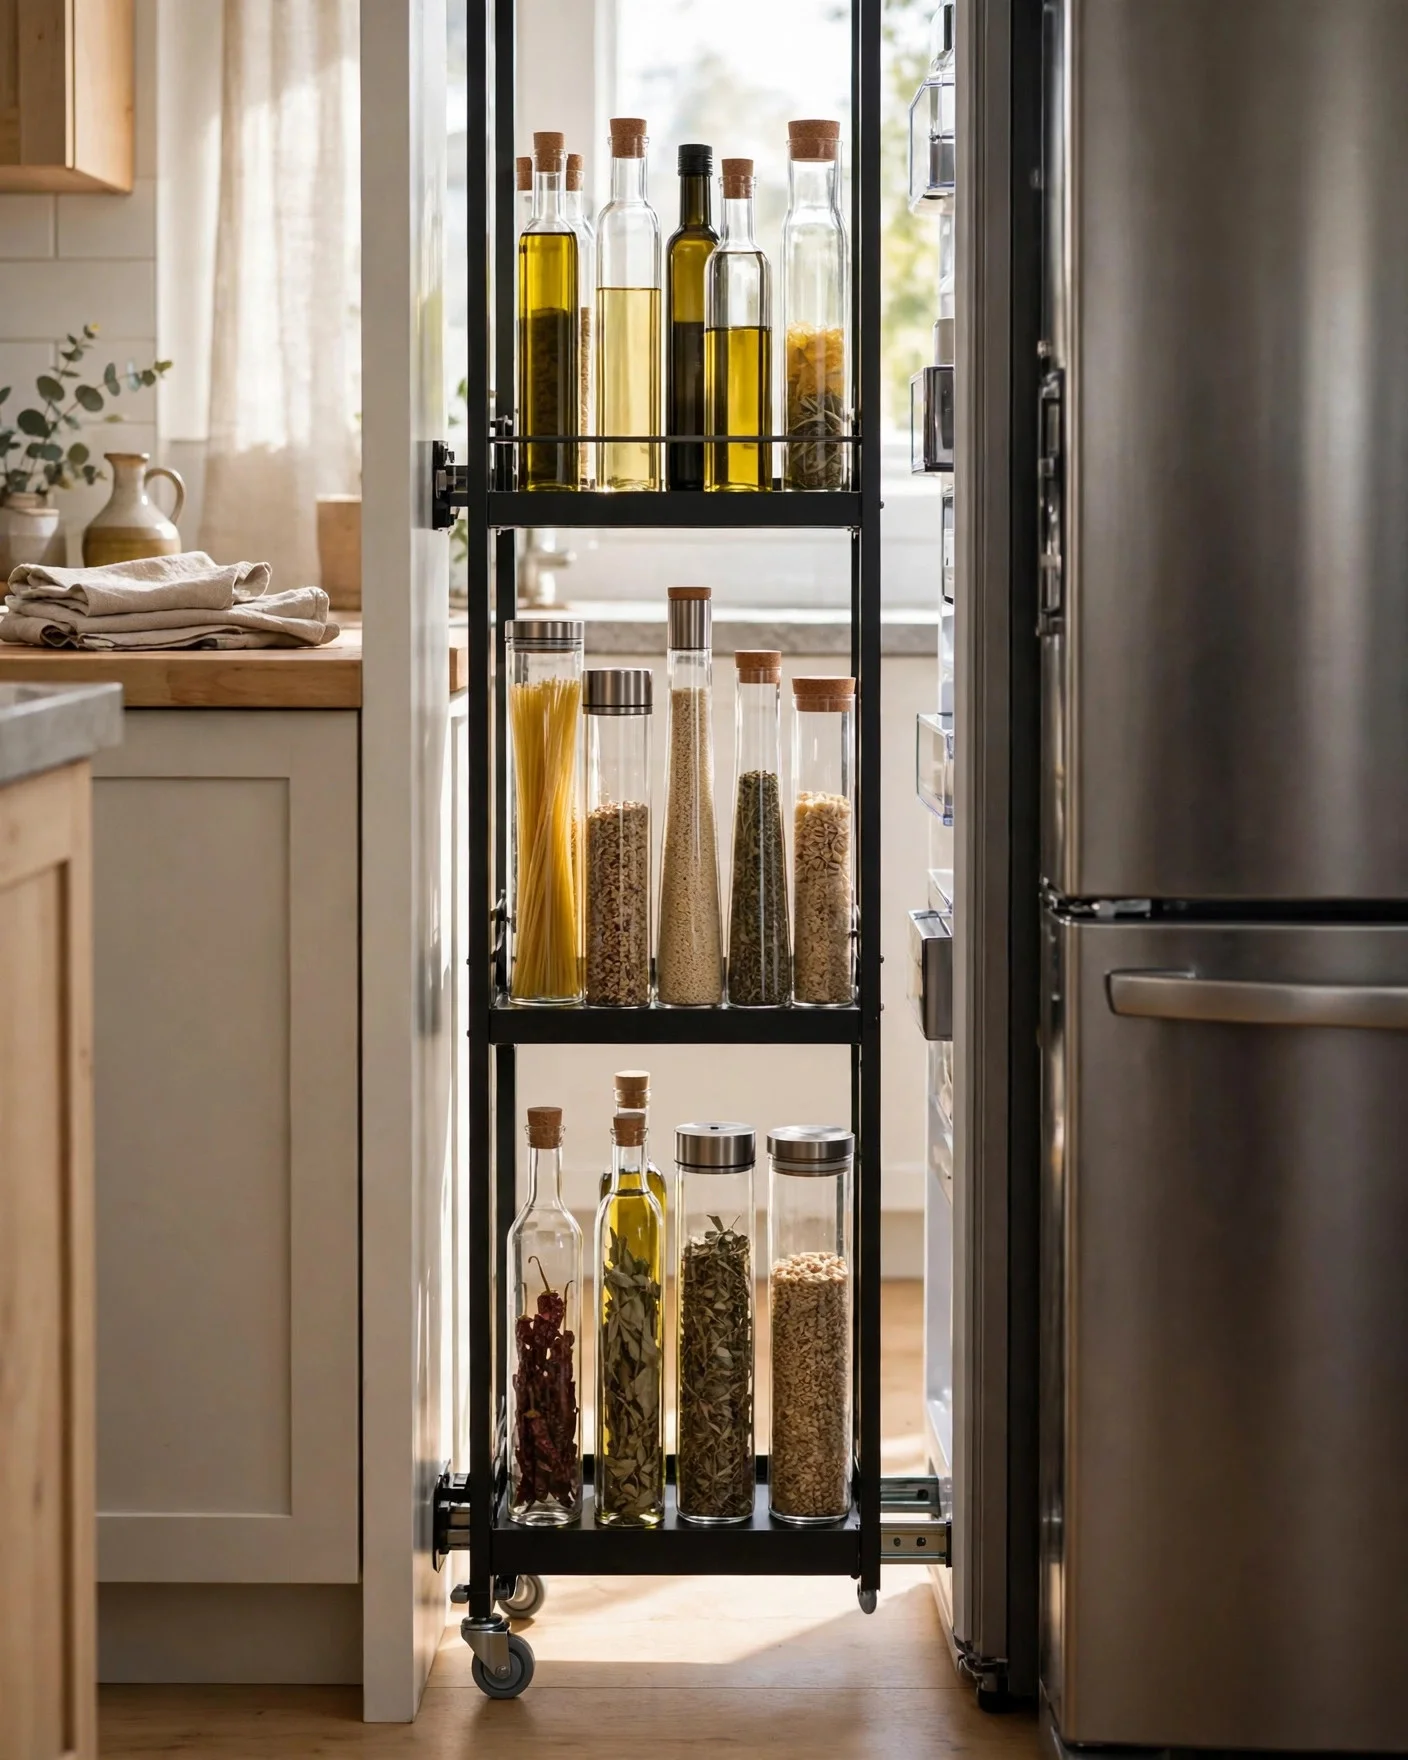
Many kitchens have a slim gap beside the fridge that fits nothing. A narrow rolling shelf slides into that gap and holds jars, bottles, or cleaning supplies in a tall stack. Build a slim frame from boards, add small shelves, and fit caster wheels at the base.
A handle on the front edge lets you pull the unit out with one hand. Keep the width a few cm less than the gap so it rolls free. Tall thin items belong on the bottom shelf for balance.
These DIY shelf ideas rescue the gaps most kitchens waste. Measure twice, fit small casters rated for the loaded weight, and the gap becomes a pantry.
Build notes:
- Small casters rated for the loaded weight.
- A lip or rail on each shelf edge.
- Tall thin items on the bottom shelf for balance.
Measure twice: Unit a few cm narrower than the gap.
Rails on: A lip on each shelf stops jars sliding off.
Load low: Heavy bottles on the bottom shelf for balance.
22. Add a Floating Bedside Shelf Instead of a Nightstand
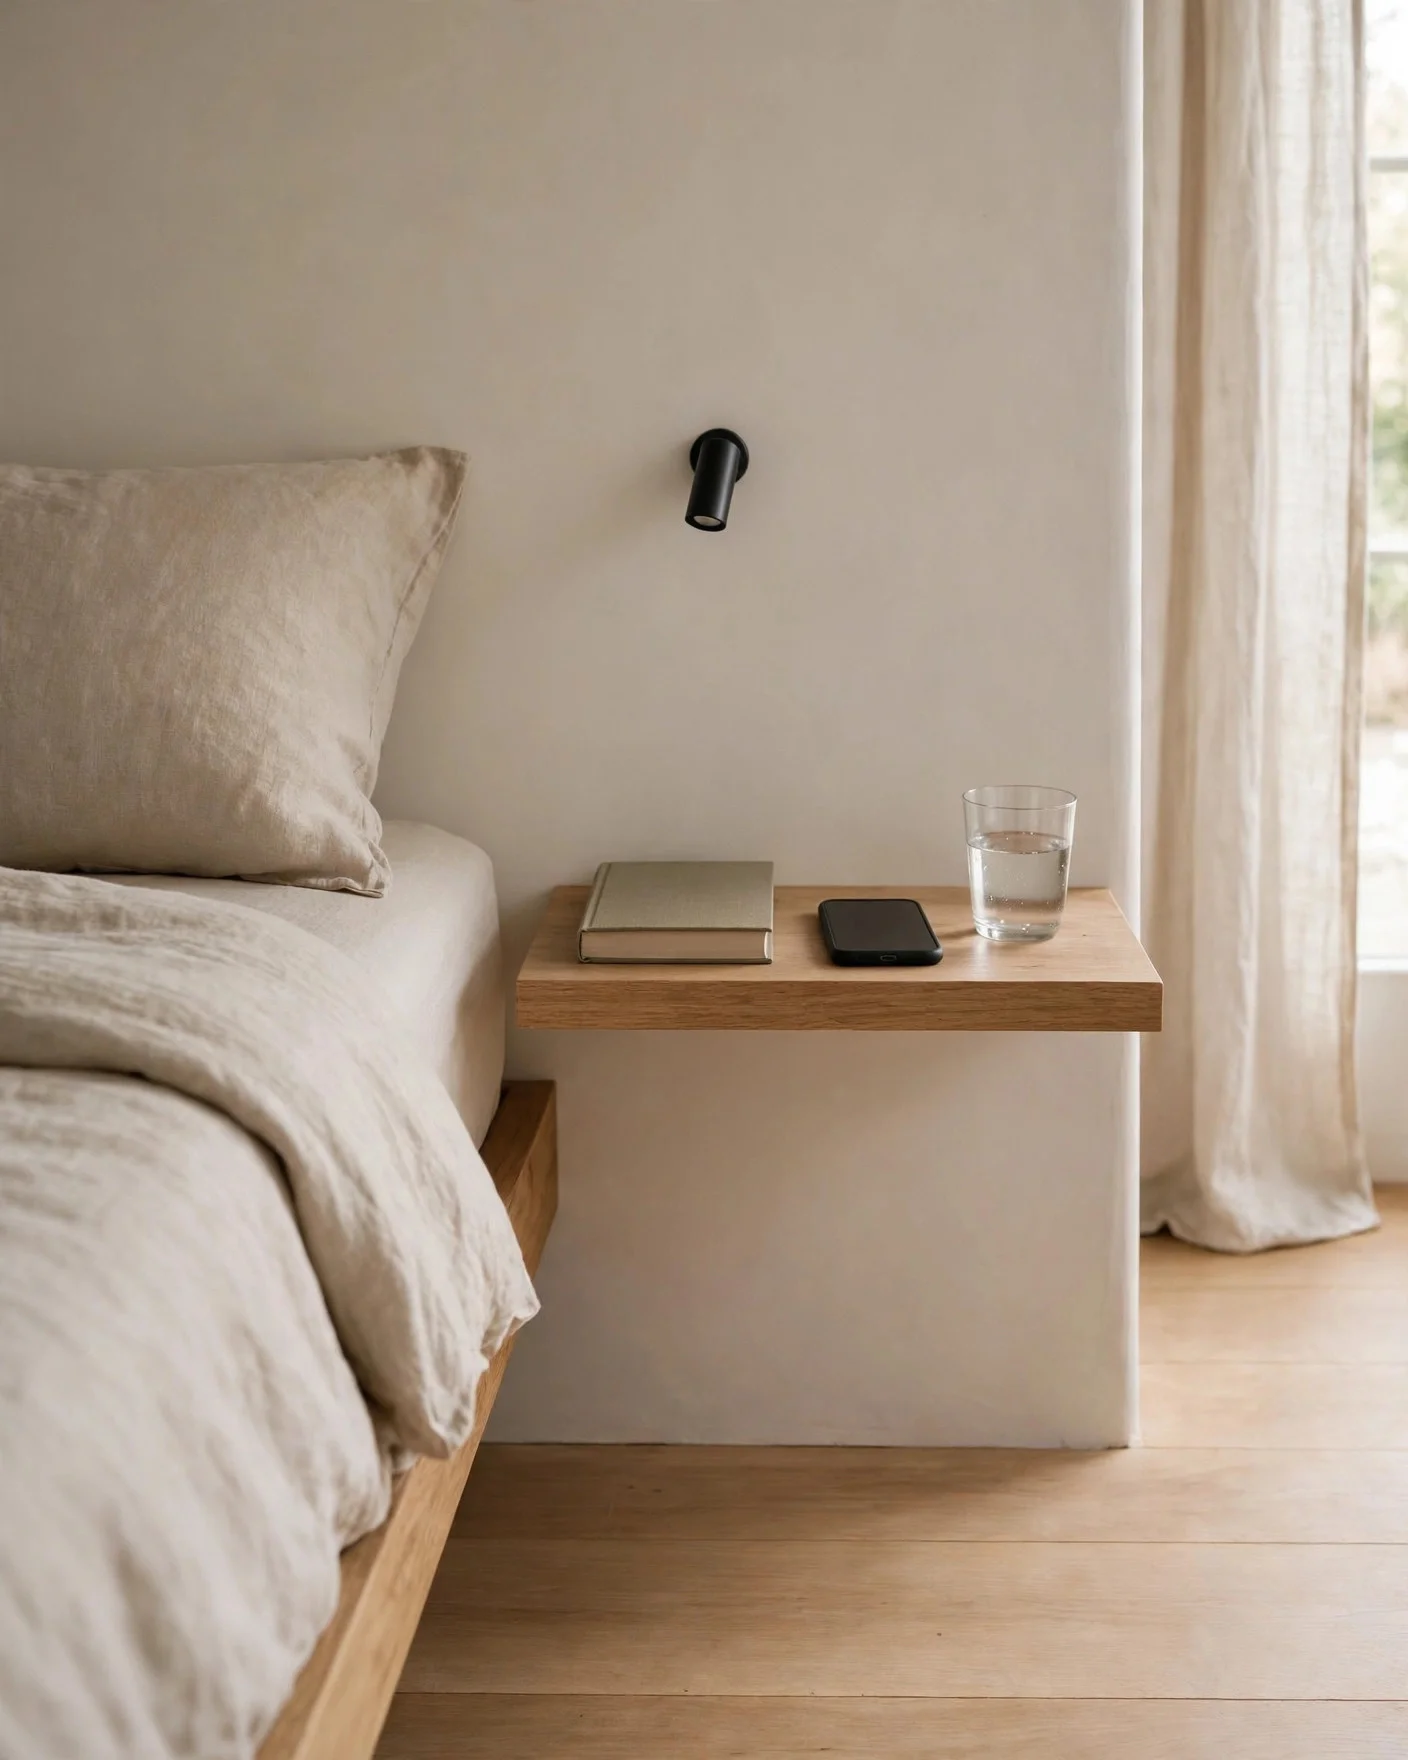
A floating shelf beside the bed holds a phone, a book, and a glass of water, and leaves the floor clear. It suits small bedrooms where a nightstand feels bulky. A thick board on a hidden bracket looks neat and modern.
Add a small drawer box under the board if you want a hidden spot for chargers and small items. Fit the shelf at the same height as the top of your mattress, so you can reach your book and glass without sitting up.
Vacuum under it with ease, since nothing touches the floor. For more bedside styling, see our above bed decor ideas for the wall space above the shelf.
Keep on top:
- One book and your phone.
- A small lamp or a wall light above.
- A glass of water on a coaster.
Right height: Level with the top of the mattress is the sweet spot. You can reach your book and glass without sitting up, and the bed still makes up neatly against it.
23. Make a Plate Rack Shelf for a Kitchen Wall
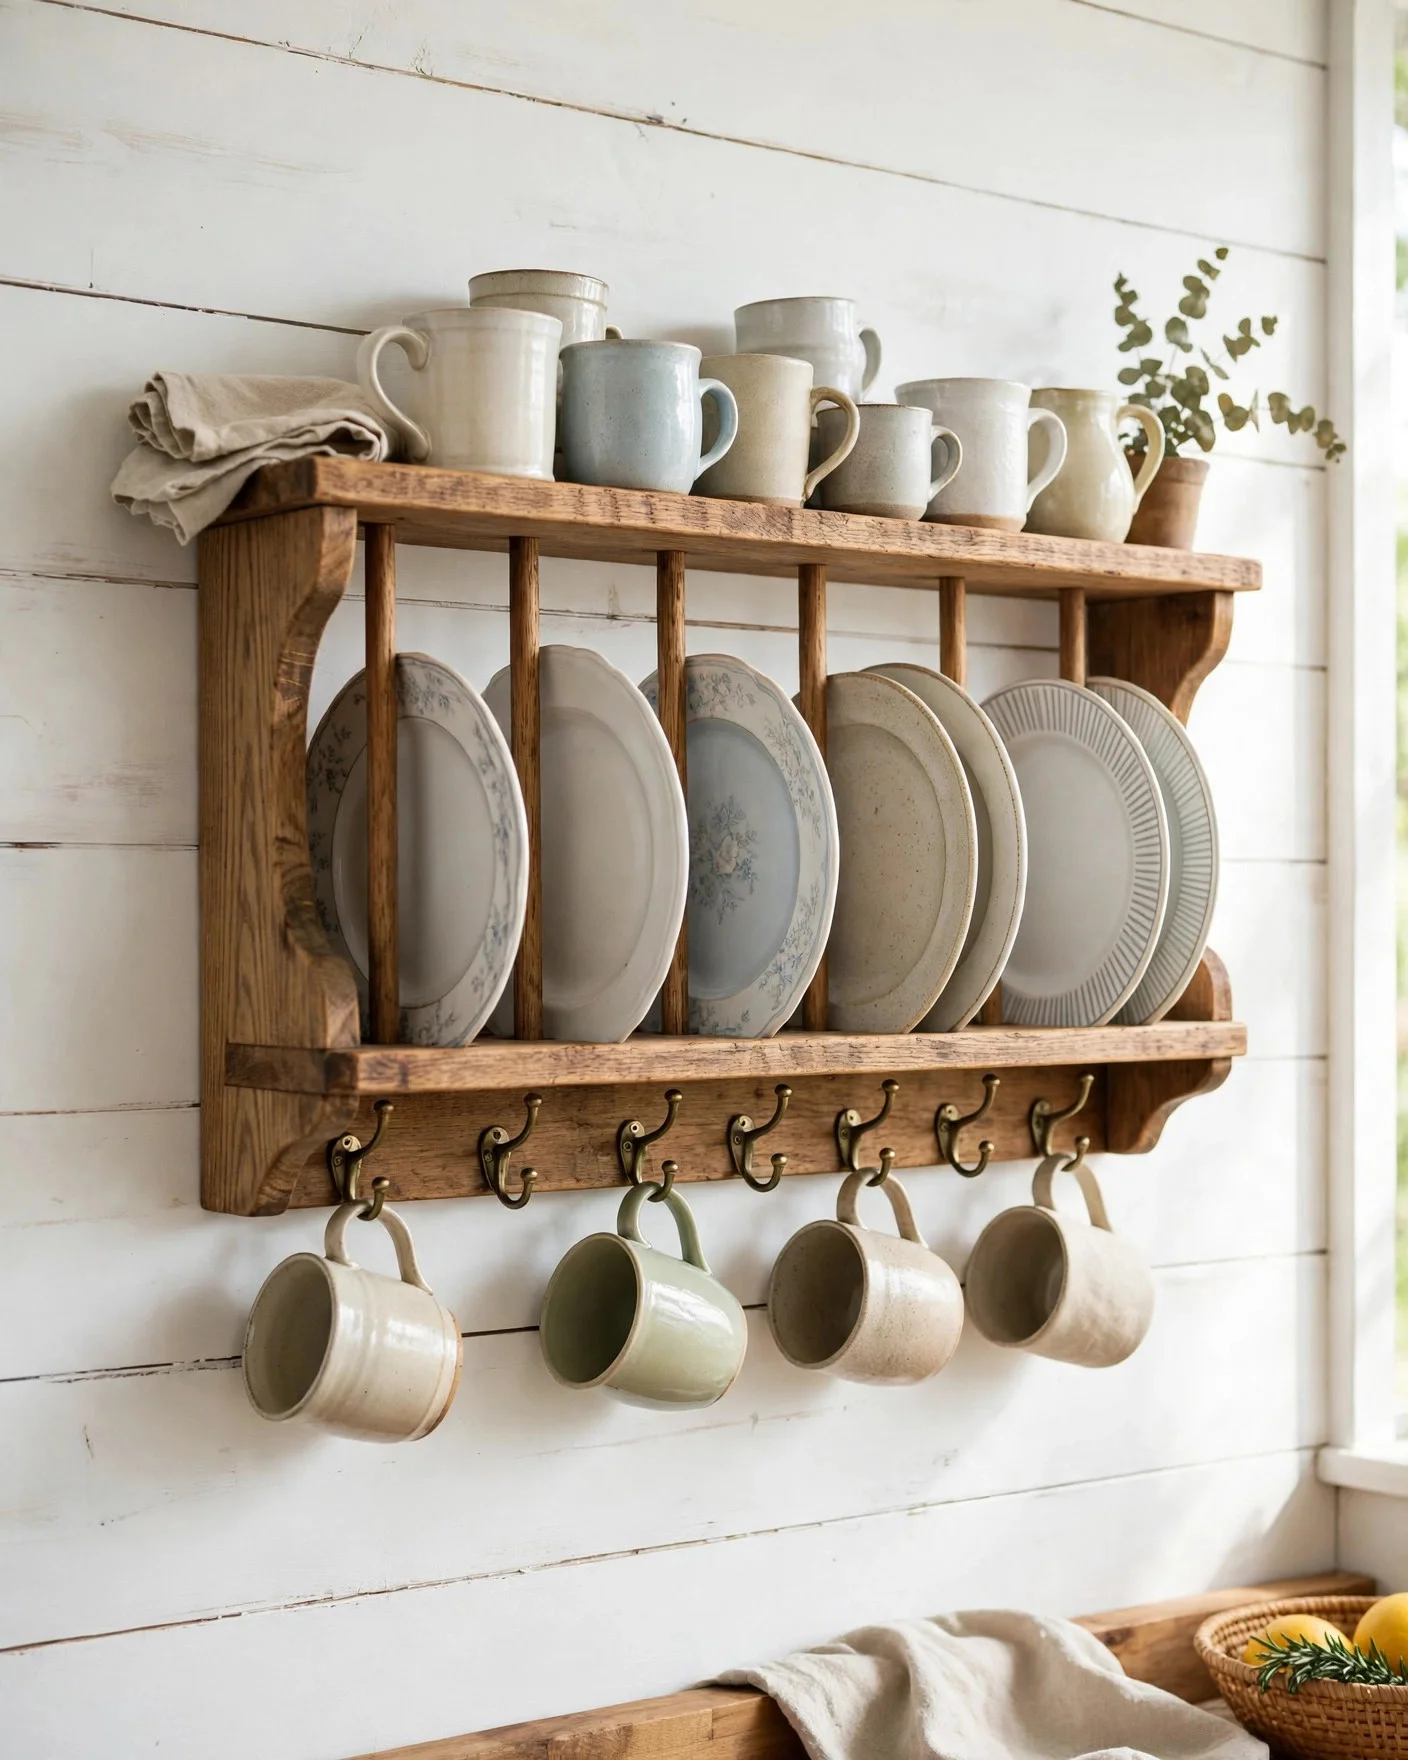
A plate rack shelf shows off pretty plates and keeps them easy to grab. The rack has a groove or dowels that hold plates upright, plus a shelf edge for cups or jugs. Build it from boards with a routed groove, or fit two rails with dowels between them.
Fix the rack into studs or solid plugs, since plates and stoneware add weight fast. Paint it to match your cabinets for a built in look. This suits farmhouse and cottage kitchens.
These DIY shelf ideas make the prettiest plates part of the decor. Measure your largest plate first, fix into studs, and add mug hooks under the rack to use the full wall.
Rack details:
- Groove or dowels sized for your plates.
- A top shelf for cups and small bowls.
- Hooks under the rack for mugs.
- Measure your largest plate before you set the rails.
- Fix the rack into studs, since plates add weight fast.
- Add mug hooks under the rack to use the full wall.
24. Fit Shelves Into a Wall Alcove
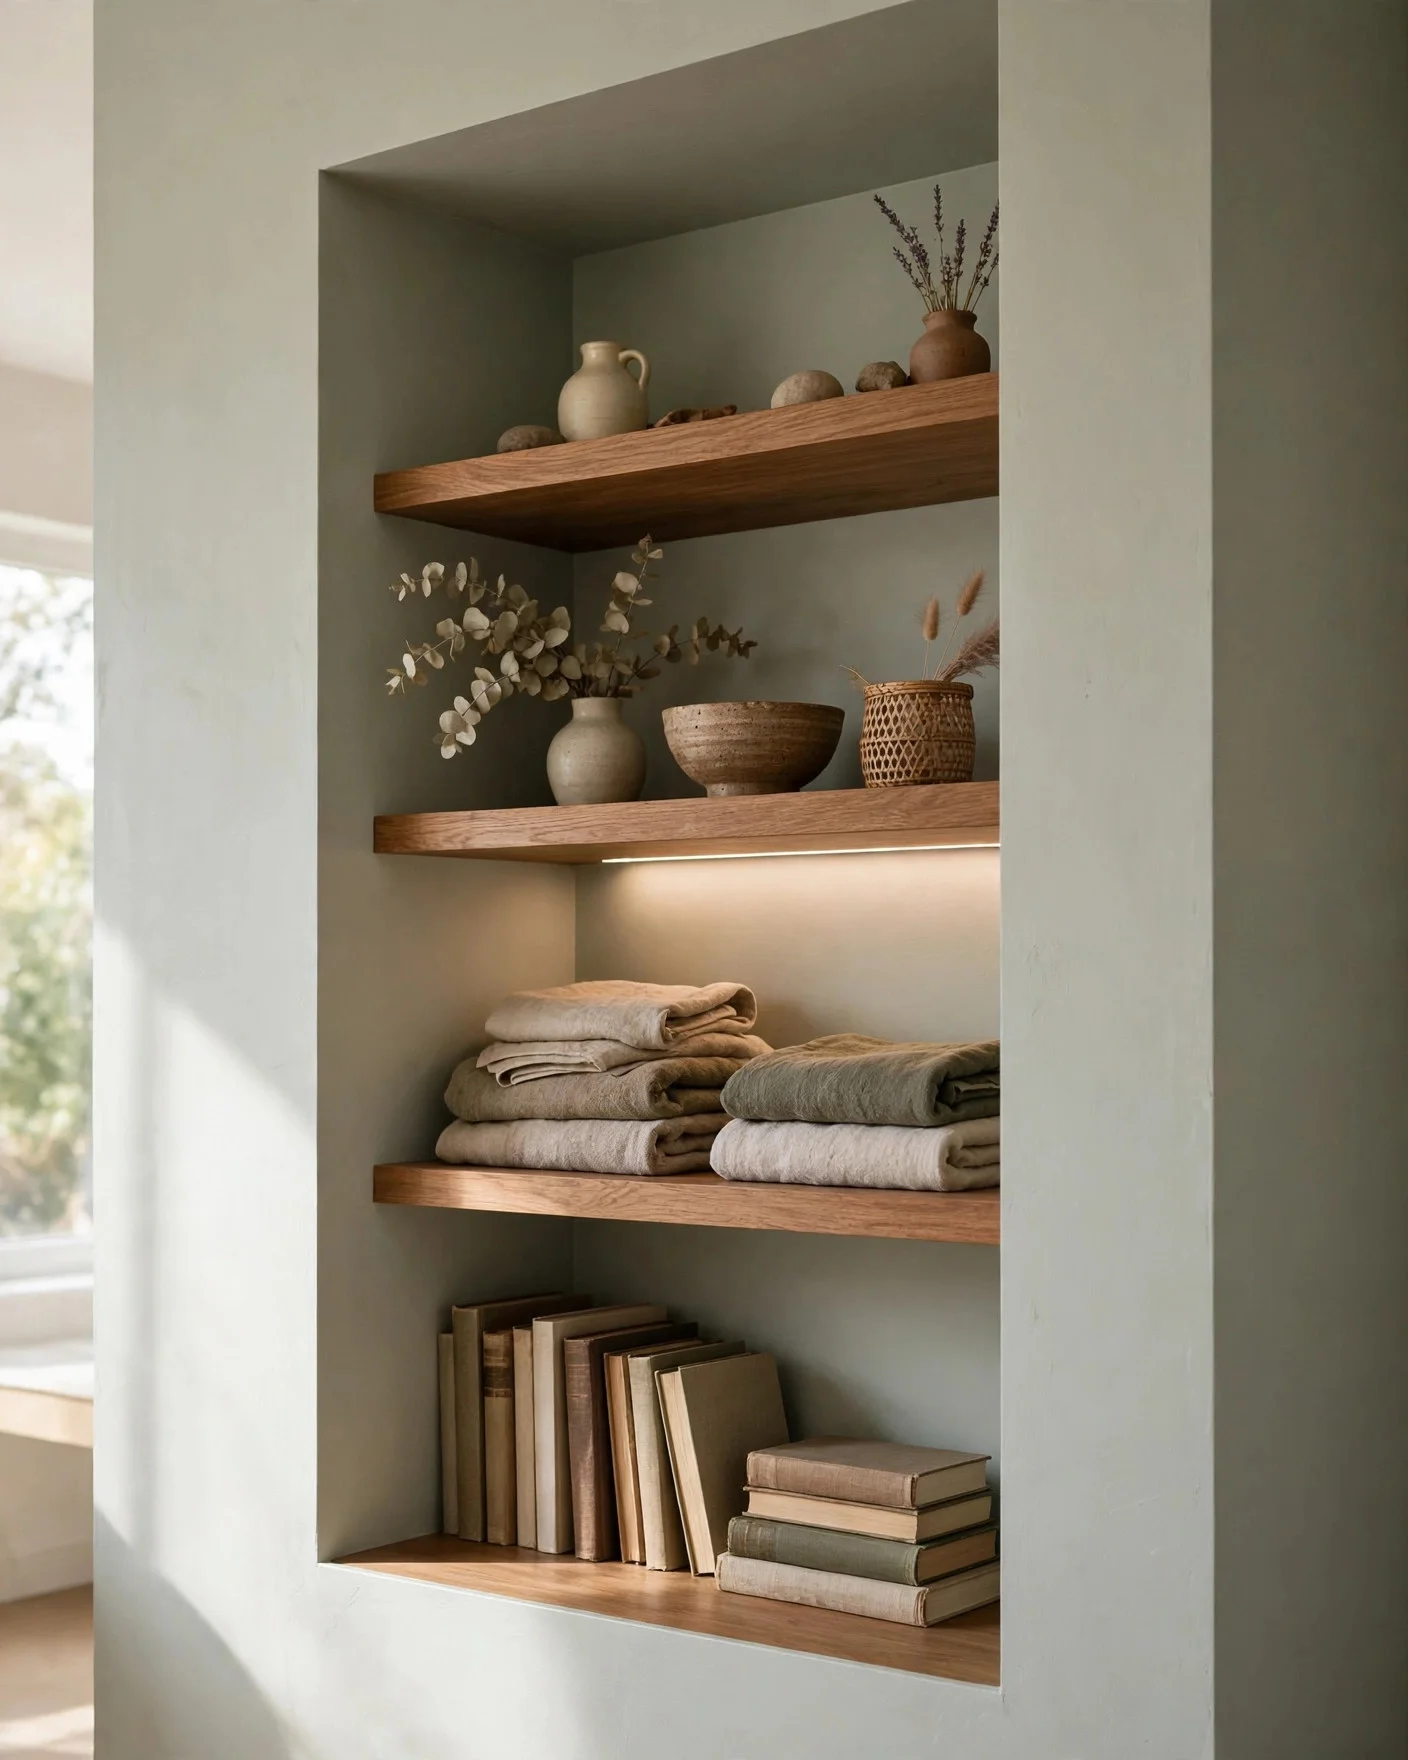
An alcove is a shelf spot waiting to happen. Boards cut to the exact width sit on battens fixed to the side walls, so no brackets show. Alcoves suit books, towels, and display items, and they make odd spaces feel planned.
Measure the width at the front and the back, since alcove walls often taper. Cut each board to fit its own level and number them as you go. Paint boards the wall color for a built in look, and add a stick on light strip under one shelf.
This works in living rooms, bathrooms, and bedrooms alike. An empty alcove becomes the most useful wall in the room.
Alcove tips:
- Battens level on both side walls.
- Paint boards the wall color for a built in look.
- Add a stick on light strip under one shelf.
Before: Empty alcove, boxes stacked on the floor below.
After: Four fitted boards, books low, towels and decor above.
25. Hang a Tree Branch Shelf for a Natural Touch
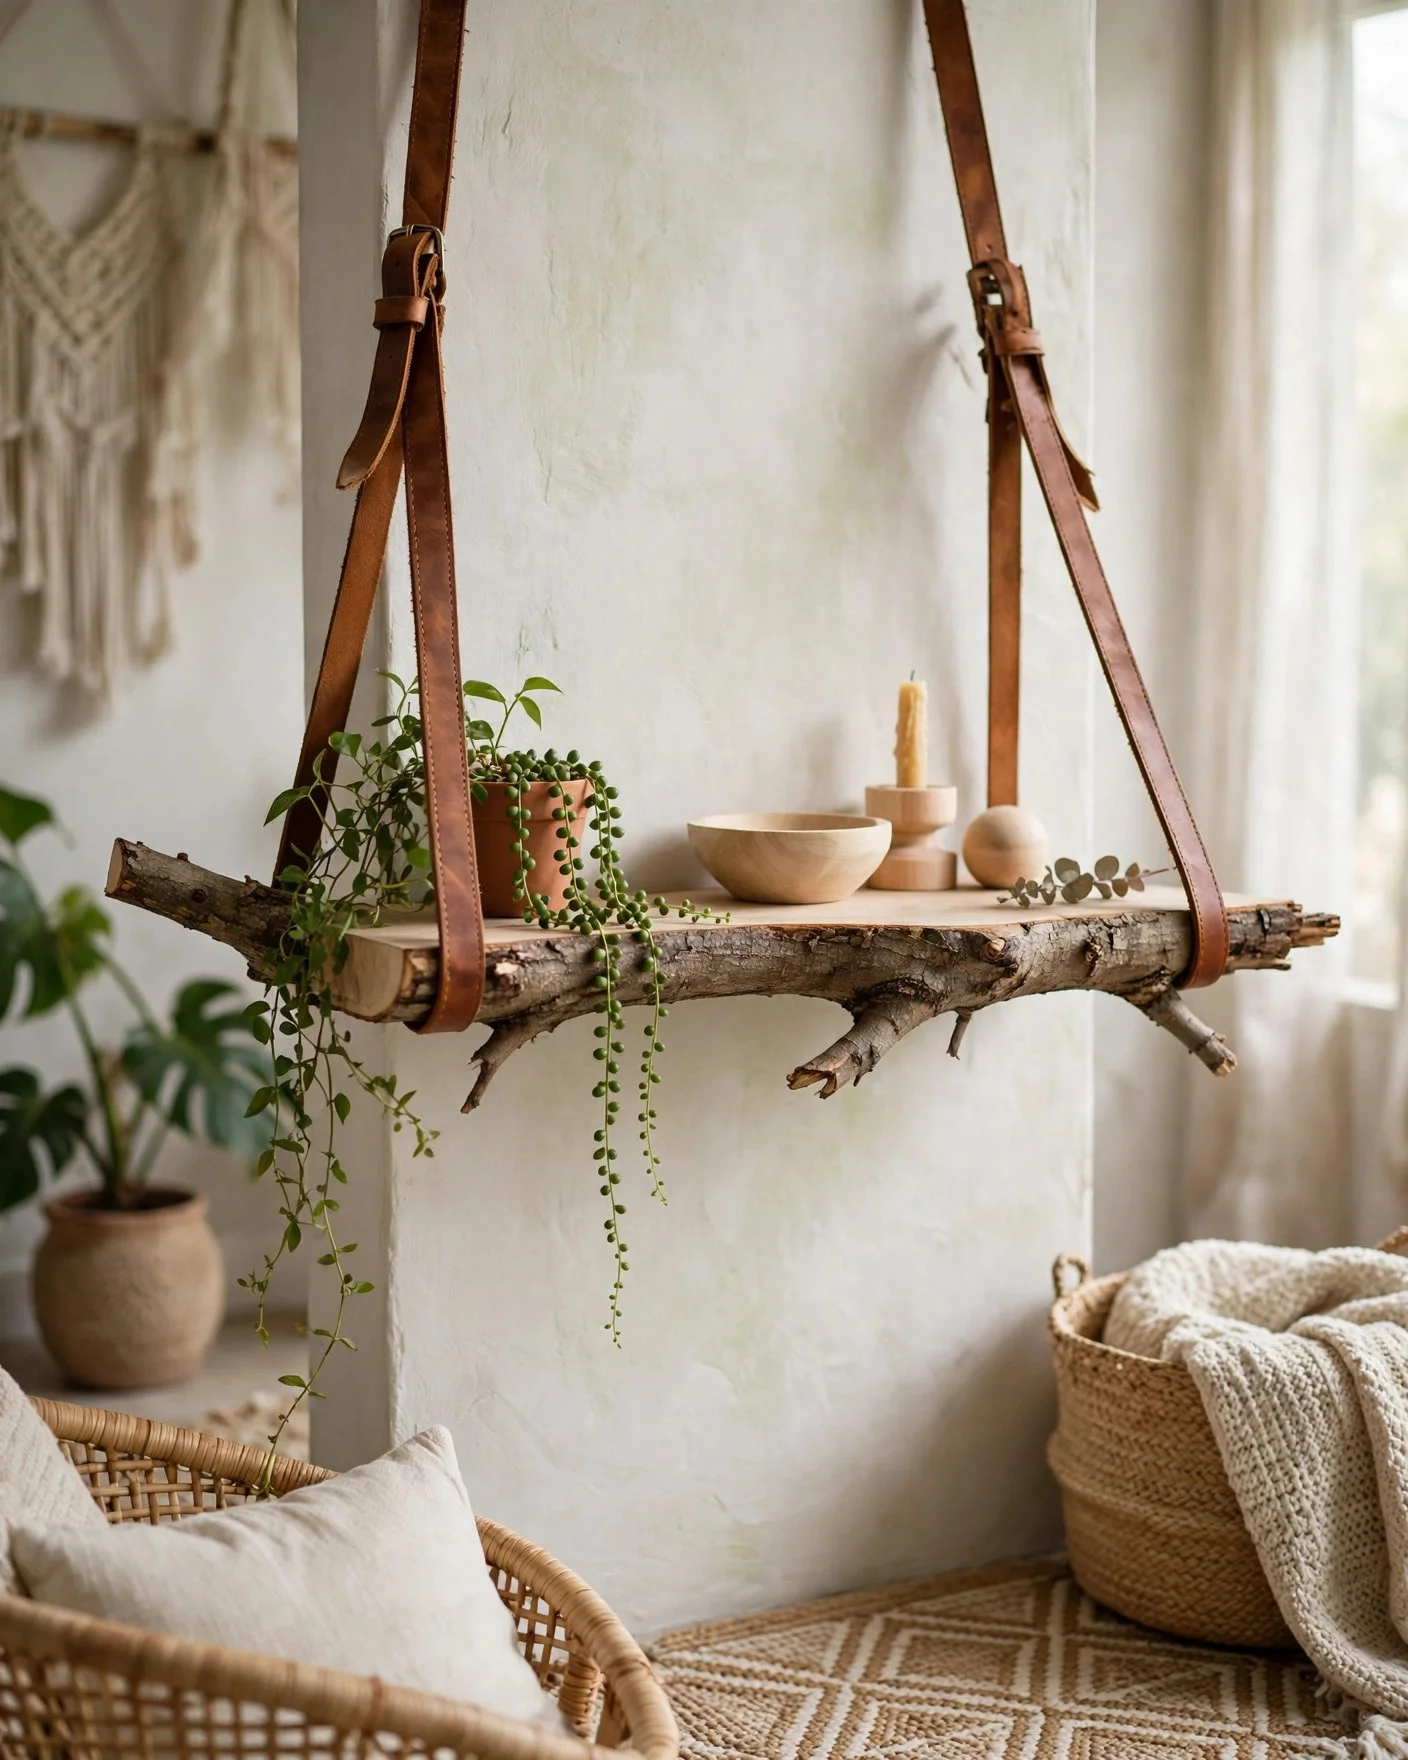
A sturdy branch can become a shelf with a flat top edge planed or sanded along one side, hung from strong rope or leather straps. It holds light plants and small objects and adds a natural shape no board can copy.
Pick a dry, solid branch with no cracks or soft spots. Clean it, let it dry indoors for a few days, and seal it if you like. Hang it from hooks fixed into studs or solid plugs.
These DIY shelf ideas suit boho, rustic, and nature loving rooms, and no two branch shelves ever look alike. Keep the load light and the straps firm, and the branch will hang steady for years.
Keep on it:
- Small trailing plants.
- Light wood or stone objects.
- Nothing heavy or breakable.
Light load only: A branch shelf is a display piece. Keep it to small plants and light objects, and fix the straps or rope into studs so the branch hangs steady.
Frequently Asked Questions About DIY Shelf Ideas
What wood is best for DIY shelves?
Pine is the common pick for a first shelf. It is light, cheap, easy to cut, and takes paint and stain well. Spruce and fir boards also work for painted shelves. For a richer look, oak and walnut cost more and feel heavier, so they need strong brackets. Plywood with a taped or painted edge suits cube units and long shelves.
How much weight can a floating shelf hold?
It depends on the brackets, the board, and the wall. A shelf fixed into studs with rated brackets holds far more than one fixed into hollow plasterboard with light plugs. Read the load rating on your bracket pack and stay under it. Spread heavy items toward the bracket points, and test with books a few at a time before you trust it with anything breakable.
What shelf depth suits books best?
Most paperback and standard hardback books fit well on shelves about 20 to 25 cm from front to back. Large art books and folders may need 28 to 30 cm. For decor ledges and picture shelves, 10 to 12 cm is enough. Measure your biggest book before you cut the board, and add a small gap so books slide in and out with ease.
What are the best renter friendly shelf options?
Ladder shelves, crate stacks, and board and brick shelves need no holes in the wall at all. Picture ledges and swing shelves need only a few fixings. Where drilling is banned, use tension rods with small boards in alcoves, over door storage racks, and furniture that leans rather than fixes. Always anchor tall units if your lease allows one small fixing at the top, since a steady shelf is a safe shelf.
How do I stop shelves looking cluttered?
Group items in small clusters and leave empty space in each cluster. Stick to two or three colors that match the room. Mix heights with one tall item, one medium item, and one low stack. Hide small clutter in baskets or boxes on the shelf. Edit every few months, and move off any item with no use and no meaning so the rest can breathe.
Conclusion
A good shelf does two jobs at once: it stores your things and it finishes the wall. Start with one project that matches your tools and your room, like a floating board in the living room or a slim shelf in the bathroom. These DIY shelf ideas range from ten minute crate stacks to a full pipe unit, so there is a build for every skill level and budget.